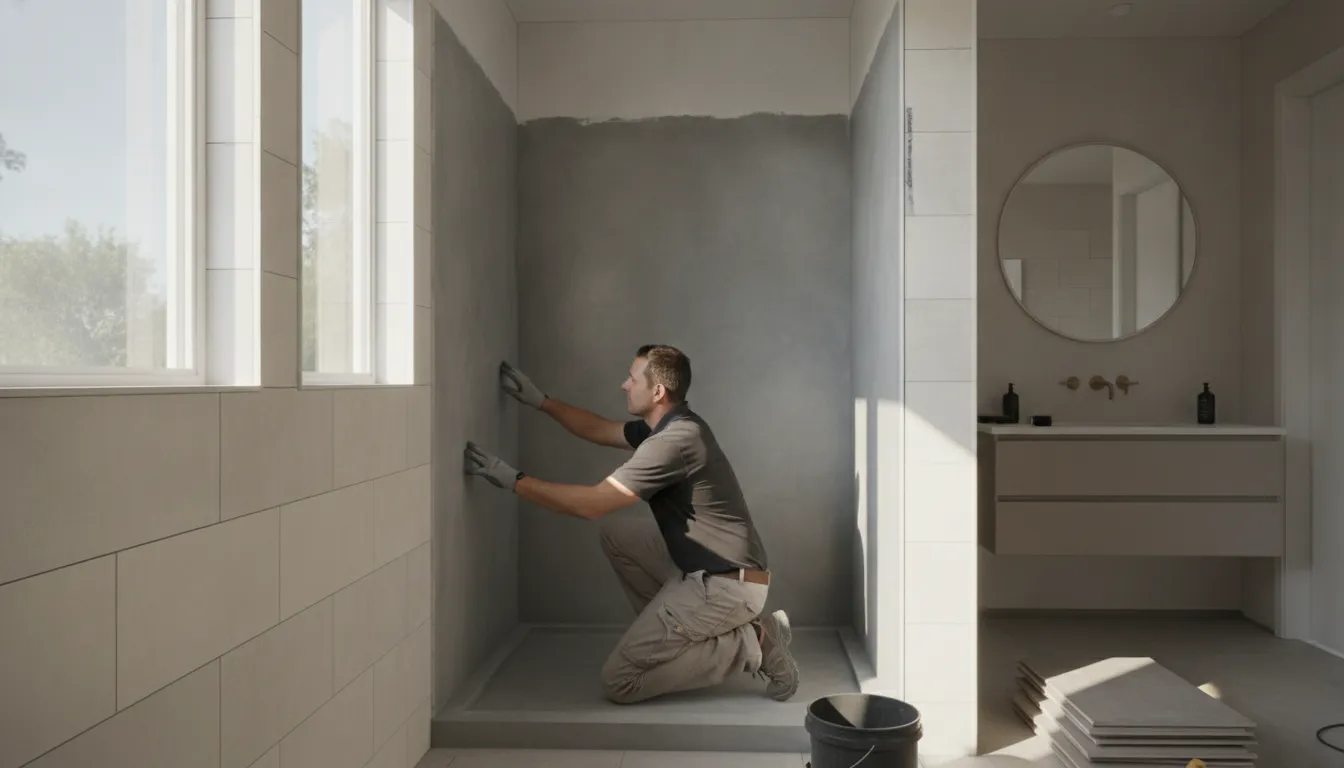
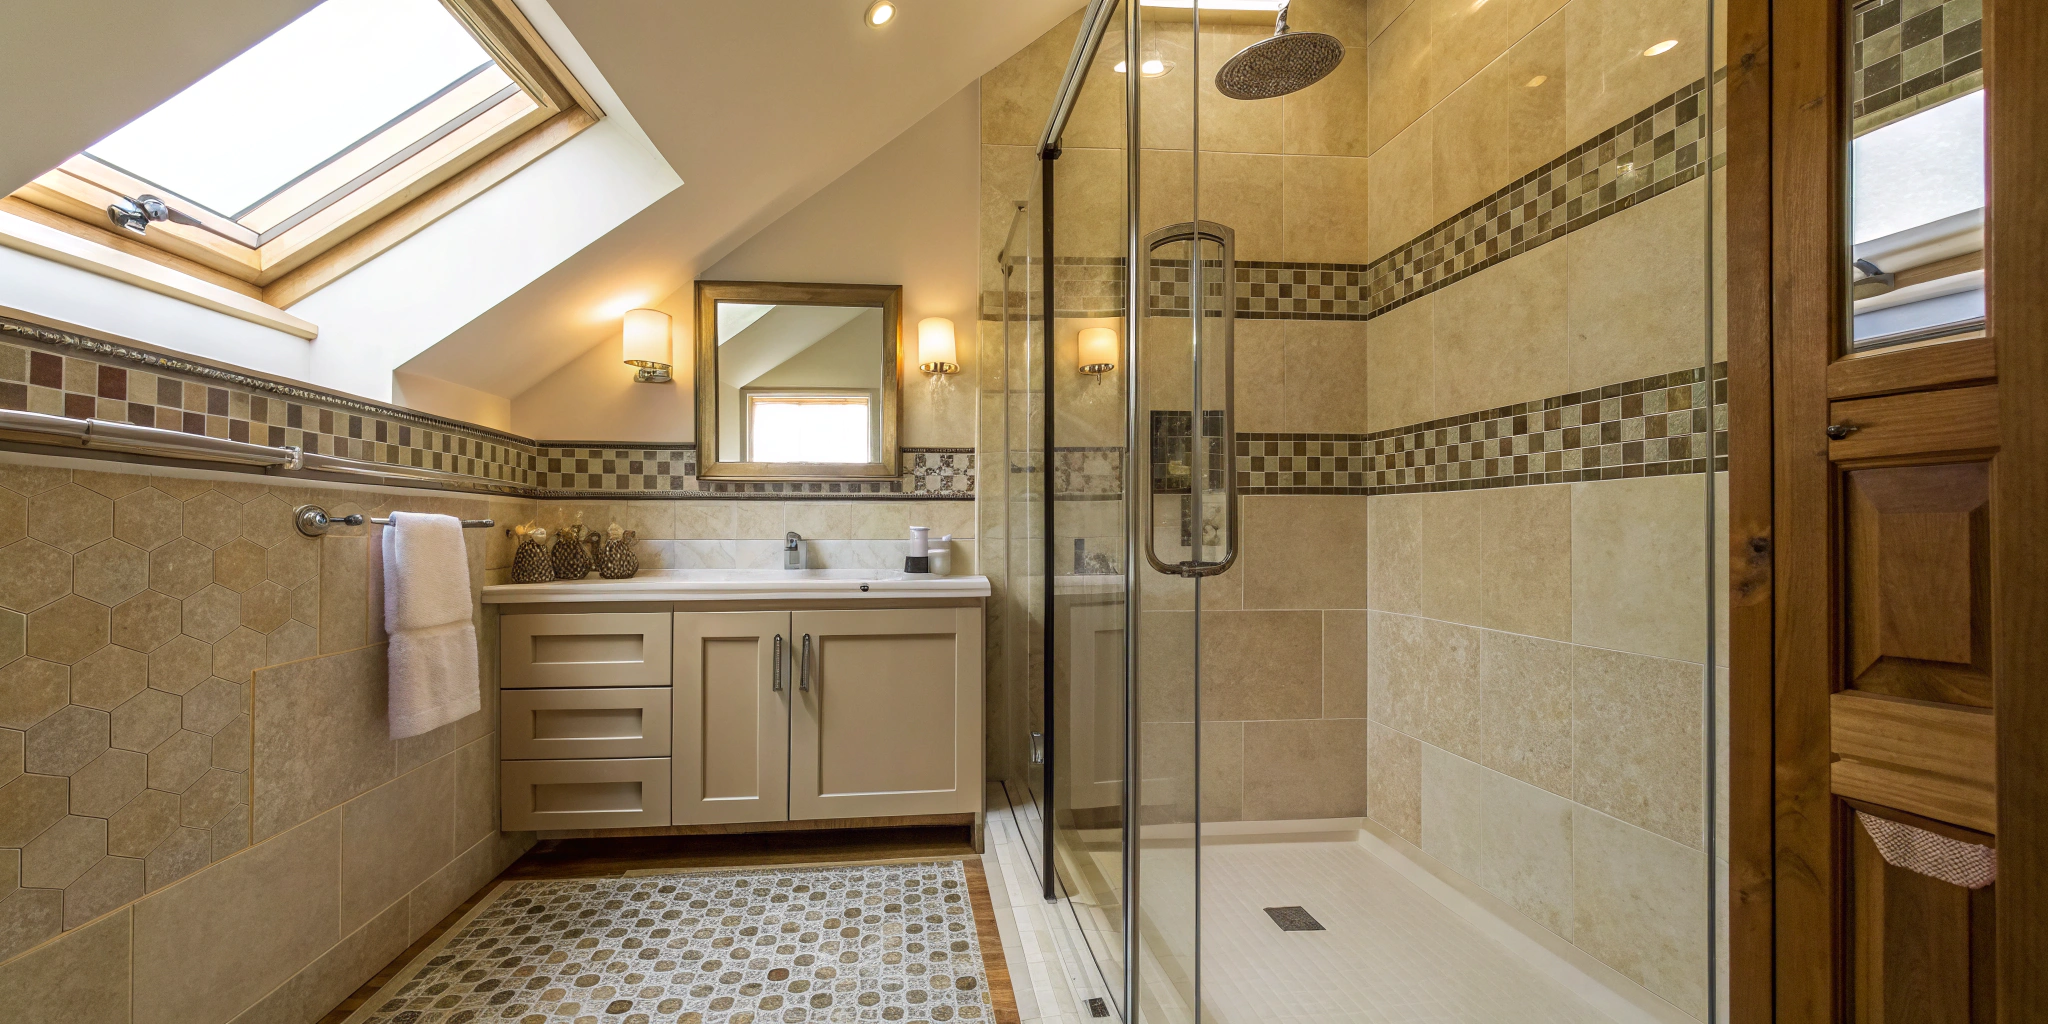
If your small bathroom feels cramped and dated, a walk-in shower can completely transform the space. The right design opens up sight lines, maximizes every square inch, and turns your daily routine into something that actually feels good. Whether you’re converting a bulky tub-shower combo or starting from scratch, the key is choosing design elements that work together to create an open, functional, and beautiful bathing space in even the tightest footprint.
At King Remodeling, we’ve designed and built over 1,500 custom bathrooms for San Diego homeowners in our 25+ years of business. Below, you’ll find 25 walk-in shower ideas for small bathrooms, each with specific guidance on why it works, how to execute it, and a pro tip from our design team to help you get the details right. Looking for general very small bathroom ideas? Start there for a broader overview, then come back here for shower-specific inspiration.
Key Takeaways
- Visual tricks create the illusion of space: Frameless glass, large-format tiles in light colors, and continuous flooring make a small shower feel dramatically bigger.
- Layout matters more than square footage: Corner alcoves, curbless entries, neo-angle designs, and micro wet rooms fit walk-in showers into bathrooms as small as 5×7 feet.
- Built-in storage eliminates clutter: Recessed niches, floating benches, LED shelf niches, and corner shelves keep toiletries organized without sacrificing floor space.
- Professional installation protects your investment: Waterproofing, proper drainage slope, San Diego building code compliance, and ventilation are critical for a shower that looks great and lasts for years.
- Cost context matters: Walk-in shower remodels in San Diego range from $8,000 to $25,000+ depending on materials, structural changes, and design complexity.
1. Frameless Glass Enclosure
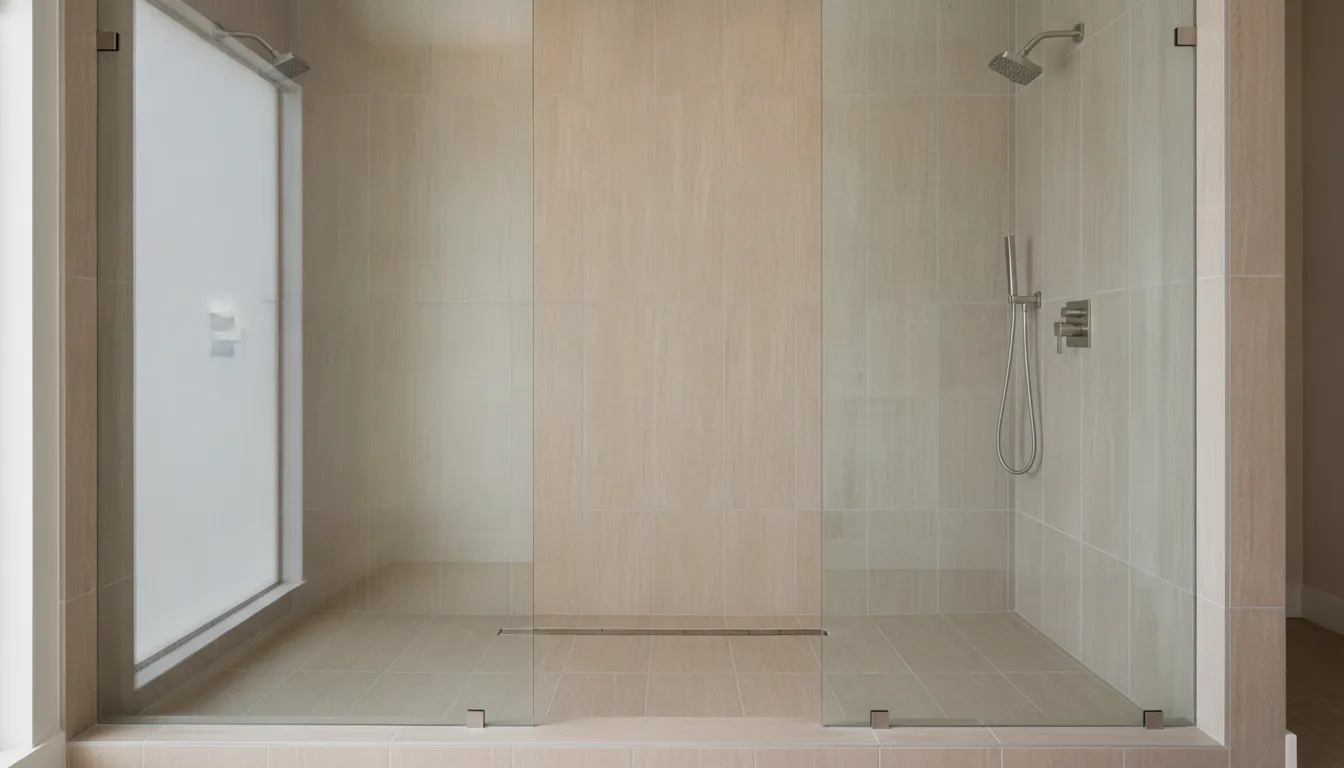
A frameless glass enclosure is the single most effective way to make a small bathroom feel larger. Without bulky metal frames interrupting your sight lines, the eye travels freely across the entire room. Clear tempered glass allows natural and artificial light to pass through the shower area, eliminating the visual “wall” that shower curtains and frosted doors create. This is why frameless glass is the most requested upgrade we see in San Diego bathroom remodels.
For the cleanest look, opt for a single fixed glass panel rather than a hinged door. This minimizes hardware and avoids the clearance problem of a swinging door in a tight space. Pair it with chrome or brushed nickel hardware for a sleek, modern finish. If water spots are a concern, ask about protective glass coatings that reduce cleaning time. Learn more about shower glass door options to find the right fit for your bathroom.
Frameless enclosures come in several configurations: fixed panel only, fixed panel with a hinged door, or a sliding barn-door style. For bathrooms under 50 square feet, a single fixed panel at 36 inches wide provides adequate splash protection without the expense or clearance demands of a door.
Pro tip: A fixed glass panel at 36 inches wide provides adequate splash protection without needing a door, and it keeps costs lower than a full frameless enclosure.
2. Curbless (Zero-Threshold) Shower
A curbless shower eliminates the raised ledge at the entry, creating a completely seamless transition from the bathroom floor into the shower. This design makes the floor plane feel continuous, which tricks the eye into perceiving more space than actually exists. It’s also the gold standard for accessibility and universal design, making the shower safe and comfortable for everyone regardless of age or mobility.
The key to a successful curbless shower is proper floor slope. The entire shower area needs a gentle pitch toward a linear drain to prevent water from escaping into the rest of the bathroom. This requires precise installation, which is why working with an experienced bathroom remodeling team matters.
Curbless showers also open up your design options. Without a curb dictating where the shower starts and stops, you have more flexibility in positioning fixtures, benches, and glass panels. This design is especially popular for homeowners creating a modern bathroom without bathtub, where the entire floor becomes a unified, open surface. Many homeowners pair a curbless entry with a rain showerhead and a teak bench for a spa-like experience that feels indulgent, not cramped.
Pro tip: Curbless showers pair beautifully with large-format tiles that continue from the bathroom floor into the shower, reinforcing that seamless look.
3. Corner Alcove Walk-In Shower
Corner alcove showers are the workhorses of small bathroom design. By tucking the shower into a corner, you use two existing walls as the shower enclosure, leaving the rest of the bathroom open for the vanity, toilet, and movement space. This layout is especially effective in standard 5×7 bathroom walk-in shower layouts where every inch counts.
A 32×32-inch or 36×36-inch corner shower is the minimum for comfort, but even at these dimensions, a walk-in feels far more spacious than a tub. Add a frameless glass panel across the open side, and you have an efficient layout that doesn’t sacrifice style.
One major advantage of the corner alcove is that plumbing typically stays in place if you’re replacing an existing tub-shower combo, which keeps costs down. The two built-in walls also make waterproofing simpler and reduce the number of glass panels you need to purchase.
Pro tip: Choose a corner entry rather than a side entry to maximize the usable floor space in the rest of your bathroom.
4. Built-In Recessed Niches for Storage
Clutter is the enemy of a small bathroom. Bottles, soap dishes, and loofahs sitting on the shower floor or hanging from a caddy make the space feel messy and cramped. Built-in recessed niches solve this by creating storage within the wall itself, keeping everything organized without taking up an inch of shower space.
Plan for at least one niche at a comfortable reaching height (roughly 48 to 60 inches from the floor). A double-stacked niche gives you room for both daily products and extras. Tile the niche interior with a contrasting material or a metallic mosaic to add a design accent that doubles as a focal point.
Pro tip: Size your niche to fit between wall studs (typically 14.5 inches wide) for the simplest installation, or go wider with proper framing for a more dramatic look.
5. Large-Format Tiles in Light Colors
Tile choice has an outsized impact on how big your shower feels. Large-format tiles (12×24 inches or bigger) have fewer grout lines, which creates a cleaner, more expansive visual. Light colors like white, cream, soft gray, and pale blue reflect light and make the walls feel like they’re receding, not closing in. Check out our bathroom floor tile ideas for more inspiration on materials and patterns.
For the most spacious feel, carry the same tile from the shower walls out onto the bathroom walls or floor. This continuity eliminates visual breaks and makes the entire room feel like one cohesive space rather than a bathroom with a shower crammed into it.
Pro tip: Install rectangular tiles horizontally to make narrow showers feel wider, or vertically to add height to a low-ceilinged bathroom.
6. Linear Drain for a Seamless Floor
A linear drain replaces the traditional center-point drain with a slim channel along one edge of the shower floor. Beyond its modern, streamlined appearance, a linear drain has a practical advantage in small showers: it allows the floor to slope in only one direction instead of four, which means you can use larger floor tiles without needing to cut them into small, awkward pieces around a center drain.
Position the linear drain along the wall opposite the shower entry for the cleanest look. Pair it with a tile-insert cover that matches your floor tile, and the drain practically disappears.
Linear drains are available in brushed nickel, matte black, and tile-insert styles. The tile-insert option is most popular for small showers because it makes the drain nearly invisible. Widths range from 24 to 48 inches, so choose one that spans most of your shower floor for maximum drainage efficiency.
Pro tip: Linear drains also handle higher water flow rates, which is important if you’re upgrading to a rainfall showerhead.
7. Wet Room Design
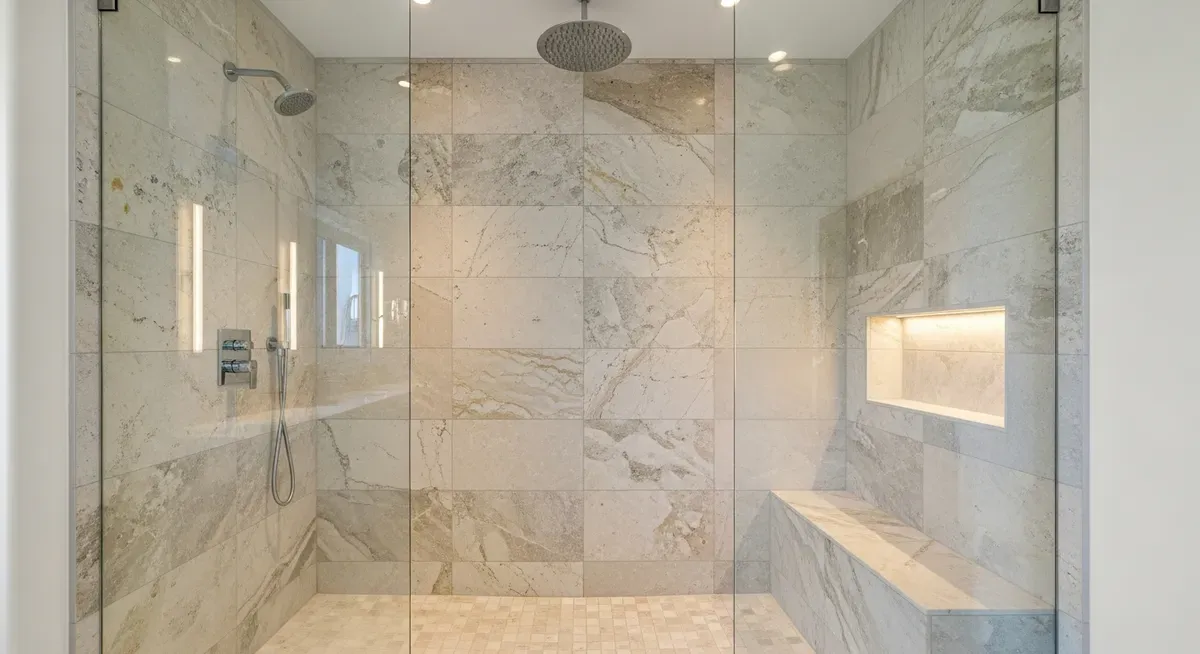
A wet room takes the curbless concept to its logical conclusion: the entire bathroom is the shower. There’s no enclosure, no door, no partition. The whole room is waterproofed from floor to ceiling, and the floor slopes gently toward a central or linear drain. This is the ultimate space-maximizing design for very small bathrooms, especially those under 40 square feet where traditional enclosures would feel confining.
Wet rooms work particularly well in half-baths being converted to full baths, or in secondary bathrooms where a streamlined, spa-like atmosphere is the goal. The entire space becomes one waterproof zone, so selecting the right waterproof flooring is essential for both durability and style.
The tradeoff with a wet room is that everything in the bathroom gets exposed to moisture, so you’ll want to choose water-resistant materials for the vanity and ensure adequate ventilation with a properly sized exhaust fan. Porcelain tile on every surface and a wall-mounted vanity keep maintenance simple.
Pro tip: Add a fixed glass splash panel between the shower area and the vanity or toilet to contain most of the spray while keeping the open-room feel.
8. Floating Bench or Fold-Down Seat
A shower bench adds comfort and functionality, but in a small shower, a freestanding stool eats up valuable floor space. A floating bench, cantilevered from the wall, gives you a place to sit, shave your legs, or store products without any legs touching the floor. The open space underneath makes the shower feel less crowded and is easier to clean.
For the smallest showers, a fold-down teak seat is even better. It mounts flat against the wall when not in use, reclaiming every inch when you just need a quick rinse. Either option also makes your shower more accessible as you age.
Pro tip: Position the bench on the wall opposite the showerhead, about 17 to 19 inches off the floor, so water hits you rather than pooling on the seat. This height is also ADA-friendly and comfortable for most adults.
9. Neo-Angle (Diamond-Shaped) Shower
A neo-angle shower fits neatly into a corner but offers a wider entry than a standard square enclosure. The angled front panel creates a diamond-like shape that opens toward the center of the bathroom, giving you more elbow room inside the shower without pushing walls outward. This design is especially effective in bathrooms where the door swing or toilet placement prevents a traditional rectangular enclosure.
The angled glass panels also bounce light in interesting directions, adding visual depth to a small room. Pair the neo-angle shape with clear glass and minimal hardware for maximum openness. In our San Diego projects, we often combine neo-angle enclosures with oversized floor tiles that continue from the bathroom floor into the shower, erasing the boundary between the two zones.
Neo-angle showers typically fit in a 36×36-inch or 38×38-inch footprint, making them one of the most compact walk-in configurations available. They’re a smart choice when you need a fully enclosed shower but don’t have the linear wall space for a rectangular design.
Pro tip: Choose a pivot door rather than a sliding door on a neo-angle enclosure. Pivot doors seal better and are easier to clean, since there’s no track to collect soap scum.
10. Floor-to-Ceiling Tile Continuity
Running the same tile from the floor up every wall to the ceiling is one of the most powerful visual tricks for small bathrooms. When tile stops partway up the wall, the transition line creates a visual break that makes the room feel shorter and more segmented. Full-height tile eliminates that break, drawing the eye upward and creating an uninterrupted surface that feels expansive.
This works especially well with large-format porcelain tiles in light neutrals. Fewer grout lines mean fewer visual interruptions, which amplifies the seamless effect. A 24×48-inch tile in a soft gray or warm white can make a 5×7 bathroom feel twice its actual size. For more design inspiration, explore our guide to bathroom floor tile ideas that carry beautifully from floor to shower walls.
The practical benefit is just as compelling: floor-to-ceiling tile is fully waterproof and eliminates the drywall-to-tile transition where mold and moisture damage most commonly start. In San Diego’s coastal neighborhoods, where humidity can be higher than inland areas, this approach provides superior long-term durability.
Pro tip: Use a contrasting grout color only if you want to emphasize the tile pattern. For maximum spaciousness, match grout color to tile color so the surface reads as one continuous plane.
11. Statement Accent Wall or Tile Pattern
While large-format neutral tiles create a sense of space, a single accent wall inside the shower adds personality without overwhelming a small room. The key is restraint: one wall of patterned or textured tile against three walls of simple tile creates a focal point that draws the eye and gives the shower design depth and character.
Popular accent wall choices in our San Diego projects include herringbone marble mosaics, vertically stacked subway tile in a bold color, zellige tile with its handmade irregularity, and geometric cement-look porcelain. The accent wall works best on the wall you see first when entering the bathroom or the wall directly facing the showerhead.
An accent wall is also a cost-effective way to incorporate premium materials. Rather than tiling an entire small shower in expensive natural marble, you can use marble on one wall and a coordinating porcelain on the other three. The result looks high-end without blowing the budget.
Pro tip: If your accent tile has a busy pattern, keep the surrounding tiles, fixtures, and hardware simple. Let the accent wall be the star. A matte black rain showerhead on a patterned wall creates a beautiful contrast.
12. Rainfall Showerhead with Handheld Combo
A ceiling-mounted or arm-mounted rainfall showerhead transforms a basic small shower into a spa-like retreat. The wide, gentle water pattern covers your entire body without the need to stand directly under a narrow stream, and the overhead position frees up wall space that a traditional showerhead would occupy. In a small shower where every square inch matters, that recovered wall space can hold a recessed niche or shelf.
Pairing the rain head with a handheld on a slide bar gives you the best of both worlds. The rain head provides the luxury experience; the handheld handles practical tasks like rinsing shampoo, cleaning the shower, or bathing children and pets. Most modern shower valve systems support a diverter that lets you run one or both heads simultaneously.
For small bathrooms, choose a rain head in the 8 to 10-inch diameter range. Larger 12-inch heads are dramatic but can produce more overspray in a tight enclosure. Brushed nickel, matte black, and polished chrome are the most requested finishes in our San Diego bathroom remodels, and all pair well with both modern and transitional design styles.
Pro tip: Install the rain showerhead directly overhead (ceiling-mounted if possible) rather than on an angled wall arm. The straight-down water flow reduces splashing on the glass and walls, keeping your small bathroom drier.
Ready to See These Ideas in Person?
Browsing photos is a great start, but nothing compares to seeing materials, finishes, and shower displays in person. Visit our Design Center in San Diego to explore real tile, glass, and fixture samples, and meet with a designer who can show you exactly how these ideas fit your bathroom.
Visit our Design Center — or schedule a free consultation to get a custom plan and estimate for your small bathroom remodel.
13. Glass Block or Half-Wall Partition
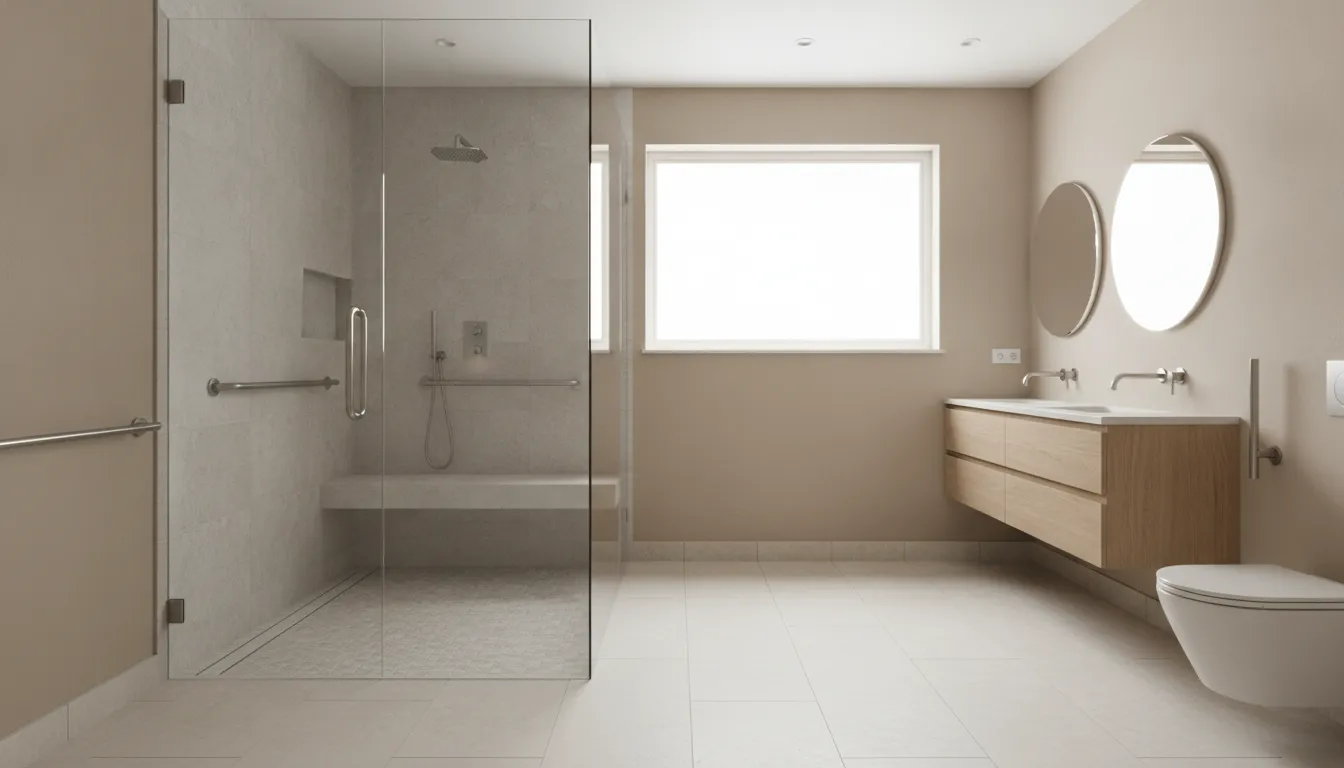
Glass blocks are experiencing a design resurgence, and they work exceptionally well as shower partitions in small bathrooms. A glass block half-wall (typically 36 to 42 inches tall) provides splash containment and visual separation without the heaviness of a full wall or the transparency concerns of clear glass. The textured surface of glass blocks diffuses light beautifully while providing privacy, making them ideal for showers that face a bathroom window or doorway.
If glass blocks feel too retro for your taste, a solid half-wall (pony wall) clad in the same tile as the shower achieves a similar function. The half-wall hides plumbing, provides a ledge for toiletries, and defines the shower zone without closing it off. Many of our San Diego clients combine a half-wall with a single glass panel on top for additional splash protection.
Both options eliminate the need for a shower door entirely, which removes a maintenance headache (no tracks, hinges, or seals to clean) and saves the cost of a glass door installation.
Pro tip: If you build a half-wall, make the top surface at least 4 inches wide and slope it slightly toward the shower side. This creates a useful ledge while ensuring water drains back into the shower rather than onto the bathroom floor.
14. Monochromatic Color Scheme
Using a single color family throughout the entire bathroom, from the shower tile to the vanity to the walls, is one of the most reliable ways to make a small space feel cohesive and larger. When your eye doesn’t encounter jarring color transitions, the room reads as one continuous space rather than a collection of small zones. Think all-white, all-gray, or all-warm-beige carried from floor to ceiling and into the shower without interruption.
Monochromatic doesn’t mean monotonous. You create visual interest through texture, finish, and scale variations within the same color range. Matte subway tile on the shower walls, polished marble mosaic on the shower floor, honed porcelain on the bathroom floor, and painted drywall on the upper walls can all be within two shades of each other while providing rich tactile variety.
In our experience remodeling San Diego bathrooms, monochromatic palettes also have stronger resale appeal because they feel clean, timeless, and universally appealing. They won’t date the way bold accent colors can.
Pro tip: If you go monochromatic, invest in quality fixtures and hardware to add visual interest. Matte black fixtures against an all-white tile scheme create definition without breaking the color continuity.
15. Walk-In Shower with Small Soaking Tub
If you love the idea of a walk-in shower but aren’t ready to give up a tub entirely, consider a layout that places a compact freestanding soaking tub adjacent to or just outside the walk-in shower area. Japanese-style soaking tubs (ofuro) have a smaller footprint than Western tubs, typically 40 to 48 inches long, and are designed for deep, upright soaking rather than reclining. They fit comfortably in bathrooms as small as 6×8 feet when paired with a curbless shower.
The tub and shower can share the same wet zone if the floor is properly sloped and waterproofed, reducing the total footprint needed. This approach gives you the spa-like luxury of both a soaking tub and a walk-in shower without requiring a large bathroom. It’s especially popular in San Diego’s Pacific Beach and La Jolla neighborhoods, where older homes often have just one bathroom that needs to serve multiple purposes.
When planning this combination, ensure there’s at least 24 inches of clear floor space between the tub and the shower glass for safe entry and exit. A wall-mounted faucet for the tub saves additional floor space.
Pro tip: Position the soaking tub near the bathroom window (if you have one) and the shower on the interior wall. This gives the tub the view and natural light while keeping plumbing runs efficient.
16. Pocket Door Shower Enclosure
In very tight bathrooms, the swing of a traditional shower door can block the toilet, vanity, or bathroom entry door. A pocket door shower enclosure solves this by sliding the glass panel into a wall-mounted track rather than swinging outward. When open, the glass tucks neatly alongside the shower wall; when closed, it provides a full seal. You get the enclosure without sacrificing any floor space to door clearance.
Pocket door systems are available in frameless configurations that look just as sleek as hinged doors. The hardware is minimal, usually a slimline track at the top and a small guide at the bottom, and the glass panels are the same tempered safety glass used in standard shower doors.
This solution is particularly valuable in San Diego’s older homes, where original bathrooms were often designed around smaller fixtures and tighter layouts than modern building standards require. A pocket door lets you install a generously sized walk-in shower in a bathroom that was never designed for one.
Pro tip: Choose a soft-close pocket door mechanism to prevent the glass from slamming. It protects the hardware and adds a premium feel to everyday use.
17. Tiled Shower Pan with Custom Slope
A pre-fabricated shower pan (base) limits your size and shape options. A custom-tiled shower pan, built on-site with a mortar bed and waterproof membrane, can be shaped to fit any bathroom layout exactly. Odd angles, narrow alcoves, and L-shaped footprints are all possible with a custom pan, and the tiled surface blends seamlessly with the shower walls and bathroom floor.
Custom slope engineering ensures water drains efficiently regardless of the pan shape. For curbless designs, the slope is subtle (typically 1/4 inch per foot) and extends slightly into the bathroom to prevent pooling. For curbed designs, the slope can be steeper and fully contained. Either way, proper slope is the most critical element of a shower that performs well over decades.
King Remodeling’s tile specialists build custom shower pans with Schluter-DITRA or similar waterproofing systems that meet or exceed San Diego building code requirements. This is one area where cutting corners leads to expensive water damage, so invest in quality waterproofing from the start.
Pro tip: If you choose a linear drain (idea #6), the pan only needs to slope in one direction rather than four, which simplifies construction and creates a cleaner tile layout with fewer cuts.
18. Open-Concept Glass Partition
An open-concept glass partition is a fixed panel of glass, typically floor-to-ceiling, that separates the shower zone from the rest of the bathroom without any door, track, or enclosure. One end of the shower is completely open, giving you a walk-in entry that feels like stepping into a wet room while still containing most of the water spray.
This design strikes the ideal balance between a fully enclosed shower (which can feel confining in a small bathroom) and a fully open wet room (which exposes everything to moisture). The glass panel blocks direct spray from the showerhead while the open end provides ventilation and easy access. For small bathrooms where claustrophobia is a concern, this approach consistently receives the highest satisfaction ratings from our San Diego clients.
Position the glass panel on the side that faces the showerhead, and leave the opposite side open. The open side should face the bathroom wall rather than the vanity or toilet to minimize overspray on fixtures. A 10 to 12-inch return panel on the open end adds extra splash protection without compromising the open feel.
Pro tip: Use an 8mm or 10mm thick glass panel for a substantial, high-end look. Thinner glass can feel flimsy and may wobble slightly, which undermines the modern aesthetic.
19. Skylight or Natural Light Shower
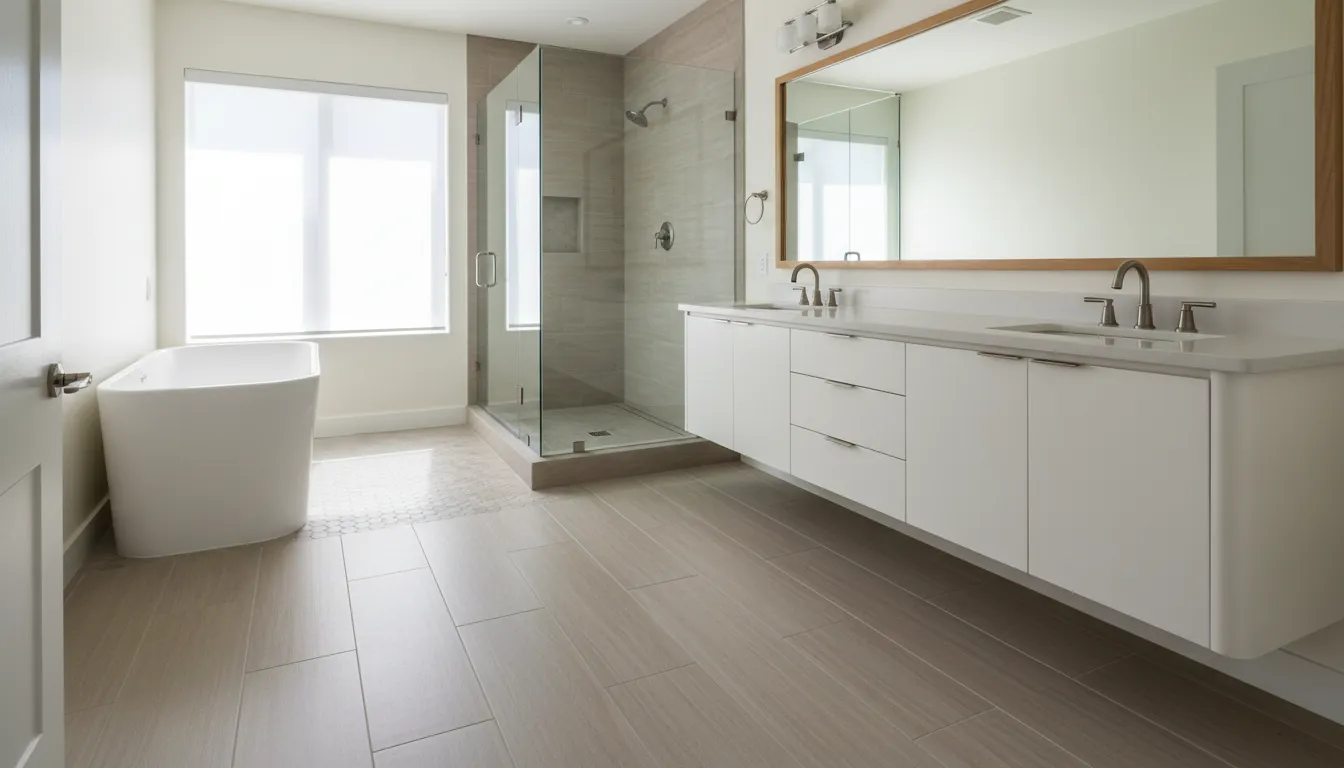
Natural light is the ultimate space enhancer, and a skylight or solar tube above the shower floods the space with daylight without sacrificing wall space or privacy. In small bathrooms where windows may be limited or absent, overhead natural light can dramatically transform the feel of the room from dark and cramped to bright and airy.
Tubular skylights (solar tubes) are the most practical option for shower installations. They’re smaller than traditional skylights, easier to install in existing rooflines, and sealed against moisture. A 10 to 14-inch solar tube provides enough light to illuminate an entire small shower area, and the diffuser lens distributes light evenly without creating harsh spots.
In San Diego, we benefit from approximately 266 sunny days per year, which makes skylight investments particularly worthwhile. Even on overcast days, a solar tube channels enough ambient light to reduce or eliminate the need for artificial lighting during daytime showers. The energy savings are modest but real, and the psychological benefit of showering in natural light is significant.
Pro tip: If a skylight isn’t feasible, a backlit LED panel recessed into the ceiling can mimic the effect of natural light. Choose a panel with adjustable color temperature (2700K to 5000K) so you can shift from warm morning light to bright daylight.
20. Two-Tone Tile Design
A two-tone tile design divides the shower walls into an upper and lower zone, each in a different shade or material. The classic approach uses a darker tile on the lower third to two-thirds of the wall and a lighter tile above. This grounds the space visually (the darker base feels stable) while the lighter upper section opens up the vertical dimension and draws the eye upward.
The dividing line between the two tones can be sharp (using a schluter trim strip or a natural tile edge) or graduated (using tiles that transition in shade). A chair-rail-height division at 36 to 42 inches off the floor is the most common proportion, but you can adjust based on ceiling height and personal preference.
Two-tone designs also give you an opportunity to mix tile sizes and textures. Large-format tiles on the upper walls keep the visual plane clean, while smaller mosaic or textured tiles on the lower walls add tactile interest where you actually touch the surface. This combination is both practical (smaller tiles provide better grip underfoot and resist showing water spots) and aesthetically rich.
Pro tip: Make the lighter color the dominant upper section. This prevents the room from feeling top-heavy and ensures the ceiling appears higher. A 40/60 split (dark lower, light upper) is the most visually balanced ratio.
21. Shower-Tub Hybrid Layout
A shower-tub hybrid layout combines a walk-in shower zone with a built-in alcove tub in a single wet area, sharing the same drain and waterproofing system. Unlike the soaking tub idea above (which uses a freestanding tub), this hybrid integrates the tub into the shower platform itself, creating a unified bathing space that works in bathrooms as small as 5×8 feet.
The key is designing the tub portion to sit flush with the shower floor on one end, allowing water to drain into the shared linear drain. A low tub deck (12 to 16 inches) doubles as a seating ledge when you’re showering, adding functionality without adding bulk.
This layout is the best solution for families who need a tub but have only one bathroom. Rather than choosing between a shower and a tub, you get both in the same footprint. Real estate agents consistently tell us that having at least one tub in the home protects resale value, especially in family-oriented San Diego neighborhoods like Scripps Ranch, 4S Ranch, and Carmel Valley.
Pro tip: Position the tub at the back of the shower zone (farthest from the entry) so it doesn’t interfere with everyday shower use. A hand-held showerhead on a slide bar serves both the shower and the tub.
22. Micro Wet Room
A micro wet room takes the full wet room concept and scales it down to the smallest possible footprint, typically bathrooms between 25 and 35 square feet. The entire room is waterproofed and tiled, the toilet and vanity are wall-mounted to keep the floor clear, and the shower is open with no enclosure at all. A central linear drain handles all the water.
This design is popular in basement bathrooms, ADU (accessory dwelling unit) conversions, and secondary half-bath-to-full-bath upgrades, all of which are increasingly common in San Diego where homeowners are adding living space to accommodate multi-generational families or rental income.
The key to making a micro wet room feel intentional (not cramped) is material consistency. Use the same tile on every surface: floor, walls, and ceiling if possible. The absence of visual transitions between “shower” and “bathroom” is what makes the space feel larger than its square footage suggests.
Pro tip: Wall-mount everything you can: toilet, vanity, soap dish, towel hooks. Visible floor space is the biggest factor in perceived room size, and wall-mounted fixtures maximize it.
23. Vertical Accent Strip
A vertical accent strip is a narrow column of contrasting tile running from floor to ceiling inside the shower. Typically 4 to 8 inches wide, this strip creates a strong vertical line that draws the eye upward and adds perceived height to a low or average-height ceiling. It’s a subtle design move that makes a big difference in a small shower.
Position the accent strip behind the showerhead or centered on the back wall for maximum impact. Popular choices include metallic mosaic, natural stone (like a strip of marble in a porcelain shower), textured 3D tile, or simply a different color in the same tile format as the surrounding walls.
The vertical accent strip is also one of the most budget-friendly ways to add visual interest to a shower. You only need 3 to 5 square feet of accent tile, compared to a full accent wall that might require 30 to 40 square feet. This lets you splurge on a premium material without blowing your budget.
Pro tip: Align the vertical accent strip with the center of the showerhead for a symmetrical, balanced look that creates a clear visual focal point as you enter the shower.
24. Shelf Niche with LED Lighting
Take the standard recessed niche up a notch by adding integrated LED lighting. A strip of waterproof LED tape along the top of the niche creates a warm glow that highlights your tile work, makes the niche contents visible in a dimly lit shower, and adds a layer of ambient light that makes the entire shower feel more spacious and luxurious.
LED-lit niches look especially dramatic with glass or metallic mosaic tile interiors. The light bounces off the reflective surface and casts a soft glow across the adjacent walls. This effect is subtle during the day but transforms the shower at night, turning a utilitarian space into a relaxing retreat.
From a practical standpoint, the LED strip runs on 12-volt DC power (safe for wet locations), and the wiring connects to a low-voltage transformer outside the shower zone. A qualified electrician can install the circuit during the remodel. In San Diego, the electrical work needs to comply with California Electrical Code requirements for wet-location fixtures, which your remodeling contractor should handle as part of the permit process.
Pro tip: Choose warm white LEDs (2700K to 3000K) for a relaxing, spa-like ambiance. Cool white LEDs can feel clinical in a bathroom setting.
25. Doorless Walk-In with Privacy Wall
A doorless walk-in shower uses a partial wall (typically 36 to 48 inches wide and 72 to 84 inches tall) to create a visual screen between the shower and the rest of the bathroom. You walk around the wall to enter the shower, so there’s no door to open, close, or clean. The result is a spacious, easy-to-access shower that feels open without sacrificing privacy.
The privacy wall can be a tiled partition that matches the shower walls, creating a seamless look. Alternatively, you can use the wall as a design feature by tiling it in a contrasting pattern or material on the bathroom-facing side. Some homeowners add a wall-mounted vanity or mirror to the outside of the privacy wall, reclaiming that wall space for the bathroom.
Doorless walk-ins require a larger footprint than enclosed showers (plan for at least 36×60 inches including the wall), so they work best in bathrooms at the upper end of the “small” range (50 to 65 square feet). The tradeoff is worth it: no glass to clean, no door hardware to maintain, and an open, resort-style aesthetic.
Pro tip: Angle the entry so the showerhead wall isn’t visible from the bathroom door. This provides splash containment and privacy while keeping the design completely open.
How to Plan Your Small Bathroom Walk-In Shower Remodel
Great design ideas only become reality with solid planning. Before you start choosing tiles and fixtures, take time to map out the practical details that will determine whether your remodel goes smoothly. Here’s how to approach your project from concept to completion.
Nail Down Your Layout and Measurements
Before choosing tiles or fixtures, measure your bathroom precisely. The minimum comfortable size for a walk-in shower is 30×30 inches, but 36×36 inches or larger is recommended. Map out where the drain connects, where the vanity and toilet sit, and how much clearance you have for a shower door or entry. A professional measurement ensures you won’t discover layout problems mid-construction. Learn how to plan a bathroom remodel step by step.
Consider how the shower door (if you have one) will swing, where towel bars will mount, and whether you need to relocate the toilet or vanity to gain shower space. These details are easy to overlook on paper but become costly problems once demolition starts.
Set a Realistic Budget and Timeline
A small bathroom walk-in shower remodel in San Diego typically ranges from $8,000 to $25,000+ depending on materials, labor, and structural changes (like moving plumbing or removing a tub). Curbless showers and custom glass enclosures are at the higher end. Get a detailed fixed-bid estimate upfront so you know exactly what to expect, with no surprises mid-project.
Timeline is equally important. A straightforward shower replacement with no plumbing changes can take as little as one to two weeks. If you’re moving drains, adding a curbless entry that requires subfloor work, or converting a tub to a shower, expect three to four weeks. Building in a buffer for tile delivery and inspection scheduling helps keep stress levels low.
Why Work with a Professional Designer
In a small bathroom, every design decision is amplified. The wrong tile scale, a poorly placed drain, or an inch of miscalculated clearance can make the difference between a shower that feels spacious and one that feels cramped. A professional designer catches these issues before construction starts, saving you time and money. At King Remodeling, our design-build team handles everything from 3D renderings to final installation under one roof. See our process to learn how we make remodeling stress-free, or visit our showroom to see materials in person.
A design-build firm also streamlines communication. Instead of coordinating between a separate designer, tile supplier, plumber, and general contractor, you have one team managing the entire project. This is especially valuable for small bathroom remodels where tight spaces leave no room for miscommunication between trades.
San Diego Building Code Considerations
San Diego bathroom remodels follow the California Building Code (CBC), which has specific requirements that affect walk-in shower design. The minimum shower compartment interior size is 1,024 square inches (roughly 32×32 inches) with a minimum 22-inch entry width. Curbless showers must meet the slope-to-drain requirements without allowing water to flow outside the shower area.
If you’re converting a tub to a walk-in shower, this typically triggers a plumbing permit. Any electrical work (like adding a recessed light or LED niche lighting) requires a separate electrical permit. In San Diego, permit inspections are handled by the City’s Development Services Department, and your contractor should pull and schedule all required permits.
Waterproofing standards have gotten stricter in recent years. The CBC requires a waterproof membrane on all shower walls and floors, tested to 2 inches of standing water for 24 hours. At King Remodeling, we exceed this standard with hot-mop waterproofing combined with sheet membrane systems, providing dual-layer protection that prevents leaks for the life of the shower.
Pro tip: Always work with a licensed contractor (CSLB Class B or C-36 license) for shower remodels. Unpermitted work can create problems when you sell your home, and unlicensed contractors aren’t covered by the California Contractors State License Board’s consumer protection fund.
How Much Does a Walk-In Shower Cost?
Walk-in shower costs in San Diego vary widely based on the scope of the project, the materials you choose, and whether structural changes are needed. Here’s a general breakdown to help you budget:
- Basic walk-in shower conversion (replacing a tub with a standard tile shower, prefab pan, semi-frameless glass): $8,000 to $12,000
- Mid-range remodel (custom-tiled pan, frameless glass, recessed niches, upgraded fixtures): $12,000 to $18,000
- High-end remodel (curbless entry, linear drain, custom glass, premium tile, LED lighting, heated floor): $18,000 to $25,000+
Factors that increase cost include moving plumbing (relocating the drain or supply lines), structural modifications (removing a bearing wall or adjusting framing for a curbless entry), and premium materials (natural stone tile, custom glass shapes, body sprays, or steam systems).
King Remodeling provides fixed-bid estimates, meaning the price we quote is the price you pay. No change orders, no surprises. Request your free estimate to get exact pricing for your specific bathroom.
Frequently Asked Questions
The smallest practical size for a walk-in shower is 30×30 inches, which meets most building codes. However, 36×36 inches is recommended for comfort. If you’re adding a bench or niche, plan for at least 36×48 inches to avoid a cramped feel.
Yes. A 5×7 bathroom (35 square feet) can comfortably fit a walk-in shower, toilet, and vanity. A corner alcove shower measuring 36×36 inches is the most common layout. Curbless designs and frameless glass make the space feel even more open.
In San Diego, a walk-in shower remodel for a small bathroom typically costs between $8,000 and $25,000. Basic tile-and-glass installations are at the lower end, while curbless showers with custom glass, linear drains, and premium tile range higher. Getting a fixed-bid estimate prevents budget surprises.
For most small bathrooms, yes. A walk-in shower takes up less space, improves accessibility, and creates a more open feel. The exception is if this is your home’s only bathroom: real estate experts recommend keeping at least one tub, especially for families with young children. A compact soaking tub inside a wet room can give you both.
Yes. A well-designed walk-in shower is one of the top bathroom features homebuyers look for. According to the National Association of Realtors, bathroom remodels recover 60% to 70% of their cost at resale. In San Diego’s competitive housing market, an updated bathroom with a modern walk-in shower can make your listing stand out and reduce time on market.
Use frameless glass instead of shower curtains, choose large-format tiles in light colors to reduce grout lines, install floor-to-ceiling tile to draw the eye upward, use a curbless entry for a continuous floor plane, and keep the color palette monochromatic. These visual tricks make a small bathroom feel significantly more spacious.
In most cases, yes. Converting a tub to a shower, moving plumbing, or adding electrical fixtures requires permits from the City of San Diego Development Services Department. A like-for-like shower replacement (same footprint, no plumbing changes) may not require a permit, but check with your contractor. King Remodeling handles all permitting as part of our design-build process.
Large-format porcelain tiles (12×24 inches or larger) in light colors are the best choice for making a small shower feel spacious. Fewer grout lines create a cleaner look, and light colors reflect light to make the space feel open. For the shower floor, use smaller tiles (2×2 mosaic) with a slightly textured finish for grip and proper drainage slope.
Ready to Start Your Small Bathroom Remodel?
Every small bathroom has potential. Whether you’re drawn to a sleek curbless design, a glass-enclosed corner shower, a micro wet room, or a doorless walk-in with a privacy wall, the right walk-in shower can transform a cramped space into your favorite room in the house.
King Remodeling has been designing and building beautiful bathrooms for San Diego homeowners for over 25 years. With more than 1,500 bathroom projects completed, our design-build team has the experience to handle any layout challenge your small bathroom presents. From your first consultation through final installation, we handle every detail so you can enjoy the process.
Browse our featured projects for inspiration, or contact us today to start planning your walk-in shower remodel. You can also visit our Design Center in San Diego to see materials and shower displays in person.