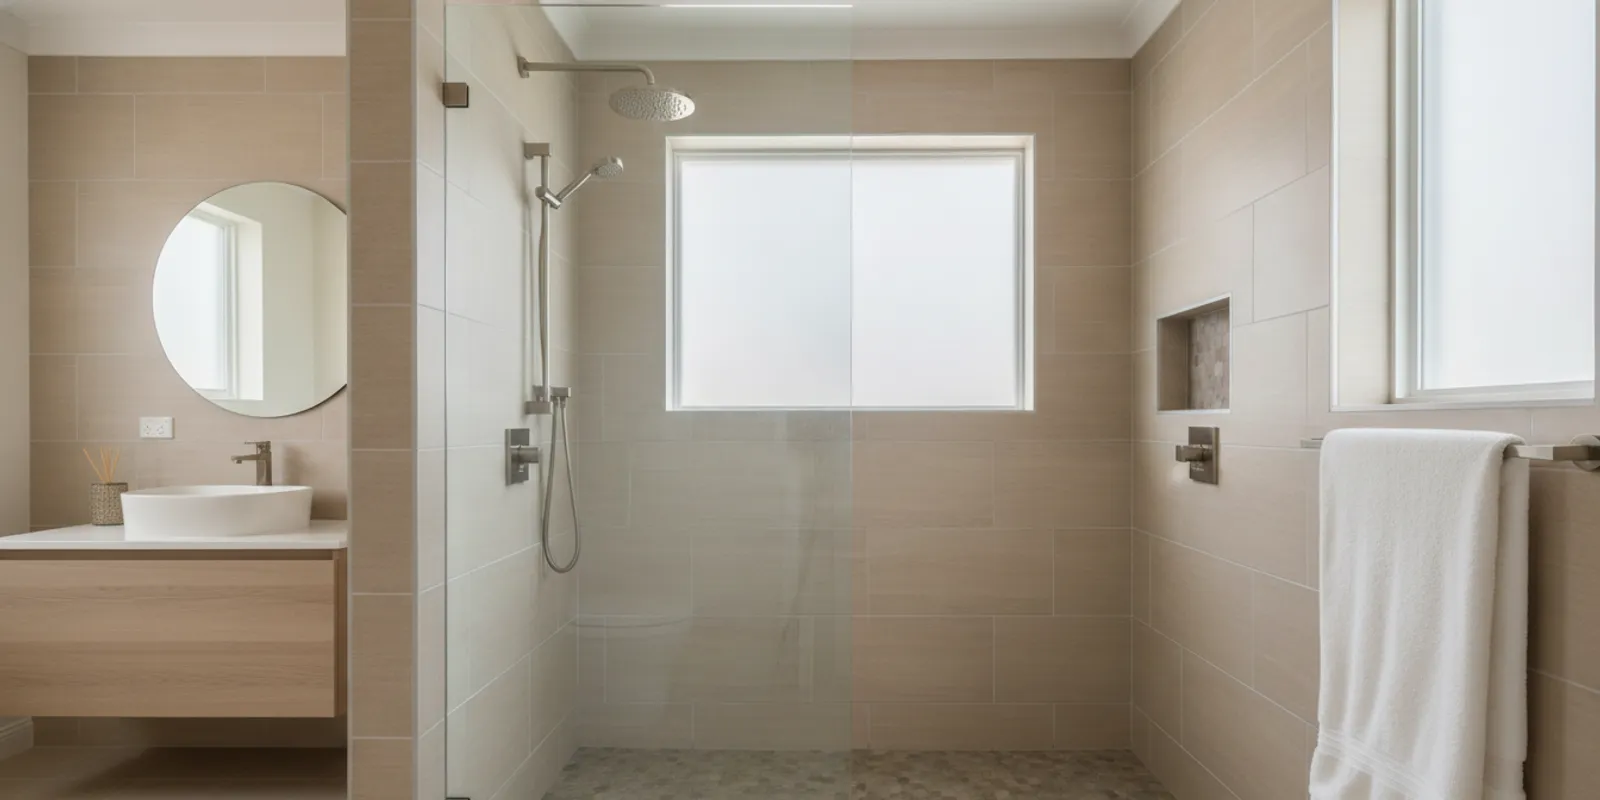
Learning how to remodel a bathroom shower with tile starts before choosing a pattern. The order of work matters: confirm the layout, remove the old finish, prepare a stable base, waterproof the entire wet area, and only then set tile and finish the joints. A careful plan helps prevent leaks, awkward cuts, and details that are difficult to correct later.
Talk with a remodeling team about your shower
A tiled shower remodel can be a surface update, or it can involve a new shower pan, drain, plumbing, glass, and changes to the room layout. The right approach depends on the existing assembly and what you want the shower to do. This guide walks through the decision points and the usual sequence so you can discuss scope clearly, compare proposals, and understand what should happen behind the finished tile.
What should you decide before remodeling a tiled shower?
Start with the use of the shower, not a tile sample. Think about who uses it, how much space is available, where water falls, and whether the existing shower has problems such as loose tile, persistent dampness, cracked grout, or a musty smell. Those symptoms do not identify the cause on their own, but they are reasons to inspect the assembly rather than simply cover the visible finish.
Write down what you want to keep and what you would change. For example, keeping the drain and valve in the same locations may reduce the amount of plumbing work, while changing the footprint or moving fixtures affects more of the project. Consider whether you want a curb, a low-entry threshold, a built-in seat, a hand shower, or a niche. Each feature needs to be planned with the waterproofing and framing, not improvised after tile installation begins.
- Set a practical scope. Decide whether the goal is new tile in the existing footprint or a complete shower rebuild.
- Check the room constraints. Note the door swing, nearby vanity or toilet, plumbing locations, and available clearance.
- Choose the finish direction. Collect a few examples of tile color, size, grout, and metal finishes rather than trying to select every detail at once.
- Ask about approvals. Permit rules differ by location and by scope. Confirm current requirements with the authority that has jurisdiction before work begins.
For a project that includes more than a shower, review the broader bathroom remodeling options and use a written remodeling process overview to understand how design and construction decisions can fit together. You can also browse completed kitchen and bath projects for examples of how different finishes work in real rooms.
How do you plan the tile, fixtures, and shower layout?
Measure the shower walls and floor, then map the location of every fixture and edge. A simple elevation drawing for each wall can help you see where full tiles land, where cuts will fall, and whether a pattern will line up around corners. Include the door opening, curb or threshold, niche, seat, valve, showerhead, and any window. A few minutes spent on layout can avoid narrow slivers at a highly visible corner or a grout line that lands awkwardly against a fixture.
Tile size is not only a style decision. Large-format tile can reduce the number of grout joints on a broad, flat wall, but it may require careful planning around corners and small features. Smaller tile can follow a sloped shower floor more easily and may provide more grout joints underfoot. Confirm that a selected floor tile is intended for the application and has a suitable surface for the conditions. Ask the supplier or installer to verify compatibility rather than assuming that any attractive tile will work on every surface.
Also think about the shape and variation of the tile. Rectified edges can support narrow, regular joints when the tile and installation allow it, while handmade or textured pieces may have more variation that should be reflected in the layout. A directional pattern needs to be oriented consistently across the walls. If the shower has a niche, decide whether the niche will use the field tile, a smaller accent, or a contrasting finish, and check how the edges will be trimmed. Keep a record of the product name, shade, size, and dye lot for each selection. If extra tile is ordered, keep it safely stored after the project in case a future repair calls for a matching piece.
Grout is another part of the visual plan. A close color match softens the grid, while a contrasting grout makes each tile shape more noticeable. Bring tile and grout samples together and view them in both bright and low bathroom lighting. The grout joint width should be appropriate for the tile and installation system; do not choose an extremely narrow joint based only on a showroom display. Your installer can explain which joint sizes and grout products suit the selected tile and substrate.
Decide how the wall and floor materials meet. A coordinated field tile with a contrasting shower floor can define the space without adding many patterns. If you use more than one tile, check actual samples together under the bathroom’s lighting. A finish that looks calm in a showroom can appear warmer, cooler, or more varied at home.
Plan plumbing trim with the valve and water outlets. Confirm the model and rough-in requirements before the walls are closed. A trim set that does not match the installed valve can create delays, and fixture placement should account for the user’s reach and the location of the shower spray. If you are evaluating a walk-in layout, the guide to custom walk-in showers can help you think through enclosure and access choices.
What happens during demolition and inspection?
Before demolition, clear the work area and protect the route from the bathroom to the exterior. The shower should be isolated from adjacent finishes as much as the project allows. Workers need to remove tile and the layers beneath it without damaging plumbing or framing that will remain. Demolition can reveal conditions that were hidden, such as deteriorated backing, water damage, or an unsuitable prior installation.
Once the old finish is removed, inspect the framing, plumbing connections, and shower base. The underlying structure needs to be sound enough to support the new assembly. If damage is found, the repair should be included in the scope before it is covered. Do not treat new tile as a fix for a leak or unstable substrate; those problems must be addressed first.
Discuss what happens if hidden damage changes the work. A useful agreement explains how concealed conditions are documented, how proposed changes are approved, and how cost or schedule adjustments are handled. This is more practical than assuming demolition will reveal a perfect base. When comparing estimates, check whether protection, debris removal, inspection, and repair of discovered damage are addressed, or whether some are excluded.
How should the shower base and waterproofing be built?
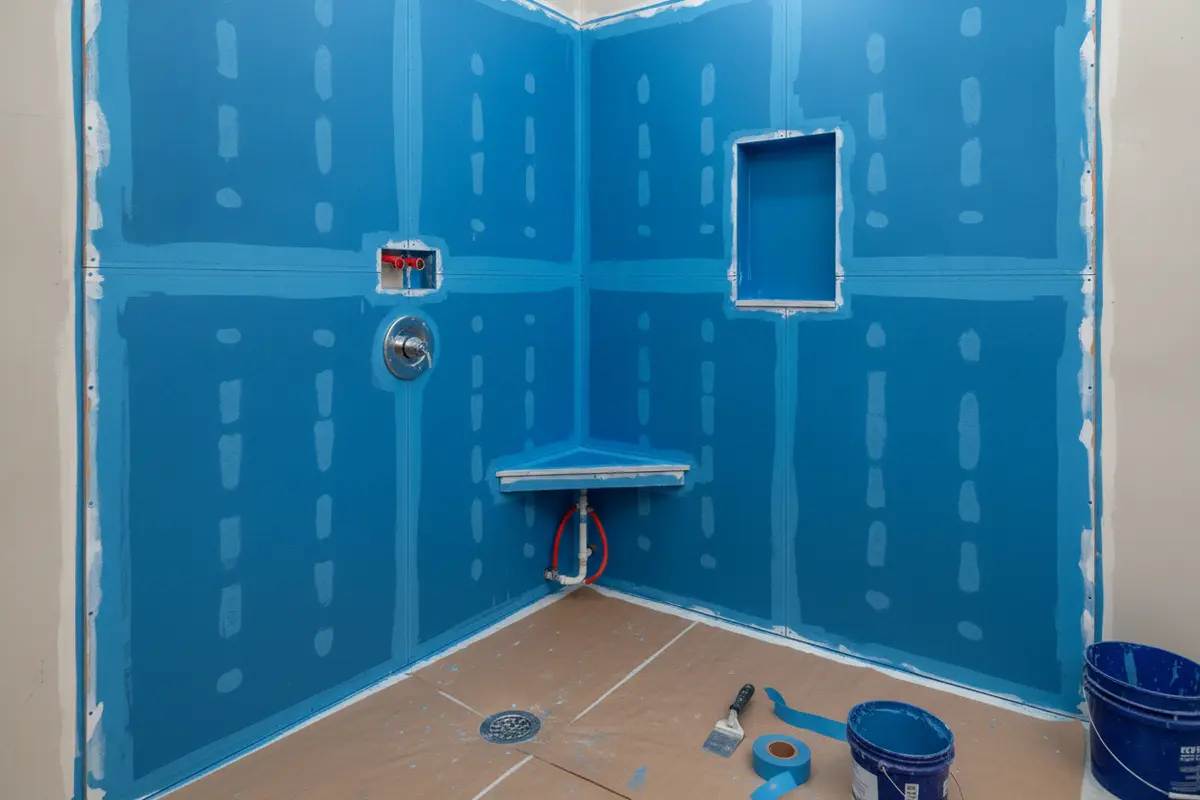
Waterproofing is the part of the job that protects what you cannot see after tile is installed. Tile and grout are the finish; they are not a substitute for a properly designed waterproof assembly. The shower floor, corners, wall transitions, niche, bench, curb, and plumbing penetrations need to work as one continuous system. The product instructions and the details for the chosen system determine how that continuity is created.
There are different shower construction approaches. Some use a waterproof membrane behind or on top of an appropriate backer; others use a system with a prefabricated base and matching components. The products should be compatible, and transitions must be installed according to the manufacturer’s instructions. Mixing components without confirming compatibility can leave weak points at seams or penetrations.
The base must direct water toward the drain. The drain type and the waterproofing system need to be planned together, and the finished floor must not leave areas where water sits. Walls and framing should be checked for flatness and plumb before tile is set; tile can follow a prepared surface, but it cannot reliably correct a poorly built one. In the shower, slopes, corners, and penetrations are especially important details to review before covering them.
Some local building guidance specifies suitable backer materials in tub and shower tile areas. For example, the City of El Cerrito’s residential bathroom remodel document describes cement, fiber-cement, or glass-mat gypsum backers for tile in wet areas. That is local guidance, not a substitute for the product instructions or the current requirements in San Diego. Ask your project team which approved assembly is being used and how the specific system handles seams, corners, and penetrations.
Before tile covers the waterproofing, ask what inspection or verification is part of the installation. Depending on the system, the installer may perform a water test or other checks before proceeding. A clear sequence matters: finish and inspect the waterproof layer first, then set the tile. Take photographs of concealed work for your project records if the contractor permits it.
How do you set tile on shower walls and floors?
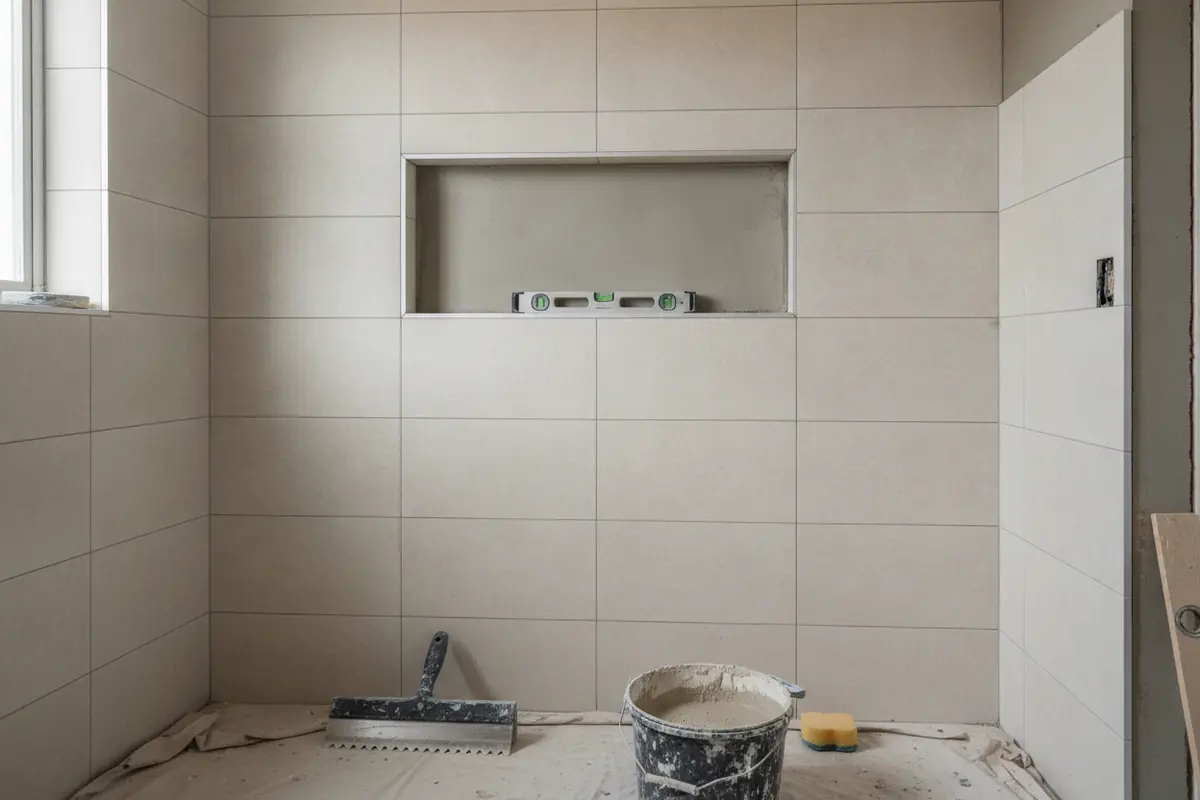
Tile setting begins with a dry layout and reference lines. Installers typically establish level and plumb guides so rows do not drift as they move up the wall. They should check the layout around corners, the niche, valve, and showerhead, and adjust the starting point to avoid distracting cuts. The goal is not necessarily to eliminate every cut; it is to place cuts where they look intentional and fit the design.
Use a mortar or adhesive that is appropriate for the tile, substrate, and wet-area application, following its instructions for mixing, application, and working time. The installer needs to achieve appropriate coverage and keep joints consistent. Large-format pieces, mosaic sheets, and handmade or textured tiles each need their own handling. Tile edges around a niche or exposed corner also need a planned finish, such as a coordinating trim or a carefully made edge.
On the floor, the small pieces often used around a drain must follow the slope without creating sharp lippage or uneven transitions. Confirm the floor tile, drain detail, and pattern are coordinated before setting begins. On walls, check alignment as the work proceeds, not only at the end. A quick review while mortar is workable is much easier than trying to change a row after it has set.
For a deeper look at tile choices across a bathroom, see the bathroom tile installation guide. If the project includes flooring beyond the shower, the separate flooring installation service page covers that broader scope.
When should grout, sealant, and fixtures be installed?
After tile has set for the time required by the setting material, the joints can be cleaned and grouted. The grout type should suit the joint width and selected tile, and the installer should follow the manufacturer’s directions for mixing, application, cleanup, and cure time. Grout color can change how prominent the pattern appears: a close match blends joints, while contrast emphasizes the grid. Review a sample if the color choice is difficult.
Changes of plane—such as wall-to-wall corners or the wall meeting the floor—are commonly finished with an appropriate flexible sealant rather than rigid grout. The exact detail depends on the system and product instructions. Sealant at these transitions can accommodate movement; it is not a repair for missing waterproofing. Keep corners clean and consistent, and do not use a visible bead to hide an uneven or unfinished joint.
Fit the shower trim, drain cover, enclosure, and accessories after the tiled surfaces are ready, following the installation requirements for each product. Avoid drilling through waterproofed areas unless the detail is designed and sealed for it. Confirm that the glass door clears nearby fixtures and that its sweep or bottom seal directs water into the shower. Allow grout, sealant, and other materials to cure for the stated period before using the shower.
How can you check the finished shower before using it?
Walk through the finished work with the installer before the project is considered complete. Look at the tile alignment, grout joints, edges, corners, niche, and transitions. Check that the valve and showerhead operate as expected and that the enclosure opens and closes without hitting the vanity, toilet, or other hardware. Ask how to clean the selected tile and grout, which cleaners to avoid, and whether any surface requires periodic sealing.
Once the shower is approved for use, run water and observe drainage and the enclosure. Water should flow toward the drain rather than collect in low spots. Check for water escaping past the door or enclosure, and report any concern promptly. Keep the care instructions and product information with your project documents so you can identify the materials if future maintenance is needed.
A practical completion checklist includes:
- Tile is secure, with consistent joints and no obvious unfinished edges.
- Grout and flexible sealant are complete at the transitions that require them.
- Fixtures operate, and trim plates sit properly against the finished surface.
- The enclosure moves freely and its seals are properly positioned.
- Drainage has been observed, and the shower is not put into service before cure times are met.
- You have received care guidance and know whom to contact about a concern.
What mistakes can make a shower tile remodel harder?
Choosing tile before defining the assembly. Tile format, drain, niche, and waterproofing details need to work together. Set the technical plan before committing to a layout that depends on a particular product or fixture.
Assuming grout makes the shower waterproof. Grout is part of the visible finish, not the shower’s sole water barrier. The waterproof layer and its connections need to be designed and installed beneath or behind the tile.
Skipping the layout review. A tile can look good in isolation but create awkward cuts at the niche or curb. Review full wall elevations and the floor pattern before installation.
Covering questionable framing or backing. A flat, stable base supports cleaner tile work. Repair damage and address movement before new finish materials hide the area.
Rushing cure times. Mortar, grout, sealant, and waterproofing products each have instructions. Using the shower too soon can compromise a new installation, so get the specific waiting period from the installer and product guidance.
How long does a tiled shower remodel take?
The schedule depends on the scope, the availability of materials, the condition uncovered during demolition, and the sequence of trade work. A straightforward replacement in the same footprint differs from changing the drain, plumbing, framing, or shower size. Waterproofing, tile setting, grout, sealant, and enclosure installation also have separate steps and cure times. Ask for a project-specific schedule that identifies what must happen before the next phase can begin.
To plan the room around the work, compare the expected sequence with the bathroom remodel timeline guide. A quicker surface-focused refresh is not interchangeable with a full shower rebuild. The fast shower remodel overview can help clarify which updates may be limited in scope and which require a more extensive plan.
How do you choose help for a shower tile project?
Look for a proposal that describes the work in sequence rather than simply listing tile and fixtures. It should make clear what is removed, what will be rebuilt, how the waterproofing system is handled, who supplies materials, how hidden damage is addressed, and what is excluded. Ask who coordinates the work and how you will be updated if the scope changes.
Ask to see examples of similar shower projects and discuss how the contractor handles layout, waterproofing, and final checks. Confirm the relevant license and insurance details independently, and make sure the written agreement identifies the contractor and project scope. King Remodeling’s general contracting information and San Diego showroom page are useful starting points for understanding its remodeling and material-selection process. You can also review the available remodeling services before deciding what kind of support fits your project.
Permit requirements depend on location and project scope, so do not rely on a rule from another city as a decision for your home. As one example, the City of Rancho Palos Verdes says its permit FAQ covers kitchen and bathroom remodels and distinguishes non-structural work from projects involving structural changes. See its kitchen, bathroom, and laundry remodel FAQ as an example of why scope matters, then verify requirements with the appropriate San Diego jurisdiction for your address.
Frequently Asked Questions
Can you tile over existing shower tile?
It may be possible in limited situations, but it should not be assumed. The existing tile, substrate, waterproofing, and wall condition need evaluation, and adding a layer can affect clearances and fixtures. If there is a leak, loose tile, or moisture damage, covering the surface does not resolve the underlying issue.
Which tile is best for a shower floor?
Choose a tile intended for shower-floor use, with a surface appropriate for wet footing and a size and shape that can follow the floor slope. Coordinate it with the drain and waterproofing design. Ask the supplier or installer to confirm suitability for the exact application.
Does a tiled shower need a waterproof membrane?
A shower needs a properly designed water-management assembly, but the exact system varies. It may use a membrane or a compatible integrated system. Follow the system manufacturer’s instructions and verify that seams, corners, penetrations, and the drain connection are addressed.
Do shower remodels require a permit in San Diego?
That depends on the address and the work being done. Replacing finishes may be treated differently from changing plumbing, the footprint, or structural elements. Check with the local building department before construction rather than relying on another city’s rules.
Explore bathroom remodeling options
A successful tiled shower remodel is built from the structure outward: define the scope, prepare a stable base, create continuous waterproofing, plan the tile carefully, and verify the finished details before use. With those steps clear, you can make design choices that fit the room and compare project proposals on more than appearance alone.