
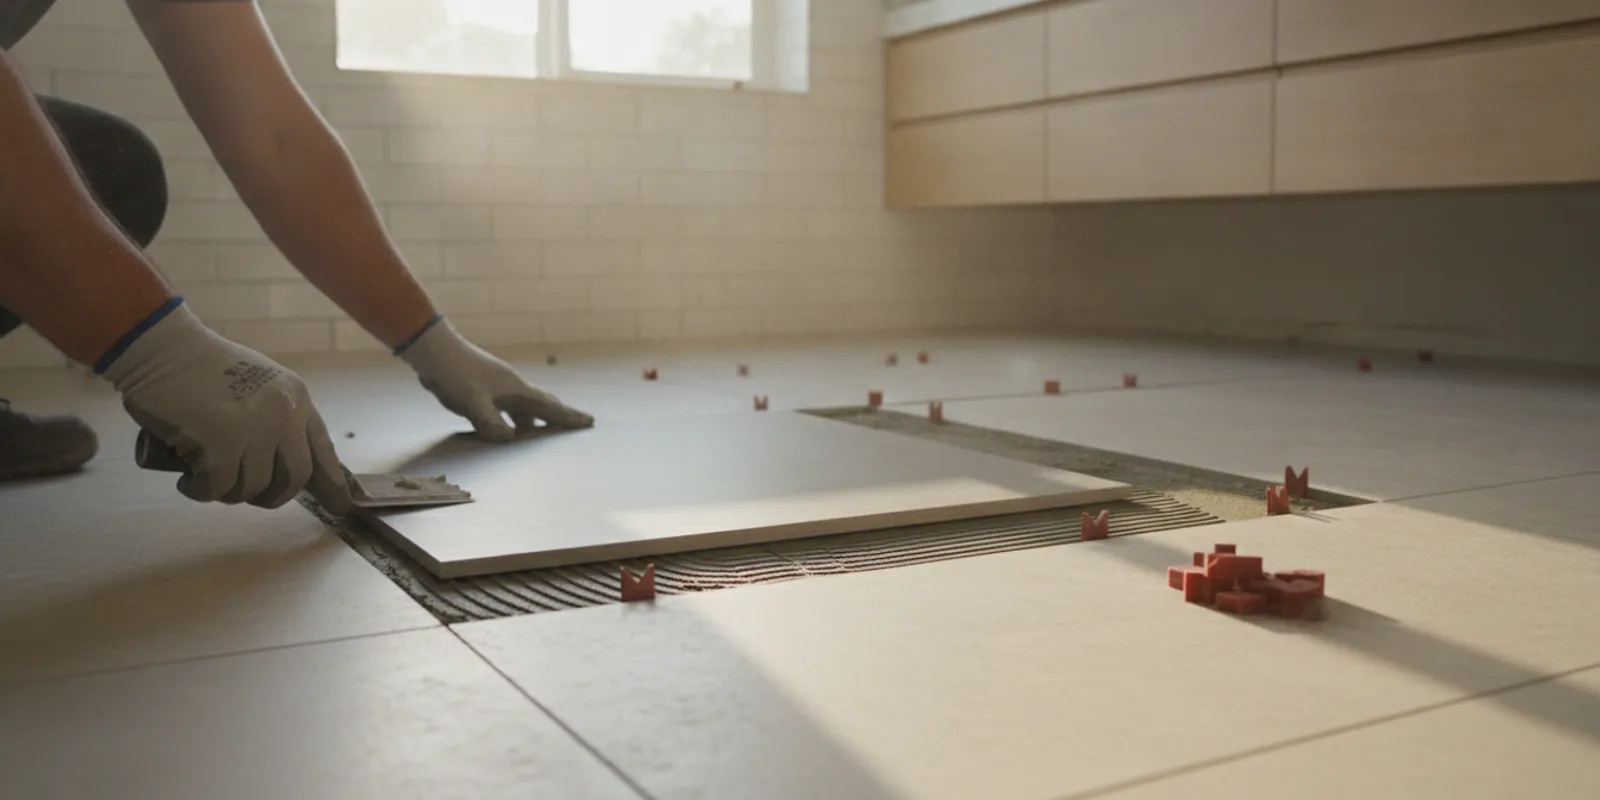
A bathroom can feel disjointed when the floor, wall tile, vanity backsplash, trim, and doorway transitions are chosen in isolation. A whole-room plan resolves those connections before materials arrive, so the finished space works as one coordinated renovation rather than a series of separate surfaces.
Contact King Remodeling to discuss your whole-bathroom tile plan.
Effective bathroom tile installation planning covers the full room. Define each tiled surface, calculate quantities and cuts, coordinate layouts and transitions, document selections in the proposal, and confirm the handoff between design, plumbing, electrical, and installation work.
This guide stays focused on that planning boundary for San Diego County homeowners. It does not repeat the published custom shower installation process, detailed shower waterproofing sequence, or generic shower inspiration. Instead, start by deciding what the complete room scope must include and how each surface relates to the next.
What should a whole-bathroom tile installation plan cover?
A complete plan should treat the bathroom as one connected room, not a collection of separate tile surfaces. Start by identifying every area that will receive tile: the floor, full-height or partial-height walls, the vanity backsplash, and any returns, niches, thresholds, or exposed edges. This room-wide view helps the finished materials relate to one another while making the scope clear before demolition or ordering begins.
Define each surface and its boundaries
For the floor, document the starting point, pattern direction, perimeter cuts, doorway transition, and relationship to adjacent flooring. For walls, specify where tile stops, how corners and outside edges are finished, and whether the same field tile continues behind or around the vanity. A backsplash plan should identify its height, side returns, outlet locations, and how its edge meets painted wall areas. These details prevent assumptions that can lead to mismatched trim or unfinished-looking transitions.
The University of Arizona’s tile specifications provide a useful planning standard. They call for drawings to show floor and wall layouts, tile sizes, patterns, color arrangements, perimeter conditions, interfaces with different materials, trim components, joints, thresholds, and setting details. The specifications also recommend verifying that matching trim units are available for the selected floor and wall tile. Review the University of Arizona tile specifications for the complete checklist.
Coordinate the work with the broader remodel
Tile decisions should be coordinated with cabinet dimensions, vanity installation, plumbing fixtures, electrical work, door clearances, and adjacent flooring. Confirm who is responsible for moving or protecting fixtures, preparing surfaces, installing trim, and completing cleanup. The order of work matters too. If you are planning a larger renovation, review the bathroom remodel installation sequence so tile work fits the wider project rather than being planned in isolation.
Finally, account for movement and transitions. The University of Arizona guidance calls for detailing exposed edge protection, floor-height changes at doorways, and joints coordinated with building details. A written scope that covers these items gives your installer a practical reference and gives you a clearer basis for comparing bathroom remodeling services.
How do you prepare bathroom floors and walls for tile?
Preparation starts with an honest look at what is already in the room. Before bathroom tile installation begins, the installer should identify what will be removed, what can remain. And whether the existing floor or wall is stable enough to support the planned finish. Movement, soft areas, cracks, swelling, prior leaks, and uneven surfaces should be documented rather than covered with new tile.
Ask how the floor will be checked for high and low areas and how the wall will be checked for plumb, flatness, and damage. A floor that moves or varies significantly can affect tile alignment and finished edges. On walls, loose panels, deteriorated backing, and old adhesive or other residue may prevent reliable bonding. Clean, sound surfaces matter, but cleaning alone does not make an unsuitable substrate appropriate.
Demolition also deserves a specific conversation. If old flooring, adhesive, or wall finishes are being removed, confirm how dust and debris will be contained and how nearby cabinets, doors, and fixtures will be protected. If staining, a musty odor, or a history of leaks appears, pause before installation and ask what investigation or repair is recommended. Hidden conditions may change the scope, so request an explanation and approval before extra work proceeds.
Substrate compatibility depends on the location and the complete product system. University of Michigan design guidance describes cementitious backer units as backing and underlayment materials suitable for wet or dry locations and for floor, wall, and ceiling applications. The same guidance recommends considering intended use, durability, cleanability, application, and slip resistance where water is present. It also notes that crack-isolation membranes may be appropriate for certain existing slab cracks, subject to the manufacturer’s recommendations. Read the guidance in the University of Michigan tile design document, then let the installer confirm the right assembly for the actual room.
- What substrate will remain after demolition, and is it sound?
- How will movement, unevenness, cracks, and residue be addressed?
- Are the tile, setting materials, underlayment, and intended application compatible?
- What changes if concealed damage is found?

How should you choose tile, trim, grout, and quantities?
Choose materials as a coordinated group, not as isolated samples. A tile that looks appealing on a display board still needs to suit the surface, cleaning demands, foot traffic, and visual scale of your bathroom. For floors, discuss slip resistance where water is present, along with durability and cleanability. For walls, consider how the format will work around outlets, niches, vanities, and corners. The University of Michigan design guidance recommends evaluating intended use, long-term performance, cleanability, and application when selecting tile.
Format affects both appearance and installation planning. Larger tile can reduce the number of grout joints, but it may create difficult cuts around tight spaces or make transitions less forgiving. Smaller tile can help resolve narrow areas and detailed borders. Before approving a pattern, ask to see how the chosen size will land at the room edges, behind the vanity, and at the doorway. Your San Diego Design Center visit can help you compare full-size samples, textures, colors, and coordinating materials in person.
Check trim, grout, and setting materials together
Trim availability should be confirmed before the main tile is selected. A matching bullnose, pencil liner, edge profile, or other finished-edge piece may affect the tile family you choose. University of Arizona specifications specifically recommend verifying that matching trim units are available for floor and wall tile. Also confirm that the grout, mortar, adhesive, and sealant are appropriate for the installation method and selected surfaces. These are product-compatibility decisions for the installer and manufacturer, not assumptions to make from color alone.
Bring home or review physical samples in the bathroom’s actual lighting. Compare the tile at different times of day, and check shade variation across multiple cartons before installation. Record the tile name, size, finish, lot or shade information, grout color, trim, and approved layout. A short material schedule prevents substitutions from being treated as minor changes. For planning the broader scope, review the factors discussed in this guide to bathroom tile renovation costs, without treating any figure as a standard price.
Calculate quantities with room for real cuts
Measure each surface separately, then account for doors, windows, cabinets, and other areas that will not receive tile. Add a cutting allowance rather than ordering only the exact measured square footage. A cutting allowance may be appropriate, but the right amount depends on room shape, tile format, pattern, and the installer-approved layout. Replace any damaged or unusable pieces from the same shade lot when possible. Order enough matching trim, grout, and setting materials for the complete scope, and keep the approved material schedule with your project records.
Bring your tile selections and room questions to King Remodeling.
How should bathroom tile installation coordinate layout, cuts, and transitions?
A room-wide layout should be reviewed before tile is set, not improvised one surface at a time. Map the bathroom floor, tiled walls, vanity backsplash, doorways, fixtures, and any areas where tile stops beside another finish. The goal is not to force every grout line to align, but to make the visible relationships feel intentional.
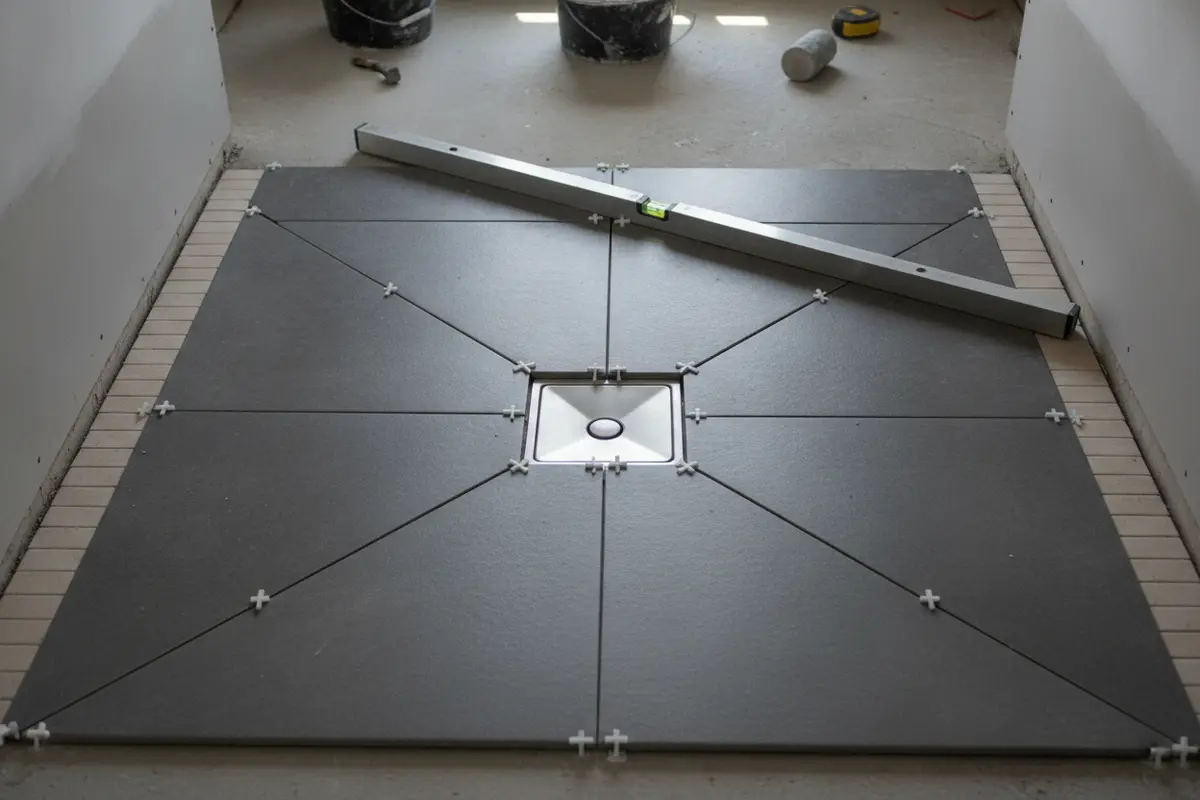
Begin by identifying the room’s most visible sightlines. From the doorway, consider how floor joints meet the vanity, tub, and adjacent flooring. On a wall, a center reference line can help balance the field, but it may need adjustment if the planned cuts would leave narrow slivers. A practical layout often shifts the starting point so both sides receive more usable cuts rather than leaving one highly visible edge with a small strip.
Use measured drawings or a dry layout to test tile size, pattern direction, and fixture locations. Include the height of the vanity backsplash and decide whether its joints should relate to the countertop, cabinet lines, or nearby wall tile. For more detail on that focused area, review this vanity backsplash installation guide.
Transitions also need a written decision. Tile and backer materials can raise the finished floor enough to affect door clearance, so check the doorway before ordering materials. Plan how tile will meet wood, vinyl, carpet, or another floor covering, including any change in height. At exposed corners and tile stops, specify an edge profile or another finished-edge detail rather than leaving the cut edge visible.
University of Arizona tile specifications identify floor and wall layouts, perimeter conditions, interfaces with dissimilar materials, trim, joints, and thresholds as items to detail in the drawings. They also call for coordinating expansion joints with building details. Use that neutral tile specification reference as a reminder to discuss the complete room, including the less obvious edges and transitions, with your installer before work begins.
What should a tile installation proposal and trade handoff include?
A useful proposal turns a broad bathroom tile installation idea into a shared plan. It should identify every tiled surface, including bathroom floors, walls, backsplashes, thresholds, base details, and trim. If an area is excluded, the document should say so clearly. This prevents assumptions from appearing later as scope gaps.
Define the work and material responsibilities
The scope should describe demolition, disposal, surface preparation, tile setting, grouting, sealing where applicable, edge treatment, protection, and final cleanup. It should also identify who is responsible for ordering tile, trim, grout, setting materials, and other finish products. Confirm whether materials are supplied by the contractor, selected through the design center, or purchased by the homeowner.
Record each selection by product name, size, color, finish, quantity, and approved sample when possible. Include allowances for cuts, breakage, attic stock, and future repairs based on the installer or supplier’s recommendations. Selection deadlines matter because a missing trim profile or delayed material can affect the work sequence. A written record is more reliable than a showroom conversation or an assumption based on a product photograph.
Coordinate the tile work with other trades
The handoff should show how tile work fits with demolition, plumbing, electrical, cabinetry, vanity installation, painting, and accessory installation. Note which fixtures, outlets, valves, lighting components, and cabinetry must be positioned before tile layout is finalized. Confirm who measures and approves openings, penetrations, finished heights, and clearances. This is especially important where a floor transition meets another material or where a backsplash meets a countertop and wall accessories.
Also document site access, room protection, dust control, storage, homeowner responsibilities, and cleanup expectations. A clear remodeling process helps everyone understand when design decisions become construction decisions. Before work begins, ask how changed selections, concealed conditions, damaged materials, or requested layout revisions will be priced and approved. Change handling should be written, not settled casually in the middle of installation.
Finally, keep the signed scope, selection records, product instructions, change approvals, and care information together. That file gives the homeowner and trades a common reference from the first consultation through the final review.
What should homeowners review after tile installation?
A final walkthrough should cover the entire tiled room, not just the most visible wall. Review the floor, wall surfaces, backsplash, trim, doorways, and transitions together so small issues are identified before the room is put back into regular use. This is also the right time to compare the finished work with the approved selections and the written scope.
Check joints, edges, and transitions
Look closely at grout joints for visible voids, cracks, excess grout, or mortar. The University of Arizona tile specification describes finished joints as free of these conditions, which gives homeowners a useful quality-control reference. Ask the installer to review any questionable area rather than assuming it will disappear with cleaning. Examine exposed tile edges, corners, thresholds, and transition profiles as well. At a doorway or floor-height change, confirm that the transition is secure, aligned, and appropriate for the adjacent finish.
Also check the relationship between the floor tile, wall tile, vanity backsplash, base trim, and door casing. The room should feel coordinated from multiple viewpoints, with clean terminations and no unfinished slivers that were not part of the agreed layout.
Confirm cleanup, protection, and care instructions
Confirm that excess grout, adhesive, and construction residue have been removed without damaging the tile or finish. Finished tile should remain protected until the installation is accepted, especially if other trades still need access. Before anyone resumes normal use, ask which areas need additional time and follow the adhesive, grout, and sealant manufacturer’s instructions. Do not rely on a universal cure-time promise; product requirements and site conditions can differ. The adhesive packaging should control when grouting is appropriate, so review the product instructions before approving the next step.
Keep a practical homeowner record
Request the final product names, colors, grout and sealant details, care instructions, and any leftover material. Keep photos of completed transitions and concealed product information with your remodeling documents. If the broader project schedule affects when fixtures, cabinetry, or other trades return, use the bathroom remodel timeline as planning context, not as a guaranteed completion date. Before signing off, ask: What remains open? Which surfaces need special cleaning products? Who should be contacted if a joint, edge, or transition changes after acceptance?
Request a whole-bathroom tile installation consultation with King Remodeling.
Frequently Asked Questions
Can the same tile continue across the bathroom floor and walls?
It can, but the plan should account for each surface’s use, layout, edge conditions, and trim. Confirm the tile is appropriate for the intended application, then coordinate grout, transitions, perimeter details, and any backsplash or wainscot limit before ordering. The University of Arizona tile specifications recommend documenting floor and wall layouts, tile sizes, trim, joints, and interfaces with adjoining materials in the drawings: review the planning reference.
How much extra tile should I order for cuts and future repairs?
Start with measured quantities for each surface rather than one room-wide total, then add an allowance for cuts, layout adjustments, and attic stock. The cutting allowance depends on room geometry, tile format, pattern, and batch availability, so ask the installer to calculate it from the approved layout. Ask the installer to separate the base quantity, waste allowance, trim, and reserved material in the proposal.
How should floor transitions and doorways be planned?
Review the finished floor height where tile meets flooring in adjacent rooms, at the doorway, and around the vanity or other fixed elements. Tile and backer materials can raise the finished floor enough to affect door clearance. Specify the transition profile, exposed edges, thresholds, and any door adjustments before installation begins.
What should a bathroom tile installation proposal include?
The proposal should identify every tiled surface, tile and trim selections, grout and setting materials, quantities and allowances, layout direction, transitions, substrate preparation, demolition assumptions, and cleanup. It should also state who coordinates plumbing, electrical, vanity, and other trade work, how material delivery is handled, and how changes are approved. Clear scope lets you compare proposals based on included work rather than a single vague installation line.
Ready to plan your whole-bathroom tile installation?
A room-wide plan can help you coordinate floor and wall materials, transitions, and trade details before work begins. If you are planning a bathroom remodel in San Diego County, contact King Remodeling to discuss the right next step for your space.