A heated bathroom floors remodel is not just a comfort upgrade. The heating system, tile, waterproofing, floor height, electrical work, and remodel schedule all need to work together. Planning those details before installation helps avoid awkward transitions, misplaced controls, or a floor that must be opened again.
Explore bathroom remodeling options
What does a heated bathroom floor add to a remodel?
Radiant floor heating warms the floor surface, which can make tile feel more comfortable underfoot on a cool morning. It can also provide gentle warmth in the room. It does not replace the need to plan the bathroom’s ventilation, insulation, or primary heating needs. The benefit depends on the room, the system, and how the controls are used.
For many homeowners, the decision is about daily comfort rather than a promise of lower energy use or a particular resale return. A small floor area may be enough to warm the space where people stand, while a larger heated area may provide a different experience. The layout, floor finish, and placement of fixed items affect how much usable floor can receive heat.
Consider heated flooring while making broader bathroom flooring choices, not after the tile has already been selected and ordered. The material and installation details influence what heating products can be used and how the finished assembly is built.
Which heating system should you consider?
Residential bathroom floor heating commonly uses electric resistance elements or a hydronic system that circulates warm water through tubing. Electric systems are often considered for a single bathroom or a limited floor area. Hydronic systems may be considered where a home already has a compatible water-based heating setup or where a broader project justifies the additional planning. Neither option is automatically right for every home.
Product designs vary. Electric options may use a mat, mesh, or loose cable. A mat can be convenient in a relatively regular open area; loose cable may offer more flexibility around an irregular layout, subject to the system manufacturer’s rules. Hydronic tubing requires a planned route, compatible heat source, and suitable floor assembly. Ask the designer or installer to explain why the proposed system fits your room rather than choosing on a product name alone.
| Planning factor | Electric system | Hydronic system |
|---|---|---|
| Common project fit | A bathroom or defined floor zone where a dedicated system is being considered | A project where a compatible water-based heating system and wider design plan are available |
| Heating element | Electric mat, mesh, or cable installed according to product instructions | Water-carrying tubing integrated into a designed floor assembly |
| Key coordination | Electrical capacity, thermostat location, sensor placement, and floor layers | Heat source, tubing layout, controls, floor build-up, and servicing access |
| Layout questions | Which open areas can be heated, and where must elements stop? | How will tubing route through the space and connect to the heating system? |
| Useful next step | Confirm product compatibility and electrical scope with qualified professionals | Have the heating designer and remodel team coordinate the system before flooring work |
This comparison is a starting point, not a substitute for a site-specific design. The existing home, electrical or mechanical systems, room layout, and chosen product affect feasibility. Ask for the complete system and installation scope in writing, including what is and is not included.
How do tile, waterproofing, and floor height affect the plan?
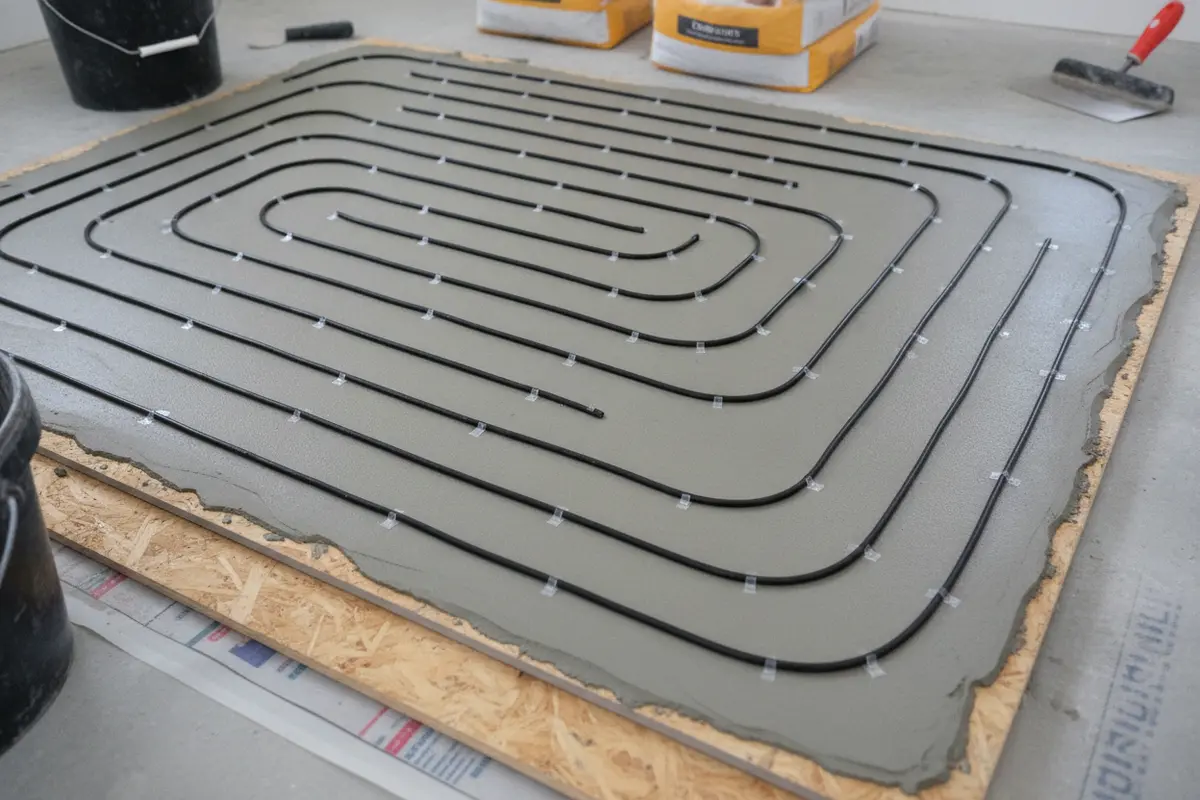
The floor is a layered assembly. Depending on the system, it may include the subfloor, preparation or leveling materials, the heating element, a compatible setting or encapsulation layer, waterproofing where specified, tile adhesive, and tile. The exact order and products must follow the heating-system instructions and the bathroom waterproofing design. Different products are not automatically compatible simply because each is intended for a bathroom.
Tile and stone are common finishes considered with radiant heat because the floor assembly can transfer warmth to the walking surface. Still, confirm that the specific finish, setting materials, and heating product are approved for use together. Ask about any limits on tile size, installation method, temperature settings, or curing time. Do not assume a product can be placed anywhere or covered by any material.
Waterproofing deserves particular attention in a bathroom. A heated floor does not make the floor waterproof, and a waterproofing layer does not by itself confirm that the heating system is installed correctly. The plan should make clear how wet areas are protected, how the heating assembly fits into the specified layers, and how transitions are handled. For tile work, review the project’s tile scope and details alongside a dedicated bathroom tile installation guide.
Floor height is another practical issue. Added layers can raise the finished surface and affect the doorway, toilet connection, vanity, nearby flooring, and transitions to a shower or adjoining room. Even a modest change can be noticeable where a door swings or where two floor surfaces meet. Before work begins, ask for the proposed finished-floor height and how the transitions will be resolved.
Where can the heating elements go?
Heating elements need a deliberate layout. They are generally placed in suitable open floor areas, not casually run beneath every fixture or obstacle. The specific product instructions determine required clearances and prohibited locations. A drawing should show the planned heated zones and identify fixed items such as a vanity, toilet, built-in storage, and shower area.
Think about where people stand and walk. Heating a useful strip beside the vanity may matter more than heating a rarely used corner. If the bathroom has a separate toilet area, decide whether it is in scope. A layout that ignores furniture dimensions can leave the warmest area under cabinetry or create an awkward unheated patch in the main walking path.
Mark permanent fixtures and likely future changes before the heating plan is approved. The owner should know where heating elements are installed so later drilling, anchoring, or fixture changes do not damage them. Keep the final layout and product information with the home’s remodeling records.
What should you know about thermostats and sensors?
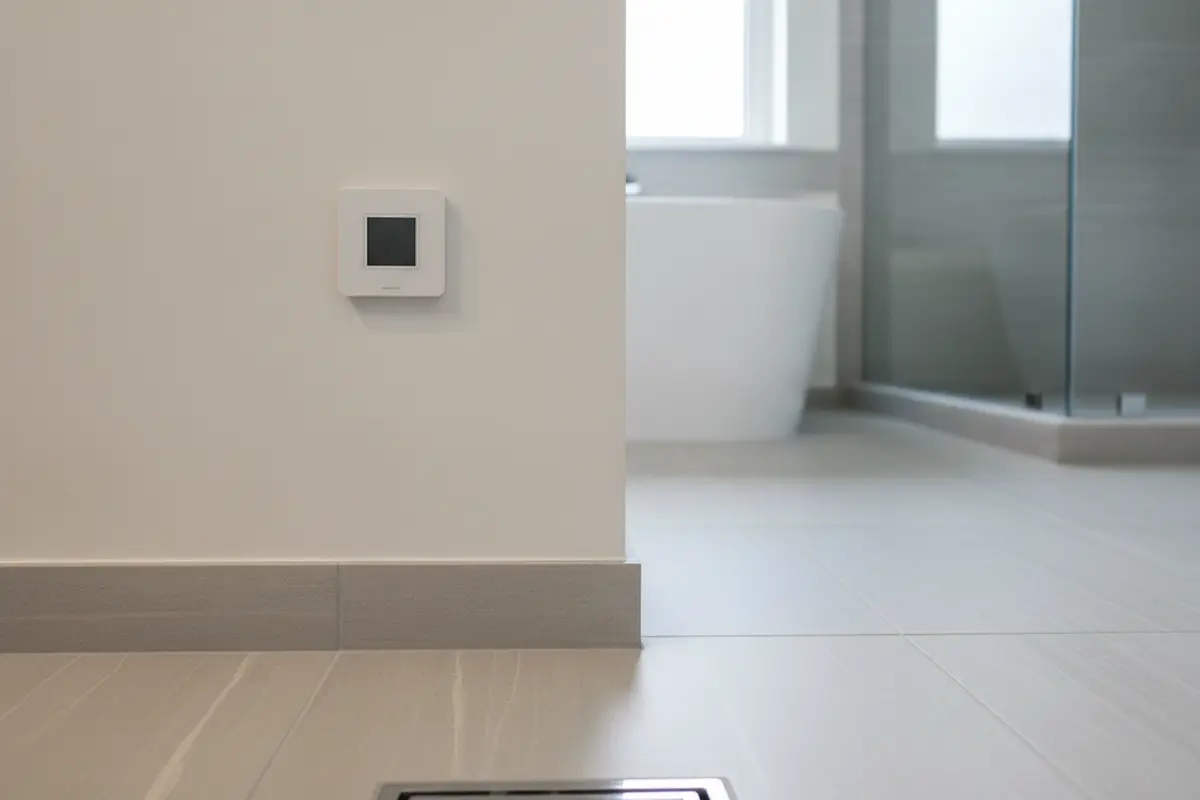
A thermostat lets the homeowner control the system, but its location and setup are part of the design. Choose a practical wall location that is accessible, easy to understand, and coordinated with switches and the bathroom layout. The sensor arrangement must match the selected product’s instructions and intended control method.
Ask whether the system uses a floor sensor, an air sensor, or a combination, and what each one controls. The floor sensor’s placement matters because it measures conditions at a particular point rather than across the entire room. Have the installer explain any temperature limits, scheduling features, and settings that should be used with the selected floor finish.
Think about how you actually use the room. A timed schedule may suit a predictable morning routine, while a simple manual control may be easier for occasional use. Do not assume a thermostat is included with the heating material or that every control is compatible. Confirm the model, installation responsibility, and final handoff instructions before the work is approved.
When should heated flooring be installed during a bathroom remodel?
Heating should be coordinated before the finished floor is installed. This usually means making the system decision during design and material selection, then confirming electrical or mechanical requirements before the relevant work is covered. It is not a late-stage accessory to add after tile has been laid.
- Measure and plan the room. Record the floor area, door swing, fixed fixtures, shower boundaries, and intended heated zones.
- Select compatible materials. Coordinate the heating product, tile or other finish, setting materials, waterproofing approach, and floor preparation.
- Confirm building-system needs. Have the appropriate professional review electrical capacity or the hydronic connection, controls, and any required project approvals.
- Prepare the substrate. Address the condition and flatness of the floor as specified for the chosen system and finish.
- Install and check the system. Follow the product instructions and project plan. Required checks should be completed and documented before the assembly is covered.
- Complete the floor layers. Install the specified protection, setting materials, and finish in the approved sequence, observing product requirements for curing and operation.
- Test and hand over. Confirm the control works as intended, record product details and layout, and explain initial operation to the homeowner.
The exact sequence depends on the selected system and waterproofing design. For example, do not infer that every heating mat belongs above or below a particular membrane; system details differ. The responsible trades should resolve that sequence before the work begins, not improvise it during installation.
A coordinated project plan can also prevent avoidable conflicts with other bathroom work. Review the remodel sequence in advance and consider the broader guide to planning a bathroom remodel when setting priorities, selections, and timing.
What questions should you ask before approving the work?
A clear proposal should address both the heating system and the complete finished floor. Ask questions that reveal who is responsible for each part and how the work will be checked.
- Which heating system and product are proposed, and why does it suit this room?
- What exact floor area will be heated, and can I review the layout before installation?
- Which areas must remain free of heating elements under the manufacturer’s instructions?
- How do the proposed tile, setting materials, waterproofing, and heating layers work together?
- How much will the finished floor rise, and how will doorways and adjoining surfaces transition?
- Who is responsible for electrical work or connections to a hydronic system?
- What inspections, measurements, or tests will be completed before the floor is covered?
- Where will the thermostat be located, and what sensor and control method will be used?
- What product documents, warranty terms, and layout records will I receive?
- How long must materials cure before the system can be switched on, and what startup settings apply?
If you are comparing remodeling proposals, compare the scope line by line. One proposal may include floor preparation and controls while another lists only the heating product. Clarify exclusions, responsibilities, and the finished-floor assumptions before comparing totals. A written scope is more useful than a general statement that the floor will be heated.
What can affect the project scope?
There is no reliable one-size-fits-all price for a heated bathroom floor. The scope depends on the floor area, system type, condition of the existing substrate, selected finish, electrical or mechanical requirements, and the amount of work needed to coordinate the layers. Removing old flooring, correcting unevenness, changing fixtures, or addressing concealed conditions can also change the work.
Ask for a site-specific proposal instead of relying on a product-only price. The proposal should say whether it includes design or layout, material, installation, electrical or hydronic work, preparation, waterproofing coordination, tile installation, controls, testing, and documentation. If a cost is outside the scope, identify who will provide it and when that decision must be made.
When evaluating a whole-room remodel, consider how the heated floor fits with the other planned updates rather than treating it as an isolated line item. The project can be discussed alongside the wider bathroom remodeling scope, and relevant remodeling project examples can help you think through finish combinations and room priorities.
How can you choose the right team for the project?
Floor heating crosses trade boundaries. The remodeling team, flooring installer, electrician or heating professional, and waterproofing installer need to understand the same plan. Ask who coordinates the sequence and who is accountable for confirming that the parts are compatible before they are concealed.
Check that the contractor and trade professionals are qualified for the work they will perform. California homeowners can use the California Contractors State License Board as a starting point to review contractor licensing information. Confirm the specific license and scope that apply to the proposed project, and ask for written documentation and clear responsibilities.
Look for a team that can explain the system without rushing past the details. They should be able to show the heating layout, name the products, describe floor layers, explain the testing plan, and answer what happens if a condition is discovered beneath the existing floor. If an answer depends on a manufacturer instruction, request the relevant product documentation.
King Remodeling describes its work as an integrated design-build process with design, materials, and construction coordinated under one roof. Homeowners can review the remodeling process and discuss how flooring decisions fit into the larger project. A visit to the San Diego kitchen and bath showroom can also help with material selections; confirm product-specific compatibility with the installation team.
How should you prepare for a planning conversation?
A short preparation checklist can make the first design discussion more useful. Gather a few photos of the existing bathroom, note where the floor feels coldest, and make a list of the surfaces you expect to change. Measure the room approximately if it is easy to do, but let the project team verify dimensions before anyone orders materials. Sketch the door swing and permanent fixtures so the conversation starts with how the room is used.
Write down what matters most: warm flooring at the vanity, a consistent floor finish, simple controls, or minimizing changes to the adjacent hallway. Priorities help the team compare options when the layout or budget requires trade-offs. Also note any timing constraints, such as when the bathroom needs to be available, because floor preparation, installation, and curing can affect the sequence.
Ask to see the heating area on a floor plan and the proposed floor layers in cross-section or clear written detail. A plan view answers where the system will go; the assembly detail helps everyone discuss the order of substrate preparation, heating, waterproofing, and finish. Request the product names early enough to review their instructions before work starts.
Before signing off on selections, confirm who will coordinate the trades and who will provide the system checks, controls, and homeowner instructions. Keep the approved layout with the project documents. These simple records are useful if you later need to locate a heating element, replace a control, or change a fixture. The kitchen remodel planning checklist illustrates the value of settling key selections and project questions before construction, even though the room-specific details differ.
Call to discuss your bathroom remodel
Frequently Asked Questions
Can heated flooring go under every bathroom floor finish?
No single answer applies to every system or finish. Check the heating product documentation and confirm that the floor material, adhesives, underlayment, and installation method are approved for use together. Tile and stone are often considered, but the specific products and assembly still matter.
Does a heated floor replace bathroom heating?
Not necessarily. A floor system warms the floor and may contribute warmth to the room, but whether it can serve as a room’s primary heat source depends on the room and system design. Discuss the home’s heating needs with a qualified professional rather than assuming the floor alone will be sufficient.
Should I install floor heating in a shower?
Do not assume that a standard floor-heating product is suitable for a shower or any wet-area installation. Product approvals and the waterproofing assembly determine whether a specific location is permitted. Have the designer and installer identify the allowed heated zones and show them on the plan.
Can I add heated flooring after a bathroom remodel is complete?
Adding it later can require removing the finished floor and rebuilding part of the assembly, so it is usually easier to evaluate during remodeling. Whether a retrofit is practical depends on the existing floor, access, system, and electrical or mechanical conditions. Ask for a feasibility review before deciding.
When can I turn the system on after tile installation?
Follow the instructions for the heating system, tile materials, and setting products. Some materials require a cure period before operation, and the correct first-use settings can vary. Get the startup timing and directions in writing from the installer.
Make the heating decision before the floor is closed in
The best time to plan heated bathroom floors is while the room layout, finish materials, and construction sequence are still being decided. Confirm the heated zones, product compatibility, waterproofing details, electrical or hydronic scope, floor height, and testing responsibilities in writing. With those decisions aligned before installation, you can assess the comfort upgrade as part of a complete bathroom remodel rather than a last-minute add-on.
Careful coordination makes it easier to know what will be installed, how the work fits together, and what information to keep for future maintenance.