A floor that looks simple once it is finished depends on careful decisions made before the first plank is laid. In a San Diego home, the room, subfloor, and selected product all affect how the work should be planned. So a reliable installation starts with inspection rather than guesswork. This guide walks through the decisions that matter before, during, and after the planks are laid.
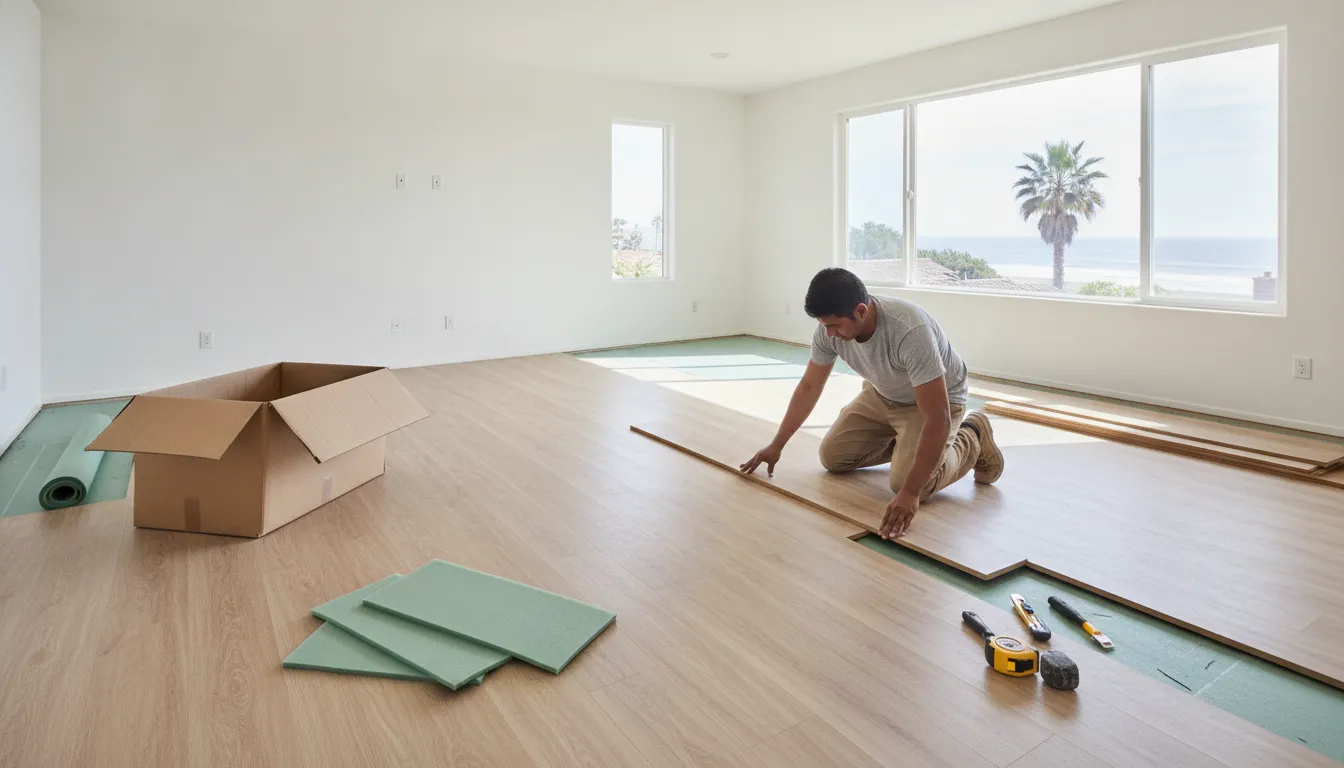
Laminate flooring installation typically involves checking the room and subfloor, then preparing a clean, suitable base. Next, follow the product’s instructions for site conditions and plan the layout. Fit the planks, then check the edges, joints, and transitions. Details such as acclimation, moisture protection, and movement clearance vary by product. The manufacturer’s instructions should guide the job.
That sequence helps homeowners understand what to expect and where small oversights can become visible later. The first step is to look at the full project from inspection through final checks, with each stage informing the next.
Ask King Remodeling about your flooring project.
What Does Laminate Flooring Installation Involve from Start to Finish?
These steps help keep the project organized from the first site check through the finished room:
- Review the selected flooring. Read its installation instructions, including rules for the room and subfloor.
- Prepare the work area. Remove old flooring if needed, and prepare the base to the product’s requirements.
- Plan the layout. Measure the room, map cuts and doorways, and select compatible transitions.
- Fit and inspect. Connect the planks as directed, finish the edges, then check the joints and transitions.
A successful laminate flooring installation is a sequence of decisions and checks, not simply a matter of clicking planks together. The installer first confirms the product, room conditions, and scope of work, then prepares the surface, plans the layout, fits the flooring, and finishes the edges and transitions. The exact requirements depend on the selected product and the home, so the manufacturer’s instructions should guide the work rather than a one-size-fits-all checklist.
Before work begins, the project team confirms which rooms are included, whether existing flooring needs removal, and how the new floor will meet doorways or adjacent surfaces. King Remodeling notes that flooring projects can include old-floor removal and preparation work. Homeowners planning a broader update can review the company’s flooring installation services to understand the scope it handles.
From there, the general sequence usually looks like this:
- Review the product instructions. Confirm the requirements for the particular flooring and substrate, including any product-specific directions that affect preparation or installation. Manufacturer guides differ, so the selected product’s instructions are the relevant reference. See, for example, Evoke’s laminate installation instructions.
- Prepare the room and surface. Clear the work area and address removal or surface preparation identified for the project. Subfloor condition, moisture considerations, and other requirements should be evaluated for the actual site and product, not assumed in advance.
- Plan the floor layout. Establish how planks will run through the space, where cuts will fall, and how the floor will meet doorways, trim, and neighboring flooring. This planning helps avoid awkward end pieces and incomplete transitions.
- Fit and connect the planks. Install the flooring according to its specified locking system and sequence, making careful cuts around room features. Product instructions determine details such as clearances and any required underlayment.
- Finish and inspect. Install appropriate trim and transitions, then check the visible joints, edges, and connections between spaces. Clean the area and follow the care guidance supplied for the flooring.
Who may benefit from a professional installation?
- DIY may suit a simple room. The surface is ready, the layout is straightforward, and the installer can follow the specific product guide.
- Ask a flooring professional when conditions are complex. An uneven or damaged base, uncertain moisture, several transitions, or fixed cabinetry can call for closer assessment.
As a final review, homeowners can walk through the completed rooms with the installer. Look for gaps or unfinished edges, and ask how to protect and clean the new surface. A clear handoff makes it easier to care for the floor as intended.
How Should You Prepare the Subfloor and Room?
A smooth-looking laminate floor starts with the surface beneath it. Before installation, inspect the subfloor for loose areas, movement, debris, old adhesive, protruding fasteners, and visible signs of moisture. The surface should be sound, clean, dry, and sufficiently flat for the selected flooring system. If boards flex, concrete is damaged, or the surface has ridges and dips, address those conditions rather than expecting the laminate to hide them.
Preparation depends partly on what is already in the room. Existing flooring may need to come out, or it may be acceptable to install over it only if the product instructions allow it and the surface is suitable. Removal can reveal repairs that were not visible before. King Remodeling notes that flooring projects may include removal of old flooring and preparation work. So include those steps in the plan rather than treating them as last-minute details.
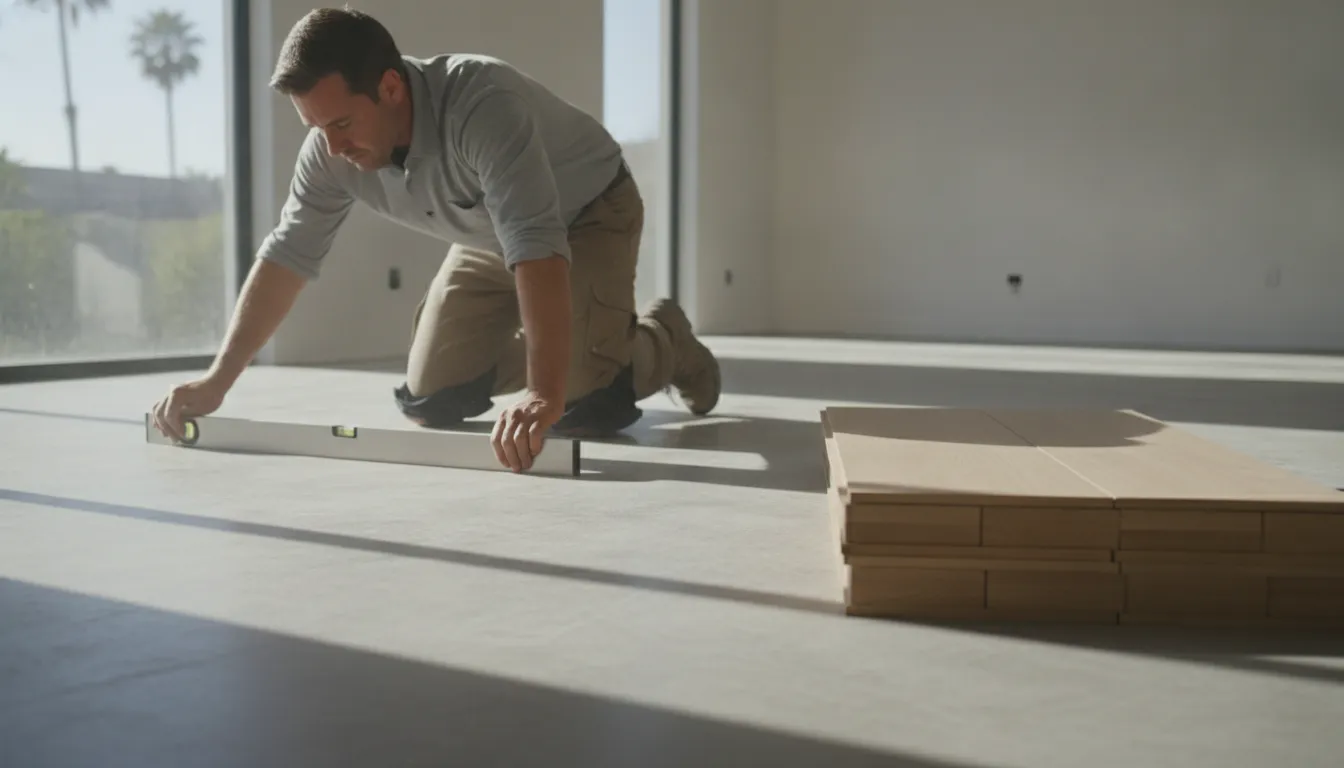
Wood and concrete substrates can have different preparation requirements. Check the installation guide for the exact laminate product, including instructions about underlayment, vapor-control layers, acceptable existing surfaces, and the condition of the subfloor. For example, Evoke’s laminate installation instructions and another manufacturer’s installation guide are product-specific references, not universal specifications. Follow the guide for the flooring you have selected, including its stated limits for flatness and moisture, rather than applying a number from a different product.
Prepare the room itself before work begins. Clear furniture and loose items, plan how the room will be accessed, and check doorways, floor vents, built-in cabinets, and other fixed elements that meet the floor. Note whether doors may need clearance adjustments and how existing trim can be removed and reinstalled or replaced. These details help prevent rushed cuts and awkward finish work.
Finally, keep the room and subfloor clean during installation. Grit or scraps under a floating floor can interfere with a close fit, while unresolved dampness can put the finished floor at risk. Pause if the inspection reveals an active leak, persistent dampness, or a substrate that cannot be prepared to the selected product’s requirements. Resolve the cause and confirm the surface is ready before laying the first plank.
How Long Should Laminate Flooring Acclimate Before Installation?
There is no single acclimation period that applies to every laminate floor. The required time depends on the specific product and the conditions at the job site. So follow the installation instructions for the flooring you selected rather than relying on a general rule or another brand’s recommendation.
Before scheduling installation, read the product manual and check its guidance for acclimation, carton handling, room conditions, and subfloor readiness. Manufacturer instructions can differ. For example, Evoke’s laminate instructions and a separate laminate installation guide are product-specific references, not interchangeable directions for every floor.
Use the product’s directions for carton handling
Do not assume cartons should be opened, left sealed, stacked, or positioned a particular way unless the selected product’s manual says so. If it calls for cartons to rest in the installation room, follow its instructions for placement and duration. Also check whether the guidance applies to the room’s expected conditions before, during, and after installation. The goal is to prepare the material as its manufacturer specifies, not to apply a customary waiting period that may not fit the product.
Check the room and subfloor before laying planks
Acclimation is only one part of readiness. Confirm that the installation area meets the manual’s requirements and that the subfloor is suitable for that flooring system. Requirements may vary with the product and substrate, including the conditions the manufacturer expects before work begins. If the site is still undergoing work or the room conditions are outside the manual’s stated range. Ask the manufacturer or a qualified flooring professional whether installation should wait.
Keep the product instructions available during the work. They govern the acclimation procedure and other product-specific details, including any stated temperature or humidity limits. If the directions are unclear, get clarification before changing carton handling or proceeding. This avoids treating advice for one laminate line as a promise that another product will respond the same way.
In short, check the manual first, prepare the room and subfloor to its requirements. Handle cartons exactly as directed, and begin only when the product’s stated conditions are met. That sequence is more reliable than choosing a universal number of hours or days.
How Do You Plan the Layout, Cuts, and Transitions?
A clean installation starts with a plan for how the rows will meet the room, not with the first plank. Check the room’s shape, doorway locations, fixed cabinets, and the direction you want the boards to run. Then measure and map the layout before cutting. This helps reveal awkward narrow pieces at walls or doorways while there is still time to adjust the starting position.
Choose a straight starting line using the room as a reference, but do not assume its walls are perfectly square. A small variation can become more visible as the rows extend across the floor. Plan the first and last rows together so the layout looks balanced, and account for the clearance required around the perimeter. That space allows the floating floor to move; the exact amount and the way it is covered depend on the flooring manufacturer’s instructions. Evoke’s laminate installation instructions are one example of product-specific guidance, not a universal specification.
Plan the end joints as well as the row direction. Avoid lining up short-end joints in neighboring rows or creating a repeated stair-step pattern. Follow the selected product’s instructions for minimum offset and joint placement, since locking systems and plank formats can differ. A dry layout can help you see the pattern before committing to cuts. Keep the installation sequence and stagger pattern consistent as you work.
Measure cuts carefully at walls, corners, and door casings, and account for any trim that will cover the edge. Doorways deserve particular attention: decide where the flooring will stop, how the edge will be finished, and whether the adjoining surface is at a different height. Select a transition profile that suits the doorway and flooring change, then confirm it is compatible with the product. Transitions connect flooring between rooms or between different surfaces, while trim conceals edges and required movement space. Do not fasten trim in a way that pins a floating floor; follow the product’s installation details.
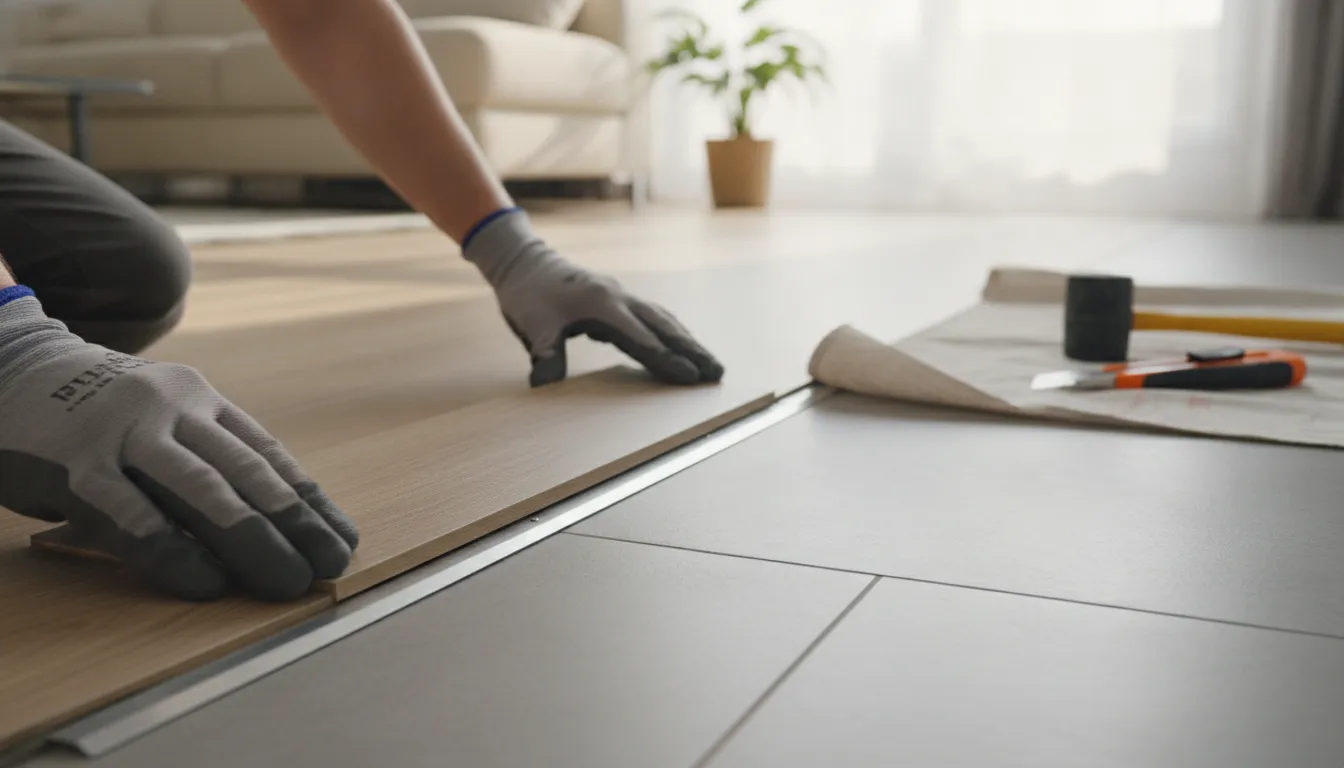
Taking time to plan these details helps the finished floor look continuous from room to room and leaves the edges properly finished.
Discuss your flooring installation plans with King Remodeling.
What Moisture Issues Should San Diego Homeowners Check?
Moisture deserves attention before laminate planks go down, especially when the installation will cover a concrete slab or sit near a kitchen, bathroom, laundry area, or entry. Check for both moisture coming from below and water that can reach the surface during everyday use. A floor that looks dry on installation day may still need evaluation against the selected product’s requirements. San Diego homes vary by room, slab, and site history, so inspect the actual conditions rather than assuming a region-wide rule.
Check the slab and subfloor before covering them
Excess moisture in an underlying concrete slab is a recognized cause of flooring failure. When vapor becomes trapped beneath an impervious floor covering, it can condense and contribute to damage such as buckling or blistering. The National Institutes of Health’s facilities guidance explains these risks and advises that slab conditions meet the flooring manufacturer’s acceptable moisture levels before installation. The applicable test and acceptance criteria depend on the product and installation system, so do not rely on a generic threshold.
Ask what moisture assessment is appropriate for the actual substrate, and address leaks, dampness, or other known moisture sources before work proceeds. Underlayment and vapor-control requirements also vary. Follow the selected laminate manufacturer’s instructions for the specific subfloor rather than assuming that one layer or method suits every installation. The NIH technical bulletin on vapor pressure and flooring installation provides further background on slab moisture and flooring damage. Its site examples are not a substitute for the chosen product’s own acceptance criteria.
Match the product to the room’s water exposure
Moisture planning does not end at the subfloor. Water can reach floors through splashes around sinks and tubs, wet shoes, spills, cooking, laundry, and bathing. Laminate may tolerate some exposure, but that does not make every product waterproof. Excessive saturation, spills, or standing water can cause planks to swell or buckle. The Building America Solution Center recommends water-resistant hard-surface flooring in rooms likely to get wet. The EPA also recommends controlling moisture sources in homes to reduce the conditions that can lead to mold.
For each room, check the product’s stated water resistance, the manufacturer’s room-suitability guidance, and any required installation details. Do not assume that a label or appearance alone means a product is appropriate for every bathroom, laundry room, or entryway. Plan how routine splashes and tracked-in water will be managed, and follow the care instructions if moisture reaches the floor. Read the Building America Solution Center’s guidance on water-resistant flooring for context on wet-room exposure, and see the EPA’s practical moisture-control guidance for home moisture prevention.
King Remodeling’s flooring and material selection showroom is a place to review options with room conditions in mind. Confirm suitability from the manufacturer’s documentation before choosing a product or scheduling installation.
How Can You Check the Finished Floor and Care for It?
Before moving furniture back, walk the completed floor and look closely at how the planks meet and how the edges finish. Check that joints appear fully engaged, with no visible gaps, raised edges, or abrupt changes underfoot. Look along walls, door casings, and fixed features to confirm that trim covers the perimeter neatly without trapping the floating floor. At doorways and changes in flooring, make sure the transition pieces sit securely and create a clean passage.
Laminate products do not all use the same installation details. For example, manufacturer instructions can specify how locking joints connect, how the floor is allowed to move, and how trim and transitions are installed. Use the manual for the product actually selected, rather than applying a gap measurement or fastening method from another brand. The Evoke laminate installation instructions illustrate why product-specific requirements matter.
Movement clearance deserves particular attention. A floating floor needs to be installed as its manufacturer directs, including at the perimeter and around fixed objects. Check that trim or cabinetry has not pinned the planks in place and that transitions are fitted according to the product instructions. If an edge looks constrained or a joint is separating, ask the installer to review it before the room is put back into regular use.
After installation, remove leftover materials and dust using the cleanup methods approved for the selected flooring. For routine care, follow that product’s maintenance directions for cleaning tools, products, and moisture exposure. Do not assume that guidance for another laminate line applies. Keep the care instructions with your project records, and check them before using a new cleaner or changing your cleaning routine.
King Remodeling can coordinate flooring selection and installation support, helping homeowners consider the material and the work as parts of one project. Explore the company’s flooring services or see how its remodeling process is organized. For questions about a specific installation, a flooring professional can assess the product instructions, site conditions, and finish details together.
Connect with King Remodeling about your flooring plans.
Frequently Asked Questions
What is the correct order for installing laminate flooring?
Start by checking the room and subfloor, then address preparation and any product-specific moisture or underlayment requirements. Plan the layout and transitions before cutting and fitting the planks. Finish with the trim and a check of joints, edges, and clearances. The selected product’s installation instructions control details such as starting point, plank connection method, and perimeter space.
How long should laminate flooring sit before installation?
There is no single acclimation period that applies to every product. Check the exact installation guide for carton handling, room conditions, and timing, and follow it for the actual job site. For example, the Evoke laminate instructions are product-specific, so do not substitute their directions for another brand’s requirements.
Will I need underlayment for my new laminate floor?
It depends on the flooring and subfloor. Some products have attached underlayment, while others specify a separate layer or moisture-control material for particular conditions. Read the selected product’s instructions before buying or installing anything, and do not add layers unless the guide allows them. The manufacturer’s installation guide is the right place to confirm what that floor requires.
Do I need trim and transition pieces?
Trim can cover the required perimeter clearance, while transition pieces finish a doorway or join the floor to another surface. Their placement and fastening should suit the flooring system so the finished floor can move as intended. Check the selected product’s instructions and choose profiles that fit the adjoining surfaces; the proper pieces complete those edges while allowing movement.
Can I install laminate flooring myself?
A careful DIYer may be able to handle a straightforward room with a suitable subfloor, accurate measuring, clean cuts, and close attention to the product instructions. Consider professional help if the floor needs significant correction, moisture conditions are uncertain, or doorways and adjoining floors create complicated transitions. Preparation matters as much as fitting the planks.
Contact Us About Your Flooring Installation
Planning laminate flooring involves more than fitting planks; preparation, layout, transitions, and product instructions all shape the finished result. A conversation can help you connect those details with the needs of your San Diego County home and coordinate material selection with installation. Start a conversation with King Remodeling about flooring installation.