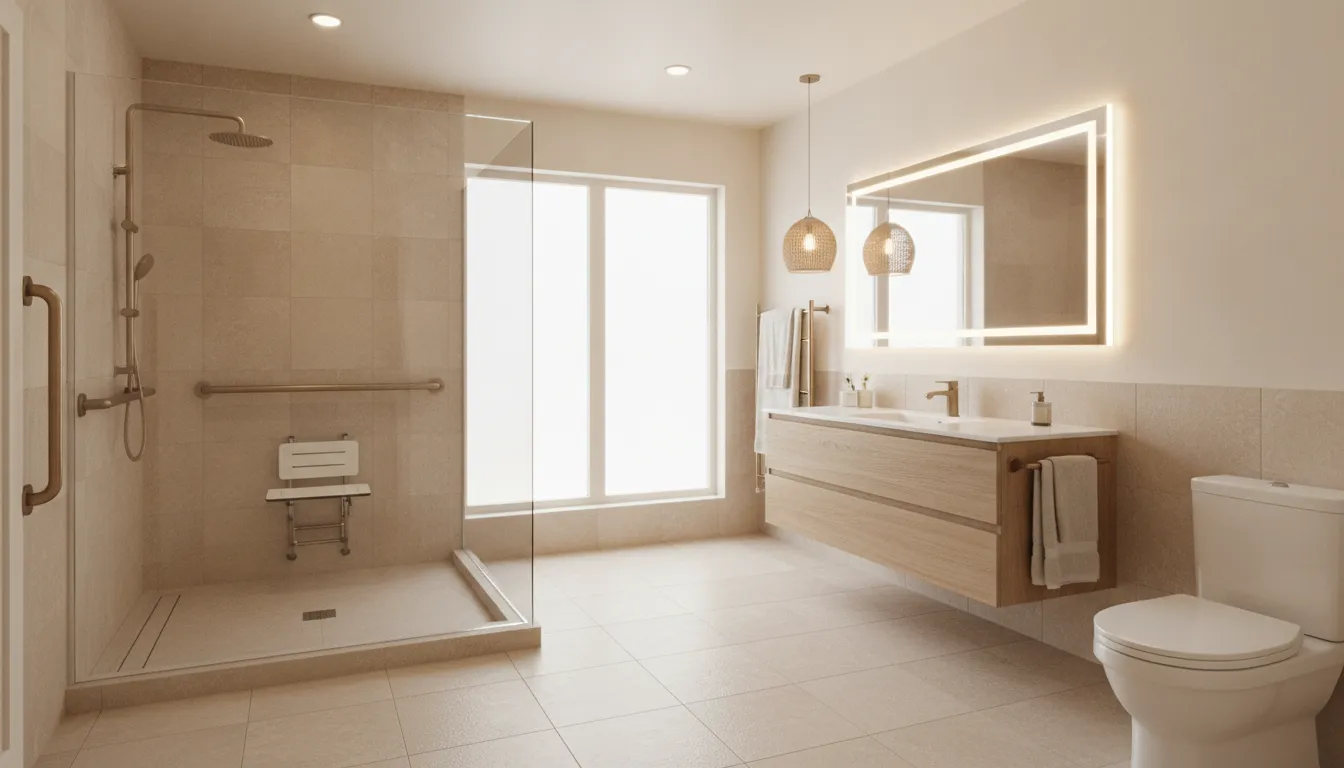
After completing over 1,500 bathroom renovations across San Diego, King Remodeling’s design team has learned that a small bathroom’s square footage does not determine how spacious it feels. The difference between a cramped bathroom and a comfortable one almost always comes down to layout. A well-planned floor plan can solve traffic flow issues, create storage where none existed, and make a 40-square-foot room feel twice its size. Below, we share the small bathroom layout ideas and design principles that consistently deliver the best results for our San Diego clients, whether they are working with a 4×6 half bath or a 6×8 full bathroom.
Planning a small bathroom remodel in San Diego? Get a free design consultation with King Remodeling’s team, or call us at (619) 281-0639 to discuss your project. For more inspiration, explore our small bathroom remodel ideas.
Key Takeaways
- Start with a Space-Saving Layout: Before choosing finishes, focus on a floor plan that consolidates plumbing to one wall and positions fixtures to maintain at least 15 inches of clearance on each side of the toilet and 21 inches in front of every fixture. King Remodeling’s designers use these clearance rules as the starting point for every small bathroom project.
- Use Light and Reflection to Visually Expand the Room: A light color scheme, a large mirror, and a frameless glass shower enclosure work together to bounce light and eliminate visual barriers. These three elements consistently produce the biggest perceived-space improvement in compact San Diego bathrooms.
- Build Storage Into the Architecture: Wall-mounted vanities, recessed medicine cabinets, and shower niches keep essentials organized without consuming floor or visual space. Built-in storage maintains the clean sightlines that make a small bathroom feel open.
Start with These Small Bathroom Design Principles
Before you start pinning your dream tile or picking out fixtures, let’s cover a few ground rules. The secret to a successful small bathroom isn’t just about choosing the right layout; it’s about understanding the core principles that make any compact space feel open, comfortable, and functional. Getting these fundamentals right from the start will ensure your finished bathroom is a space you love using every day, not just one that looks good in photos. Think of these as the foundation upon which all great small bathroom designs are built. They’ll guide your decisions and help you avoid common pitfalls that can make a small room feel even smaller.
Prioritize Function Over Form
A functional small bathroom layout prioritizes movement flow and fixture spacing over aesthetics. Every fixture should have at least 15 inches of side clearance and 21 inches of front clearance per San Diego building code requirements. King Remodeling’s design team recommends mapping your daily routine and testing the layout on paper before selecting any finishes.
| Fixture | Minimum Side Clearance | Minimum Front Clearance | Recommended |
|---|---|---|---|
| Toilet | 15″ each side | 21″ front | 18″ / 24″ |
| Vanity | 4″ from wall | 21″ front | 6″ / 30″ |
| Shower | 30″ opening | 24″ entry | 36″ / 30″ |
| Door swing | Clear of all fixtures | 30″ wide min | 32″ |
It’s easy to get swept up in beautiful aesthetics, but in a small bathroom, function has to come first. A successful layout is all about flow—how you move through the space without bumping into corners or squeezing past the toilet. Every single item, from the vanity to the towel hook, should have a clear purpose and be placed to make your daily routine easier. This means thinking through the practicalities: Can the shower door open without hitting the vanity? Is there enough elbow room at the sink? A thoughtful bathroom remodeling plan ensures the space works effortlessly for you, creating a foundation of usability that beautiful finishes can then enhance.
Plan for Proper Clearances
Proper bathroom clearances follow the 15-21-30 rule: 15 inches minimum on each side of the toilet, 21 inches of clear floor space in front of every fixture, and a 30-inch minimum doorway width. These measurements come from standard building codes that San Diego inspectors enforce during bathroom remodel permits. Getting clearances right first prevents costly mid-project changes.
Clearance is the unsung hero of good bathroom design. It’s the open space around your fixtures that allows you to move comfortably and safely. While building codes set minimums (and San Diego County building codes are particularly specific about bathroom clearances), aiming for a bit more can make a world of difference. As a general rule, try to leave at least two feet of space from side walls for your toilet and about two and a half feet of clear space in front of it. For your vanity, having at least three feet between it and the opposite wall prevents the room from feeling cramped. Planning these clearances is a key step in our process, as it ensures the final layout feels spacious and intuitive, not tight and awkward.
Think Vertically, Not Just Horizontally
Vertical storage multiplies usable space in small bathrooms without reducing floor area. Tall medicine cabinets, floating shelves above the toilet, and floor-to-ceiling tile create visual height that makes the room feel larger. King Remodeling installs recessed wall niches and over-toilet cabinetry in most small bathroom projects to maximize storage within the existing footprint.
When floor space is limited, the only way to go is up. Thinking vertically is a game-changer for storage in a small bathroom. Instead of bulky floor cabinets, look for opportunities to use your wall space. Tall, ceiling-height cabinets draw the eye upward, making the room feel taller while offering tons of storage. Built-in shelving niches in the shower or over the toilet keep essentials handy without taking up an inch of floor area. You can see great examples of this in our featured projects, where floating shelves and recessed medicine cabinets create a clean, organized look. This approach keeps your floor clear, which is essential for maintaining an open, uncluttered feel.
What Are the Most Space-Efficient Small Bathroom Layouts?
The most space-efficient small bathroom layouts are the single-wall configuration, the galley layout, and the corner layout. A single-wall layout places all plumbing on one wall to minimize pipe runs and maximize open floor space, making it ideal for bathrooms under 35 square feet. King Remodeling’s design team recommends the single-wall approach for most San Diego homes with compact bathrooms.
The foundation of any great small bathroom is a smart layout. It’s not just about fitting everything in; it’s about creating a space that feels intuitive, open, and easy to move around in. A well-planned layout can make even the most compact bathroom feel surprisingly roomy and functional. By thinking strategically about where to place your key fixtures—the sink, toilet, and shower—you can maximize every square inch. Let’s look at four of the most effective layouts our design team uses to transform cramped San Diego bathrooms into comfortable retreats.
The Galley Layout
Think of a galley layout like a ship’s kitchen—efficient, linear, and smart. This design works beautifully in long, narrow bathrooms by placing fixtures along two parallel walls with a clear walkway down the middle. Typically, we’ll place the vanity and toilet on one wall, with the shower or tub occupying the opposite wall. This arrangement keeps the floor uncluttered and creates a clean, organized look. The galley layout is also fantastic for maximizing storage and counter space along the vanity wall. Our bathroom remodeling experts can adapt this classic layout to fit any style, from modern minimalist to cozy craftsman.
The Corner Layout
If your bathroom is more square-shaped or has an awkward footprint, a corner layout can be a lifesaver. The goal here is to tuck the largest fixtures into the corners to free up the central floor area, making the room feel much more open. A corner shower, for instance, has a smaller footprint than a standard rectangular one but still offers plenty of room inside. Pairing it with a corner vanity can completely change the flow of the space, preventing that cramped feeling. This approach leaves more usable floor space, which is a huge visual and practical win in a small room.
The Wet Room Approach
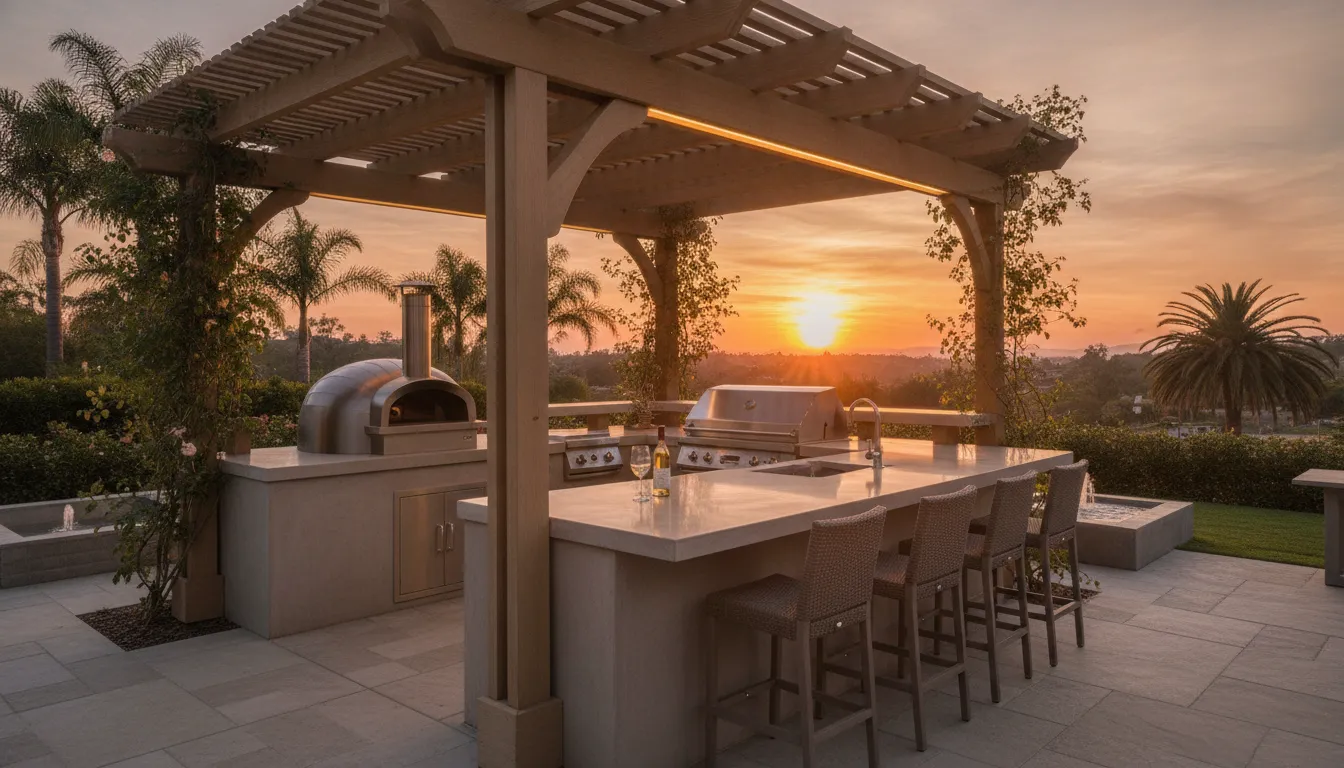
For a truly open and modern feel, consider a wet room. In this layout, the entire bathroom is waterproofed, and the shower area is open or separated by just a single pane of frameless glass. By eliminating the traditional shower curb and enclosure, you create one seamless, continuous space. This not only makes the room feel significantly larger but also adds a dose of luxury. It’s an excellent solution for accessibility, too. Proper drainage and waterproofing are critical, which is why it’s a job best left to a professional team that understands the technical details of creating a beautiful and functional wet room design. If you’re working with a standard 5×7 bathroom with walk-in shower layout, a wet room conversion can dramatically transform the feel of the space.
The Single-Wall Configuration
The single-wall layout is the ultimate space-saver. As the name suggests, all the main fixtures—sink, toilet, and shower—are lined up along one wall. This is one of the most efficient layouts for powder rooms and small full bathrooms because it consolidates all the plumbing into a single wall, which can simplify installation and potentially lower costs. While it’s incredibly compact, it doesn’t have to feel crowded. By choosing sleek, space-saving fixtures like a floating vanity and a compact toilet, you can maintain a sense of openness. You can explore a variety of these fixtures firsthand in our San Diego showroom to find the perfect fit.
| Layout | Best For | Min. Size | Plumbing Walls | Storage Potential | Cost Range |
|---|---|---|---|---|---|
| Galley | Long, narrow spaces (4-5′ wide) | 4×8 | 2 walls | Moderate | $ |
| Corner | Square rooms with door constraints | 5×5 | 2 walls (adjacent) | Good | $ |
| Wet Room | Very small spaces, accessible design | 4×6 | 1 wall | Limited | $$ |
| Single-Wall | Smallest bathrooms, budget-conscious | 4×6 | 1 wall | Moderate | $ |
Small Bathroom Layouts by Dimension
One of the most helpful ways to plan your remodel is to start with the exact dimensions of your space. Below, we break down practical layout strategies for three of the most common small bathroom sizes. Whether you’re working with a compact half bath or a slightly larger guest bathroom, these dimension-specific tips will help you make the most of every square foot. As a San Diego remodeling contractor, King Remodeling has transformed bathrooms of all sizes across neighborhoods from La Jolla to Chula Vista.
4×6 Bathroom Layout Ideas
A 4×6 bathroom provides 24 square feet of space, enough for a functional half bath with toilet and sink, or a tight three-quarter bath with a 32-inch corner shower. King Remodeling designs 4×6 layouts using a single-wall configuration and wall-mounted fixtures to keep the floor clear. Most 4×6 bathroom remodels in San Diego cost between $8,000 and $15,000 depending on fixture selections.
A 4×6 bathroom gives you just 24 square feet to work with, which is tight but absolutely functional with the right plan. This size is common for half baths and small powder rooms, and it can even accommodate a three-quarter bath with a compact shower.
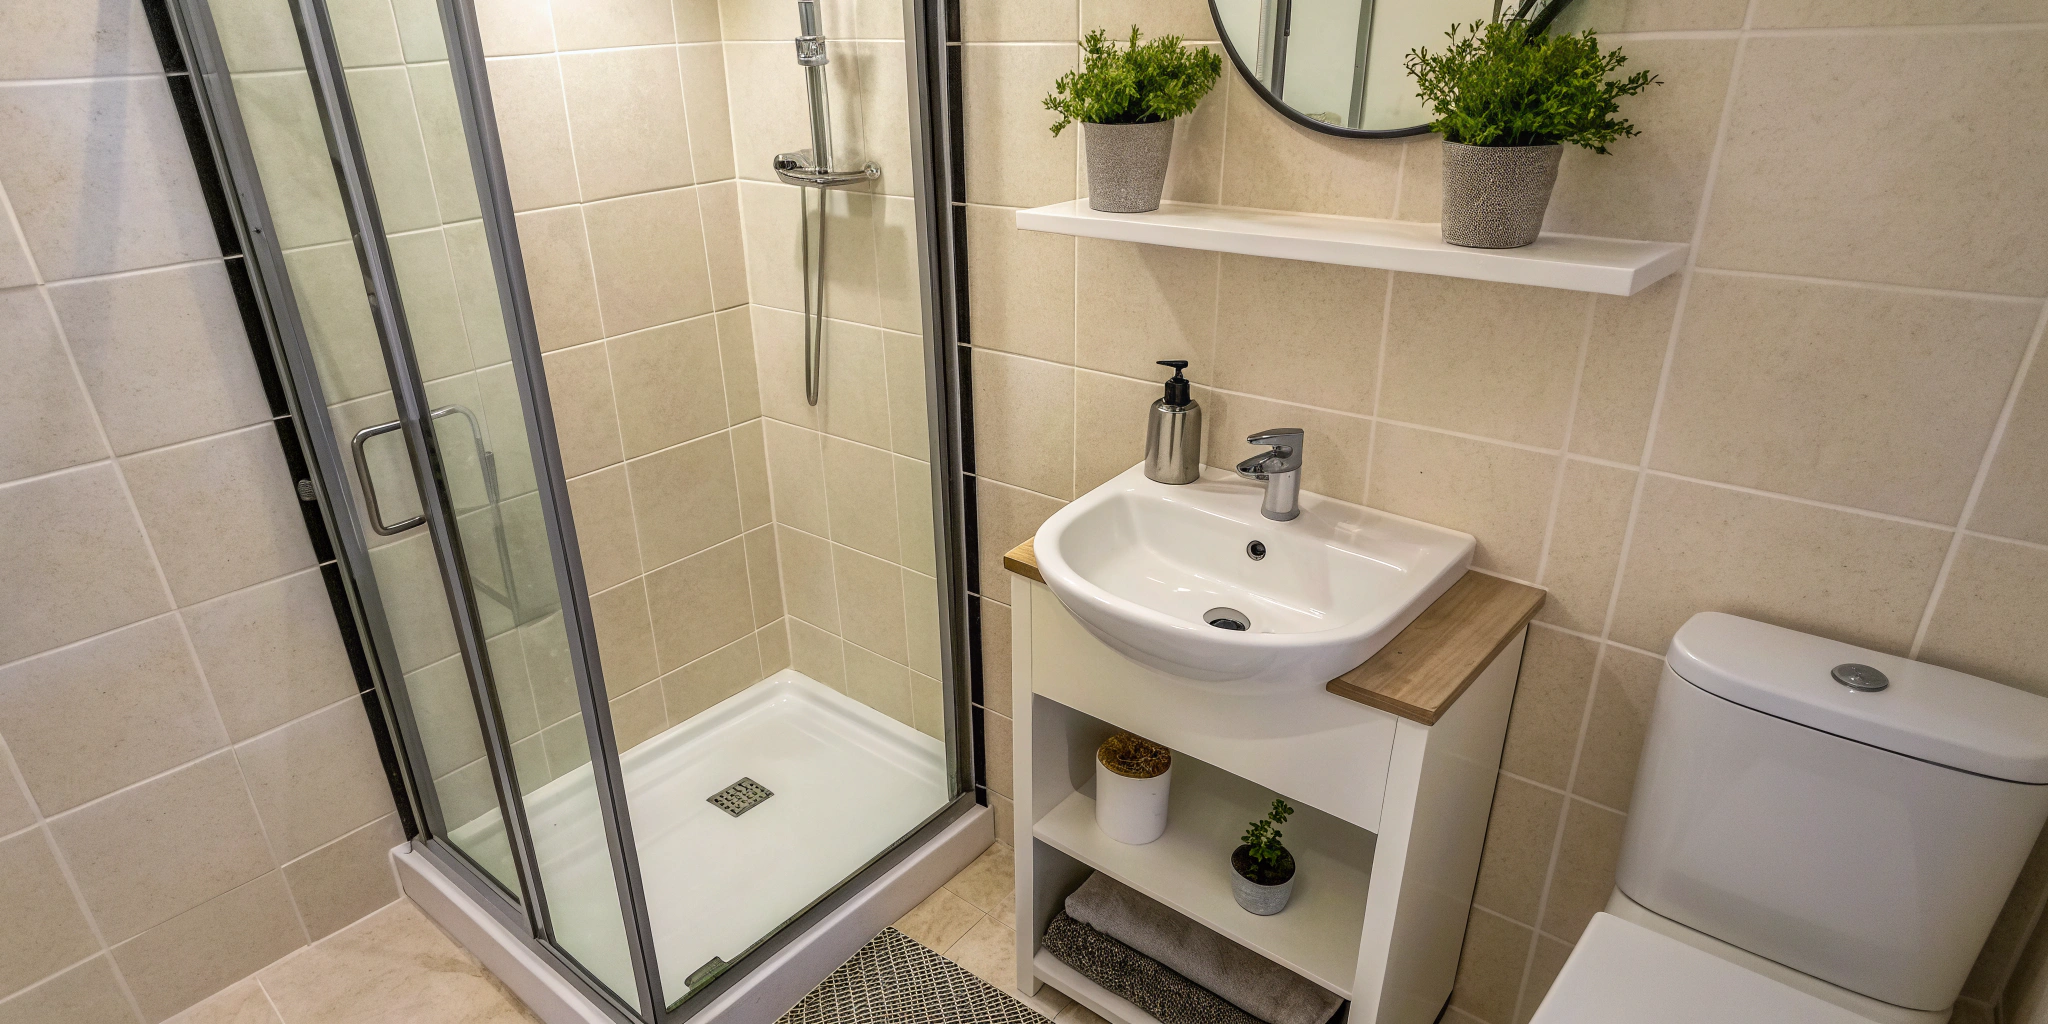
For a 4×6 layout, the single-wall configuration is your best friend. Line up the toilet and a wall-mounted or pedestal sink along one wall, leaving the opposite wall open for a 32-inch neo-angle or corner shower stall. Wall-mounted fixtures are essential here because they free up visible floor space, making the room feel less cramped. If you’re planning a half bath, you can skip the shower entirely and use the extra wall space for a small storage cabinet or a decorative accent.
Key considerations for a 4×6 space: use a pocket door or a barn-style slider instead of a swinging door (which would eat up nearly a third of your usable floor area), install a recessed medicine cabinet for storage, and keep the color palette light and neutral to maximize the sense of openness. For more expert advice on maximizing tight spaces, see our guide on remodeling a very small bathroom. To estimate your project budget, try our small bathroom remodel cost calculator.
5×8 Bathroom Layout Ideas
A 5×8 bathroom layout offers 40 square feet, which is the most common small full-bathroom size in San Diego homes built between 1950 and 1990. This footprint accommodates a toilet, vanity, and either a tub-shower combo or a standalone 36-inch shower. King Remodeling’s most popular 5×8 design places the shower at the far wall, the toilet and vanity on opposite long walls, and uses a pocket door to save 9 square feet of swing clearance.
The 5×8 bathroom, at 40 square feet, is one of the most common standard bathroom sizes in American homes. It’s large enough to include a full bath with a tub/shower combo, toilet, and vanity, yet still small enough that every design decision matters.
In a 5×8 layout, you have several strong options. The classic approach places a 60-inch tub or shower along the 5-foot back wall, with the toilet and vanity on the 8-foot side wall. This leaves a comfortable 24- to 30-inch-wide traffic lane down the center. For a more open feel, replace the tub with a walk-in shower featuring a glass panel, which instantly makes the room feel larger.
To maximize a 5×8 bathroom: consider a floating vanity (24 to 30 inches wide) with built-in drawers for storage, add a large mirror spanning most of the vanity wall to visually double the space, and install overhead and task lighting to eliminate dark corners. San Diego homeowners often find that swapping a dated tub surround for a frameless glass walk-in shower is the single most transformative upgrade for this size bathroom.
6×8 Bathroom Layout Ideas
A 6×8 bathroom layout provides 48 square feet, which is enough space for a full bathroom with separate tub and shower if designed efficiently. King Remodeling’s designers position the tub along the short wall and install a 36-inch walk-in shower beside it, using a glass partition to maintain visual openness. This layout gives San Diego homeowners the comfort of a full bath without requiring a larger footprint.
At 48 square feet, the 6×8 bathroom offers the most flexibility of the three common small bathroom sizes. You have enough room to experiment with different configurations, including a separated tub and shower if you’re willing to choose compact models.
In a 6×8 space, the galley layout works exceptionally well. Place the shower or tub at one end of the room, the toilet and vanity along opposite walls in the center, and reserve the area near the door for open floor space. This creates a natural flow that feels organized and spacious. You can also consider a corner layout, angling the vanity or shower into a corner to create a more dynamic floor plan.
With 48 square feet, you can afford a few upgrades that aren’t practical in smaller bathrooms: a double-sink vanity (if you choose a compact model around 48 inches), a built-in linen niche, or a full bench seat inside the shower. These touches add functionality and a custom, high-end feel. In San Diego’s competitive real estate market, a well-designed bathroom in this size range can significantly boost your home’s value and appeal to buyers.
How Can You Make a Small Bathroom Feel Larger?
The most effective ways to make a small bathroom feel larger are installing a frameless glass shower enclosure, using large-format tiles (12×24 or larger) with minimal grout lines, keeping the color palette light and consistent, and mounting the vanity and toilet on the wall to expose floor area. These four changes consistently produce the biggest visual impact in King Remodeling’s small bathroom projects across San Diego.
Once you’ve settled on a functional layout, the real magic begins. A small bathroom doesn’t have to feel cramped. With a few clever design strategies, you can create an illusion of space that makes your bathroom feel open, airy, and far more luxurious than its square footage suggests. It’s all about tricking the eye with light, reflection, and visual continuity.
These aren’t just minor cosmetic tweaks; they are fundamental choices that can completely transform the atmosphere of your room. From the color on the walls to the type of shower door you choose, every detail contributes to the perception of space. By focusing on materials and finishes that bounce light and keep sightlines clear, you can make even the most compact bathroom feel expansive. We guide our clients through these selections every day, helping them find the perfect combination of elements during a bathroom remodeling project. Let’s look at four of the most effective techniques.
Use Light Colors and Reflective Surfaces
The oldest trick in the book is also one of the most effective: select a light color scheme. Dark, saturated colors absorb light and can make a small bathroom feel cavelike and confining. In contrast, light and airy colors like soft whites, pale grays, and muted pastels do the opposite. They reflect ambient and natural light, creating a bright, open atmosphere that visually expands the room.
Beyond paint, consider using materials with reflective qualities. A glossy subway tile for the shower walls, polished chrome fixtures, or a vanity with a lacquered finish can all help bounce light around the space. When you visit our San Diego showroom, you can see and touch these materials firsthand to understand how they interact with light.
Place Mirrors Strategically
A well-placed mirror is a small bathroom’s best friend. Hanging a large mirror, especially one that stretches across the entire wall above your vanity, can dramatically create the illusion of more space. It works by reflecting the room back on itself, which adds visual depth and makes the area feel less confined.
For an even greater effect, try placing a mirror on the wall opposite a window. This will capture the natural light and the view, essentially bringing the outdoors in and making the room feel brighter and more connected to its surroundings. Even a simple mirrored medicine cabinet can contribute to this effect while adding much-needed storage. You can see great examples of this in our featured projects.
Install a Frameless Glass Shower
Shower curtains and bulky, framed shower doors create solid visual barriers that chop a small bathroom into even smaller zones. To open things up, opt for a frameless glass shower enclosure. Using clear, frameless glass for a shower allows light to flow freely through the room, making it feel more spacious and cohesive.
This simple change keeps the sightlines open from one end of the room to the other, allowing your eye to travel all the way to the back wall of the shower. This makes the entire bathroom footprint visible at once, creating a seamless look that instantly makes the room feel larger. It’s a sophisticated and modern choice that delivers a huge impact on both function and feel.
King Remodeling installs frameless glass shower enclosures in the majority of our small bathroom remodels. The visual difference is dramatic: a clear glass panel eliminates the visual barrier that shower curtains and framed doors create, making the shower area read as continuous open space. For bathrooms under 40 square feet, this single upgrade often produces the biggest perceived size increase. Explore our shower glass door options guide to compare frameless, semi-frameless, and framed styles.
Keep Flooring Consistent
The type of flooring you choose—and how you lay it—can have a major impact on the perception of space. To make a room feel bigger, avoid busy patterns or multiple flooring materials. Consistent flooring throughout the bathroom creates a seamless look that helps the space feel larger and more unified.
Using large-format tiles is a great strategy because it results in fewer grout lines, which can make a floor look busy and cluttered. If your layout includes a curbless, walk-in shower, running the same floor tile directly into the shower area enhances this effect even further. This creates an unbroken visual plane that tricks the eye into seeing one large, continuous space rather than a collection of small, separate zones.
What Fixtures Work Best in a Small Bathroom?
The best fixtures for a small bathroom are wall-mounted (floating) toilets and vanities, corner sinks, compact 32-to-36-inch shower enclosures, and sliding barn-style or pocket doors. Wall-mounted fixtures expose 8 to 12 inches of additional floor space, which makes the room feel measurably larger and simplifies cleaning. King Remodeling sources compact fixtures from manufacturers like TOTO, Duravit, and Kohler for San Diego bathroom projects.
The fixtures you choose can make or break a small bathroom. Bulky, oversized pieces will make the room feel cramped and difficult to use, while thoughtfully selected fixtures can create a sense of openness and improve the flow. The key is to find items that are proportional to the space without sacrificing style or function. Luckily, modern design offers a fantastic range of compact toilets, slim vanities, and space-saving showers that are perfect for tighter quarters.
When planning your bathroom remodeling project, think about how each fixture will impact the overall layout. A wall-mounted toilet might free up precious floor space, while a corner sink could make a tight walkway feel more generous. It’s all about making smart, intentional choices that maximize every square inch. Seeing these options in person can be a game-changer, which is why we walk our clients through curated selections at our San Diego Design Center. Let’s look at a few of the best fixture strategies for small bathrooms.
Float Your Toilet and Vanity
One of the most effective ways to create visual space is to lift your fixtures off the ground. Wall-hung items, like floating vanities and toilets, can make small bathrooms feel bigger because your eye can see the flooring extend all the way to the wall. This continuous line creates an illusion of a larger footprint. It’s a simple trick that has a major impact on how open and airy the room feels.
Beyond aesthetics, there’s a practical benefit: cleaning is a breeze. With no pedestal or vanity base to work around, you can easily clean the floor underneath. This modern, minimalist look is a popular choice in our featured projects because it instantly updates the space while adding a touch of functional luxury.
Consider a Corner or Pedestal Sink
A large, boxy vanity can quickly overwhelm a small bathroom. If you don’t need extensive counter space or under-sink storage, a more streamlined sink is a great option. It’s important to choose items that fit the room’s size so it doesn’t feel crowded. A corner sink is a brilliant solution because it tucks neatly into an underutilized part of the room, freeing up central floor space.
Alternatively, a classic pedestal sink offers a timeless, elegant look with a very small footprint. While you sacrifice the storage of a traditional vanity, you gain a sense of openness that can be well worth the trade-off. You can always add storage elsewhere with recessed medicine cabinets or floating shelves.
Find the Right Compact Shower
The shower is often the largest element in a bathroom, but it doesn’t have to be a visual roadblock. Frameless glass showers create openness by allowing light to flow through the room, making it feel more spacious. By eliminating a bulky frame and using clear glass, you avoid cutting the room in half visually. The result is a clean, seamless look that makes the entire bathroom feel brighter and bigger.
If your layout is particularly tight, consider a neo-angle or quadrant shower. These designs have a clipped corner that fits perfectly into the corner of a room, saving valuable floor space without making the shower itself feel cramped. For many homeowners, a tub-to-shower conversion is another way to reclaim space and create a more accessible, modern bathroom. For more inspiration, browse our collection of walk-in shower ideas for small bathrooms.
Swap Your Swing Door for a Slider
A traditional hinged door that swings into a small bathroom can be a major space-waster. You have to keep a whole section of the floor clear just for the door to open, which can dictate where you place your fixtures and limit your layout options. As a simple rule, sliding doors or doors that open outwards are good for small bathrooms.
A pocket door, which disappears into the wall when opened, is the ultimate space-saver. It completely eliminates the need for door-swing clearance. If a pocket door isn’t feasible, a stylish barn door that slides along the exterior wall is another fantastic alternative. Even just reversing the door to swing out into the hallway instead of into the bathroom can make a surprising difference in usability.
How Can You Add Storage Without Losing Space?
The most effective small bathroom storage solutions are recessed wall niches (built into stud cavities at zero footprint cost), over-toilet cabinets, tall narrow linen towers, and multi-functional vanities with internal drawer organizers. King Remodeling’s designers build recessed niches into every small bathroom project because they provide 3 to 4 cubic feet of storage without reducing floor area or visual openness.
One of the biggest challenges in a small bathroom is finding a home for everything without making the space feel cramped. It’s a constant battle against countertop clutter and overflowing drawers. The good news is that with a thoughtful design, you can add a surprising amount of storage by using overlooked and underutilized areas. A smart bathroom remodeling plan focuses on creating clever solutions that integrate seamlessly into your layout, keeping your essentials organized and your surfaces clear. Instead of adding bulky furniture that eats up precious floor space, the key is to build storage in, up, and out of the way. From custom niches built into the wall to vanities that work twice as hard, you can create a bathroom that feels both spacious and perfectly functional. It’s all about seeing the potential in your existing footprint and making every square inch count. We help homeowners do this every day by identifying these hidden opportunities during the design phase, ensuring the final space is as practical as it is beautiful.
Use the Space Over Your Toilet
That empty wall above your toilet is prime real estate for storage. It’s a classic designer trick for a reason—it adds function without taking up a single inch of your floor plan. You can add a few floating shelves for a light, airy look, perfect for storing rolled towels, toiletries in decorative jars, and a small plant. If you prefer to keep things tucked away, a shallow cabinet can conceal extra toilet paper, cleaning supplies, and other necessities. This approach turns an often-ignored area into a valuable storage hub, keeping your daily items within easy reach but off the countertop.
Build Storage Into Your Walls
For a truly seamless and high-end look, consider building storage directly into your walls. Recessed medicine cabinets offer a much sleeker profile than bulky surface-mounted versions. Even better, a custom-built shower niche provides the perfect spot for shampoo and soap, eliminating the need for a clunky shower caddy. These built-in shelves and cabinets create a clean, uncluttered look because they don’t project into the room. You can see how we’ve integrated these features in our past projects to create streamlined, functional bathrooms that feel open and organized.
Take Your Cabinets to the Ceiling
Think vertically to maximize every available inch. Installing tall, floor-to-ceiling cabinets is a powerful way to add a ton of storage while also making the room feel larger. This design strategy draws the eye upward, creating an illusion of height and spaciousness. A tall linen tower can hold stacks of towels, baskets of toiletries, and backstock supplies, keeping everything neatly organized behind closed doors. It’s an incredibly efficient use of a small footprint that can completely transform how you use your bathroom, eliminating clutter for good.
Choose a Multi-Functional Vanity
Your vanity is one of the hardest-working fixtures in your bathroom, so make sure it pulls its weight in the storage department. While pedestal sinks can look elegant, they offer zero storage. Instead, opt for a vanity with a combination of drawers and cabinet space. Drawers are fantastic for organizing smaller items like makeup and hair tools, while the cabinet below can house larger items and cleaning supplies. When you’re planning your remodel, visiting our Design Center can help you find a vanity that not only fits your style but also provides the smart, functional storage your bathroom needs.
Need expert help designing storage into your small bathroom? King Remodeling’s design team creates custom storage solutions for San Diego homeowners. Visit our Scripps Ranch showroom to see built-in storage ideas in person, or request a free quote to get started.
What Design Elements Improve Both Function and Style?
A beautiful small bathroom is great, but a beautiful and functional one is even better. The best designs merge style with practicality, ensuring every choice serves a purpose. It’s not just about picking pretty things; it’s about selecting elements that make your daily routine smoother and your space feel more open and organized. From the furniture you choose to the materials you install, these details work together to create a room that feels both luxurious and effortless to live in. A thoughtful bathroom remodeling plan considers how you’ll use the space every day, ensuring the final result is as smart as it is stunning. By focusing on clever, dual-purpose solutions, you can create a small bathroom that punches well above its weight in both form and function. It’s about making strategic decisions that enhance your life, not just the look of the room. This is where professional design guidance can be invaluable, helping you see possibilities you might have missed and ensuring every element works in harmony.
Select Multi-Functional Furniture
In a small bathroom, every piece of furniture needs to earn its keep. Choosing multi-functional items is one of the smartest ways to maximize your square footage without sacrificing style. Think of a vanity that offers deep drawers instead of just a cabinet, a mirrored medicine cabinet that hides clutter, or even a small stool that doubles as a storage spot for towels. A well-planned layout with hard-working furniture can make even the most compact bathroom feel roomy and organized. The goal is to reduce visual clutter by ensuring everything has a place, which in turn makes the entire room feel more serene and spacious.
At King Remodeling, we specify multi-functional pieces for nearly every small bathroom project. A vanity with soft-close drawers, internal organizers, and an integrated towel bar serves four purposes in the footprint of one piece. Our Scripps Ranch Design Center showroom has 20+ vanity options sized specifically for compact bathrooms, so San Diego homeowners can see and touch the options before committing.
Use Waterproof Materials in Wet Zones
Zoning your bathroom into “wet” and “dry” areas is a pro-level design trick that improves both longevity and ease of maintenance. The wet zone—your shower and the area immediately around your tub—gets the most exposure to water. Here, you’ll want to use durable, waterproof materials like porcelain tile, quartz, or solid surfaces. Separating these areas from dry zones, like your vanity and storage, makes cleaning simpler and prevents water from damaging cabinetry or drywall over time. When you visit our San Diego showroom, our designers can walk you through the best material options for each zone, ensuring your bathroom is built to last.
Choose Large Tiles for Visual Continuity
It might seem counterintuitive, but large-format tiles are a small bathroom’s best friend. Using larger tiles on the floor and walls creates fewer grout lines, which makes the surfaces appear seamless and uncluttered. This visual continuity tricks the eye into seeing a bigger, more open area. For an even greater sense of space, consider running the same large tile from the floor right up the shower walls. This technique erases the visual barriers that can make a small room feel choppy and confined. It’s a simple switch that delivers a high-impact, modern look while making the space feel more expansive. For tile pairing inspiration, see our bathroom tile combination tips.
Integrate Your Laundry Solutions
If your home layout allows for it, integrating laundry into a bathroom can be a game-changer for convenience. This is especially true for upstairs bathrooms, where dirty clothes and linens tend to pile up. Adding a stacked washer and dryer combo into a closet or a custom-built alcove can save you countless trips up and down the stairs. This approach consolidates your chores into one efficient zone, streamlining your daily routine. While it requires careful planning for plumbing and ventilation, our design-build process is perfect for handling these kinds of complex integrations, turning a simple bathroom into a highly functional workhorse for your home.
How to Use Lighting to Make Your Bathroom Feel Bigger
Proper bathroom lighting requires three layers: ambient overhead lighting for general visibility, task lighting flanking the mirror at eye level for grooming, and accent lighting (like LED strips under a floating vanity) for depth and atmosphere. King Remodeling’s electricians wire all three layers during bathroom remodels so homeowners can adjust the mood and functionality of the space with separate switches.
Great lighting is one of the most effective tools for making a small bathroom feel open and airy. It’s not just about installing a single, bright overhead fixture; a smart lighting plan uses multiple sources to eliminate shadows, highlight features, and create a sense of depth. By thinking about how light interacts with the space, you can trick the eye into seeing a much larger room. A well-lit bathroom is also more functional. Getting ready in a poorly lit space is frustrating, but the right combination of fixtures ensures you have clear, even light where you need it most.
The key is to think in layers, combining different types of light to serve different purposes. From bright, functional vanity lights to soft, ambient glows, a thoughtful strategy can completely transform your small bathroom. This is where working with a design-build team really helps. We can integrate the electrical plan directly into your layout from day one, ensuring fixtures are placed perfectly for both aesthetics and utility. When you’re planning your bathroom remodel, putting lighting at the top of your priority list will pay off in both style and function for years to come.
Layer Your Lighting
Layering your lighting is essential in a small bathroom. Instead of relying on one central light, you’ll want to combine three types: ambient, task, and accent. Ambient lighting provides the room’s overall illumination—think recessed ceiling lights or a stylish flush-mount fixture. Task lighting is focused on specific areas, like the vanity. Accent lighting highlights architectural details or decor. By combining these, you can create a more spacious and inviting feel. Using wall sconces, for example, helps distribute light more evenly than a single overhead source, washing the walls in a soft glow that makes the room feel wider and brighter.
Add Functional Task Lighting
Good lighting is critical around the mirror, and getting it right can make your small bathroom feel bigger. Instead of a single fixture above the mirror, which can cast unflattering shadows, position lights on either side. This provides even, cross-illumination for tasks like shaving or applying makeup. Backlit LED mirrors are another fantastic option; they enhance brightness with a clean, modern look and serve a functional purpose. The light from the mirror and sconces will reflect around the room, creating an illusion of more space and making your morning routine much more pleasant.
Make the Most of Natural Light
If your bathroom has a window, make the most of it. Natural light is the best way to make any space feel larger and more open. Keep window treatments simple and sheer, or opt for frosted glass to maintain privacy without blocking the sun. If a full renovation is on the table, consider adding a skylight, which can significantly brighten the space. For windowless bathrooms, you can mimic the effect of daylight with the right bulbs. Choose bright, cool-toned LED lighting to keep the atmosphere airy and prevent the room from feeling like a cave.
Avoid These Common Small Bathroom Layout Mistakes
The most common small bathroom layout mistakes are choosing oversized fixtures that block traffic flow, ignoring ventilation requirements (critical in San Diego’s coastal climate where moisture causes mold), skipping a measured floor plan before selecting finishes, and installing swing doors that collide with fixtures. King Remodeling’s design team starts every project with a scaled floor plan to prevent these issues before construction begins.
A successful small bathroom remodel is as much about avoiding common pitfalls as it is about embracing clever solutions. Even the best ideas can fall flat if the fundamentals aren’t right. A layout that looks great on paper can feel awkward and cramped in reality if you overlook a few key details. From fixture sizes to airflow, getting these elements right from the start ensures your finished space is both beautiful and functional. Let’s walk through some of the most frequent missteps we see and how you can steer clear of them in your own project.
Don’t Overcrowd the Space with Big Fixtures
It’s easy to fall in love with a grand vanity or a spacious, spa-like shower, but forcing them into a compact room is a recipe for regret. When fixtures are too bulky, they disrupt traffic flow and make the bathroom feel tight and uncomfortable. Instead, look for sleek, compact models designed for smaller footprints. A thoughtful bathroom remodeling plan will prioritize fixtures that serve their purpose without overwhelming the room, leaving you with a space that feels balanced and easy to use. Choosing appropriately sized pieces is the first step toward creating a bathroom that feels open and functional, not frustrating.
Rethink Your Ventilation Placement
Ventilation might not be the most glamorous part of a bathroom remodel, but it’s one of the most important, especially in a small space where steam and moisture get trapped easily. In San Diego’s coastal climate, where humidity levels can fluctuate significantly, proper ventilation is even more critical to protect your bathroom finishes. Poor ventilation is a serious issue that can lead to “mold, mildew, and bad smells,” creating an unhealthy environment and damaging your new finishes over time. A standard, noisy fan stuck in the middle of the ceiling isn’t your only option. Modern exhaust fans are incredibly quiet and can be integrated seamlessly into your design. A good plan ensures your fan is properly sized for the room and placed to maximize airflow, protecting your investment for years to come.
Pay Attention to Scale and Proportion
Beyond just the size of your fixtures, it’s crucial to consider how every element relates to the room as a whole. This is the principle of scale and proportion. The goal is to “choose items that fit the room’s size so it doesn’t feel crowded.” For example, large-format floor tiles can actually make a small room feel bigger, while a busy mosaic pattern can feel overwhelming. This is also why wall-hung items are so effective in small bathrooms—by lifting the vanity and toilet off the ground, you create uninterrupted floor space that makes the room feel more open and airy.
Don’t Underestimate Your Lighting Needs
Lighting has the power to completely transform a small bathroom, but it’s often treated as an afterthought. A single, dim overhead light is rarely enough. As experts from Aspen Kitchens point out, “Too little light or lights placed in the wrong spots make it hard to see and do tasks like shaving or putting on makeup.” A layered lighting plan is the solution. Combine ambient overhead lighting (like a flush-mount fixture) with task lighting (like sconces on either side of the mirror) to eliminate shadows and brighten the entire space. This not only makes the room more functional but also creates a more open and inviting atmosphere.
Related Articles
- Remodel a Very Small Bathroom: The Ultimate Guide
- Cost to Remodel a Small Bathroom: A 2025 Guide
- Realistic Cost to Remodel a Small Bathroom: How Much Is It?
- 15 Small Bathroom Remodel Ideas for More Space
Frequently Asked Questions About Small Bathroom Layouts
What is the golden rule for bathroom layouts?
The golden rule is to design around flow and function first. Ensure at least 15 inches of clearance on each side of the toilet, 21 inches of clear space in front of each fixture, and a minimum 30-inch-wide doorway. Consolidate plumbing to one or two walls to maximize open floor area. When you start with these clearance requirements and work backward, the rest of the design falls into place naturally. San Diego building codes require similar minimum clearances, so following the golden rule helps keep your remodel compliant as well.
How do you arrange a very small bathroom?
Start by choosing a space-efficient layout like a single-wall or corner configuration. Use wall-mounted fixtures to free up floor space, install a frameless glass shower instead of a curtain, and add recessed storage like medicine cabinets and shower niches. Keep the color palette light and use large-format tiles to reduce grout lines and create visual continuity. The key is to eliminate visual clutter: the fewer objects on the floor and the fewer visual breaks in the surfaces, the more spacious the room will feel.
Is 4 feet wide enough for a bathroom?
Yes, a 4-foot-wide bathroom can work as a half bath (toilet and sink only) or a three-quarter bath with a narrow shower stall. The key is using a single-wall layout, a compact corner or wall-mounted sink, and a 32-inch neo-angle or corner shower. A 4×6 footprint gives you 24 square feet, which is sufficient for a functional bathroom when every inch is planned carefully. Many San Diego homes, especially bungalows and mid-century properties, feature bathrooms in this size range that function beautifully with the right design.
What are common small bathroom design mistakes?
The most common mistakes include choosing oversized fixtures that crowd the space, ignoring ventilation (especially important in coastal climates like San Diego where moisture control is critical), skipping a proper floor plan before selecting finishes, using dark colors that make the room feel smaller, and installing a swinging door that blocks fixtures. Always plan the layout first, then choose finishes and fixtures that fit the plan. Another frequent error is underestimating storage needs, which leads to countertop clutter that makes even a well-designed bathroom feel cramped.
Ready to Transform Your Small Bathroom?
King Remodeling has completed over 1,500 bathroom renovations across San Diego County in 25+ years of business. Our design-build approach means one team handles your layout planning, material selection at our Scripps Ranch Design Center, and construction, with most small bathroom remodels finished in 3 to 4 weeks. Every project includes a 3-year labor warranty, fixed-bid pricing with no surprise costs, and a dedicated project manager.
Ready to transform your small bathroom? Here is how to get started:
- Call us: (619) 281-0639 for a free phone consultation
- Get a quote: Request your free estimate online
- Visit us: Tour our Scripps Ranch Design Center at 10035 Carroll Canyon Rd to explore materials and layouts in person
Licensed Contractor #1039019 | 4,500+ completed renovations | 4.8-star average rating