A bathroom can have beautiful finishes and still feel harsh, dim, or awkward if the lighting is treated as an afterthought. The right plan helps you see clearly at the vanity, move safely through the room, and create a more relaxed atmosphere when the day winds down.
The most effective bathroom lighting ideas combine four layers: ambient light for overall visibility, task light for grooming, accent light for architectural details, and decorative light for character. This layered approach, recognized in professional lighting design, should be adapted to your bathroom’s size, layout, ceiling height, and available natural light. Learn more about the four lighting layers.
For a San Diego bathroom remodeling project, planning these layers alongside the floor plan, mirror. Cabinetry, and ventilation creates a more cohesive result than selecting fixtures one at a time. It also makes it easier to balance brightness, glare control, and the atmosphere you want. Start by understanding how each layer contributes to a comfortable, functional room.
How Layered Bathroom Lighting Ideas Create a Functional Design
A bathroom needs more than one bright fixture overhead. Layered lighting combines general visibility with focused illumination, visual detail, and atmosphere, so the room works for both a quick morning routine and a quiet evening soak. Professional lighting design commonly organizes illumination into four layers: ambient, task, accent, and decorative lighting. Each layer has a distinct purpose, and the balance should reflect the bathroom’s size, layout, ceiling height, and available daylight.
- Ambient lighting: The base illumination that helps people move safely through the room and prevents dark, cave-like areas. Recessed fixtures, flush mounts, and well-distributed ceiling lights can contribute to this layer.
- Task lighting: Focused, higher-intensity light for activities at the vanity, shower, or bathing area. Proper placement helps reduce shadows and glare while shaving, applying makeup, or grooming.
- Accent lighting: Light that draws attention to architectural features, tile textures, niches, artwork, or other details that deserve emphasis.
- Decorative lighting: Fixtures that add character and visual presence, such as sconces, pendants, or a carefully scaled chandelier.
Start by establishing an adequate ambient level, then add task lighting where precision matters. The Illuminating Engineering Society recommends 20-50 foot candles for bathrooms, while residential guidance also places general illumination near 70-80 lumens per square foot. These are useful planning benchmarks, not a substitute for evaluating the room in person. Over-lighting a small bathroom can create harsh glare, while an under-lit room can leave corners and walking paths difficult to see.
Color temperature also affects how the room feels and functions. Warm light in the 2700-3000K range supports a relaxed atmosphere in a tub or shower area. Cooler light in the 3600-5500K range produces higher contrast and is better suited to visual tasks near a vanity. Using one temperature throughout the room can make the space feel flat or overly clinical, so coordinate fixtures by zone and select bulbs with strong color rendering.
Layering gives you control that a single switch cannot. Dimmers, separate circuits, or smart controls can let ambient light remain low at night while task lighting stays available when needed. For a related look at how multiple lighting sources work together, see our kitchen lighting design guide. A thoughtful plan makes the bathroom safer, more comfortable, and more intentional without relying on brightness alone.
How to Choose the Best Vanity Lighting for Your Bathroom
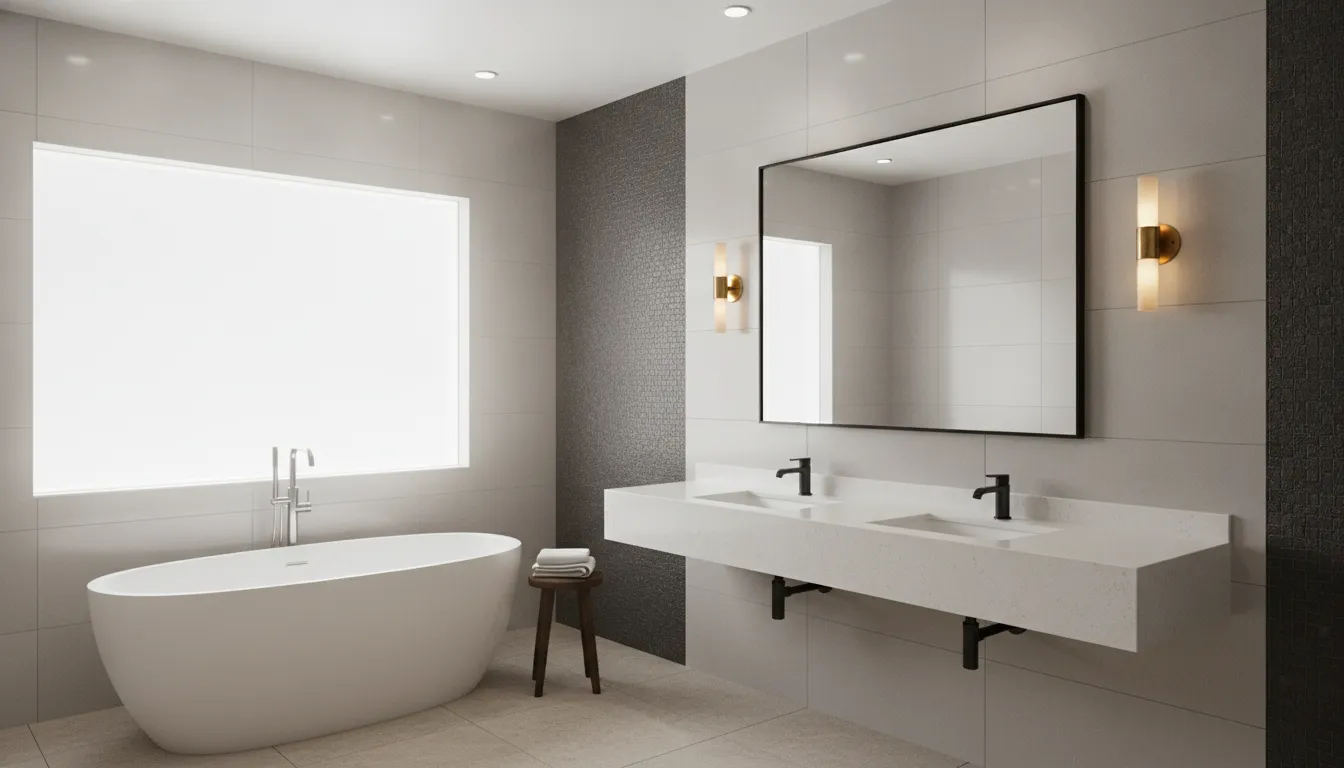
Vanity lighting is task lighting, so its first job is to make everyday routines easier. Makeup application, shaving, skincare, and grooming all require an even view of the face. A fixture that looks attractive but leaves dark areas around the eyes or chin can make the mirror less useful.
| Fixture Type | Best For | Key Consideration |
|---|---|---|
| Side sconces | Even facial illumination, minimal shadows | Requires wall space beside the mirror |
| Vanity bar | Wide mirrors, limited side wall space | Should span 75-80% of vanity width |
| Lighted mirror | Streamlined look, consistent edge lighting | Integrated LEDs, ideal for smaller spaces |
The most reliable placement for vanity lighting is at eye level on both sides of the mirror. Side-mounted sconces direct light across the face and help eliminate the shadows that commonly appear when a single fixture is mounted above the mirror. This approach is supported by guidance from the Lighting Research Center and Houzz, which both emphasize even facial illumination and side placement (Lighting Research Center; Houzz).
When side sconces are not practical, a vanity bar above the mirror can provide a clean alternative. Choose a bar that does not exceed the mirror’s width. For a wider vanity, a useful sizing rule is to select a bar that spans about 75 to 80 percent of the vanity width. The fixture should feel proportional without extending beyond the visual boundaries of the mirror or countertop.
Compare fixture types before choosing a style
- Sconces: Best for side-to-side facial illumination and a tailored, furniture-like appearance.
- Vanity bars: A practical choice when wall space beside the mirror is limited or when you want one continuous light source.
- Lighted mirrors: Useful for a streamlined look, especially when integrated LEDs provide consistent light around the mirror’s edge.
Bathroom light fixtures also include recessed lights, flush mounts, pendants, and chandeliers, but those fixtures serve broader ambient or decorative roles. They should supplement vanity lighting rather than replace a properly positioned task source. A layered plan keeps the mirror functional while allowing the room to feel comfortable when bright task lighting is not needed.
Choose a comfortable color temperature
For makeup and shaving, look for a color temperature around 3000K to 4000K. This range provides clear, useful light without making the bathroom feel excessively cold. Dimmable LEDs can add flexibility, allowing brighter illumination for grooming and a softer setting for evening routines.
Glare deserves special attention, particularly in bathrooms used by older adults. Select diffused shades or frosted lenses, avoid exposed bulbs at direct eye level, and use dimming when possible. Thoughtful bathroom vanity light placement in master suites can improve both comfort and daily usability.
Recessed and Overhead Lighting Options for Bathrooms
Recessed lighting provides clean, even ambient illumination without competing with mirrors, tile, or other design details. For a balanced layout, recessed fixtures are typically spaced about 3 to 5 feet apart. With the final arrangement adjusted for ceiling height, room dimensions, and the locations of showers, vanities, and cabinets. This spacing helps reduce dark spots while avoiding a ceiling crowded with downlights. Recessed lighting for compact layouts can be especially effective when every inch of visual space matters.
Fixture selection matters most in areas exposed to moisture. A wet-rated fixture is designed for locations where water may contact the light directly, making it the appropriate choice for many shower installations. Damp-rated fixtures are intended for humid areas where moisture is present but direct water exposure is limited, such as a general bathroom ceiling. Always follow the fixture manufacturer’s location requirements and applicable electrical code, particularly inside a shower enclosure.
For bathrooms with low ceilings, a flush-mount or low-profile fixture can provide dependable overhead light without making the room feel compressed. Flush mounts also offer more decorative flexibility than many homeowners expect. A simple opal diffuser can soften glare, while a carefully selected finish can coordinate with cabinet hardware, faucets, and mirror frames. This approach works well in bathroom lighting ideas for small spaces, where a large hanging fixture may interfere with circulation or sightlines.
Higher ceilings and larger primary bathrooms allow overhead lighting to become a design feature. A chandelier above a freestanding tub can establish a focal point, provided it is installed in a code-compliant location with appropriate clearance. Pendants can add a more focused decorative element over an open area or beside a tub. Designers often combine these statement fixtures with recessed lights rather than relying on one source alone. A mix of chandeliers, sconces, pendants, and other fixtures gives a bathroom more visual character when each piece has a clear role. As illustrated by the range of styles documented by Southern Living.
Finally, place overhead and decorative fixtures on dimmers whenever the electrical plan allows. Brighter settings support cleaning and daily routines, while lower settings create a calmer atmosphere in the evening. Dimmers also let homeowners adapt the room as natural light changes throughout the day, making the lighting plan more useful than a fixed, all-or-nothing switch.
Accent and Decorative Lighting to Elevate Your Bathroom
Once ambient and task lighting handle everyday visibility, accent and decorative fixtures give the bathroom its character. Accent lighting highlights a texture, architectural feature, or carefully chosen finish, while decorative lighting contributes a visible design element of its own. Used together, these layers make the room feel intentional rather than simply well lit.
Use light to emphasize architectural details
A shower niche can become a refined focal point with a properly rated linear or recessed light. Place the fixture so it washes the shelves and tile without creating harsh glare. This approach makes shampoo and bath products easier to see while drawing attention to the niche’s material detail. A backlit mirror offers a similar effect. Its soft halo separates the mirror from the wall and adds depth, especially when the surrounding finishes are simple.
Accent lighting should support the room’s architecture, not compete with it. The goal is a controlled glow that reveals texture and shape. The Interior Design Institute describes accent lighting as a layer used to highlight specific objects, textures, or architectural features (source on accent lighting).
Create a softer nighttime path
Toe-kick lighting beneath a floating vanity can provide a low, indirect glow for nighttime trips without turning on bright overhead fixtures. Under-vanity lighting works particularly well with warm color temperatures and concealed LED strips. It adds ambiance during a relaxing bath and gives the room a more comfortable transition from dark to light.
Connect these fixtures to dimmers whenever possible. Dimmers let you move from bright task lighting for grooming to a softer setting for relaxation, without needing separate fixtures for every mood. They also make decorative lighting more practical because its intensity can change with the time of day.
Make a larger bathroom feel distinctive
In a spacious bathroom, a chandelier over a freestanding tub can serve as a focal point, provided its placement, clearance, and electrical specifications are appropriate for the space. Pendants and sculptural fixtures can create a similar effect when their scale complements the vanity and ceiling height. A mix of chandeliers, sconces, and pendants is one established way to combine function with visual interest (decorative fixture examples).
Fixture selection is easier when you can compare scale, finishes, and light quality in person. You can visit our San Diego Design Center for lighting selection and evaluate options before construction begins. King Remodeling’s showroom in Scripps Ranch helps homeowners make those choices alongside other bathroom materials, creating a more cohesive design from the start.
Maximizing Natural Light in Your Bathroom Design
San Diego’s abundant year-round sunshine gives homeowners an opportunity to make daylight part of the bathroom design. Thoughtful window placement can brighten finishes, make the room feel more spacious, and reduce the need for artificial lighting during daytime hours. The goal is to invite in light without sacrificing privacy or comfort.
Window size and position should respond to the room’s layout. A window placed beside or above the shower can provide useful daylight, but direct sightlines into the bathroom should be addressed during planning. Frosted or textured glass diffuses views while still admitting light. High clerestory windows are another practical option because they sit above typical eye level. In bathrooms with limited exterior wall space, a skylight or solar tube can bring daylight from above and avoid a street-facing opening altogether.
Window treatments can provide an additional layer of control. Moisture-resistant roller shades, top-down shades, or simple shutters can balance privacy and daylight as conditions change. Select products that tolerate bathroom humidity and leave enough glass exposed to preserve the room’s natural brightness.
Daylight should complement, not replace, a complete lighting plan. A bathroom can feel bright at noon and still be unsafe at 2 a.m. Adequate artificial lighting is critical for middle-of-the-night bathroom trips, when inadequate visibility can increase fall risk, particularly for older adults. Research on nighttime bathroom trips under different lighting conditions highlights the importance of planning for safe movement: review the study on nighttime bathroom lighting and fall risk.
Use dimmable ambient lighting, a softly illuminated path, or a low-level night-light so the room remains visible without an uncomfortable glare. During a renovation, an experienced team can coordinate windows, privacy materials, electrical work, and finishes as one plan. Explore our bathroom remodeling services in San Diego to develop a design that uses daylight effectively while keeping nighttime safety in view.
Frequently Asked Questions
What is the best lighting for a bathroom?
The best approach combines ambient lighting for overall visibility, task lighting at the vanity, and accent or decorative lighting for depth and atmosphere. Layering these sources gives you comfortable everyday illumination without relying on one harsh ceiling fixture. Add dimmers where appropriate so the room can shift from bright morning routines to a calmer evening setting.
Where should vanity lights be placed in a bathroom?
Place vanity sconces at approximately eye level on both sides of the mirror when the layout allows. This position helps illuminate the face evenly and reduces shadows under the eyes and chin. A properly sized fixture above the mirror can supplement side lighting, but a single overhead light often creates less flattering shadows.
Should bathroom lighting be warm or cool?
Choose the color temperature based on how you use the room. Warm light around 2700 to 3000K creates a relaxed atmosphere, while cooler light from about 3600 to 5500K provides higher contrast for visual tasks, according to the U.S. Department of Energy. Many homeowners use a balanced, neutral option for the vanity and warmer decorative light elsewhere.
How much lighting is needed for a bathroom?
Plan for roughly 70 to 80 lumens per square foot for general illumination, while also considering ceiling height, finishes, daylight, and the room’s layout. The Illuminating Engineering Society recommendation for bathroom ambient lighting is 20 to 50 foot-candles. A lighting professional can refine the fixture count and placement so the room is bright without excessive glare.
How do you light a bathroom without windows?
Use layered fixtures to recreate the benefits of natural light: even ambient illumination, focused vanity lighting, and subtle accent sources. LED fixtures can provide efficient, long-lasting light with good color rendering for grooming tasks. Include a low-level or dimmable night light as well, because safe paths matter when the bathroom is used after dark.
Ready to Plan Your Bathroom Lighting?
A thoughtful lighting plan can make your bathroom more comfortable, functional, and cohesive with the rest of your remodel. Schedule a free design consultation at our San Diego showroom to discuss your space, lighting priorities, and preferred design direction. Contact King Remodeling to get started.