There’s a special satisfaction that comes from a successful DIY project. But while painting a room or changing a light fixture can be a great weekend task, installing countertops is in a completely different league. Quartz is a heavy, expensive, and surprisingly fragile material before it’s secured in place. One wrong move can lead to a cracked slab, damaged cabinets, or even serious injury. That’s why when it comes to quartz countertop installation, the stakes are simply too high to go it alone. This guide will walk you through the professional process, explaining why this job is non-negotiable for experts and what a high-quality installation truly involves.
Key Takeaways
- Professional Installation Protects Your Investment: Quartz is extremely heavy and requires specialized tools for a perfect fit. Hiring a professional team prevents costly mistakes, creates nearly invisible seams, and keeps your manufacturer’s warranty intact.
- A Flawless Finish Starts with a Solid Foundation: The final look of your countertops depends entirely on the prep work. This includes creating a precise digital template and making sure your cabinets are perfectly level and secure enough to support the stone’s weight.
- Keep Your Quartz Looking New with Simple Habits: The beauty of quartz is its low-maintenance durability. Daily cleaning only requires soap and water, and you can prevent damage by using trivets for hot pans and avoiding harsh chemical cleaners; best of all, it never needs to be sealed.
What Is Quartz and Why Is It So Popular?
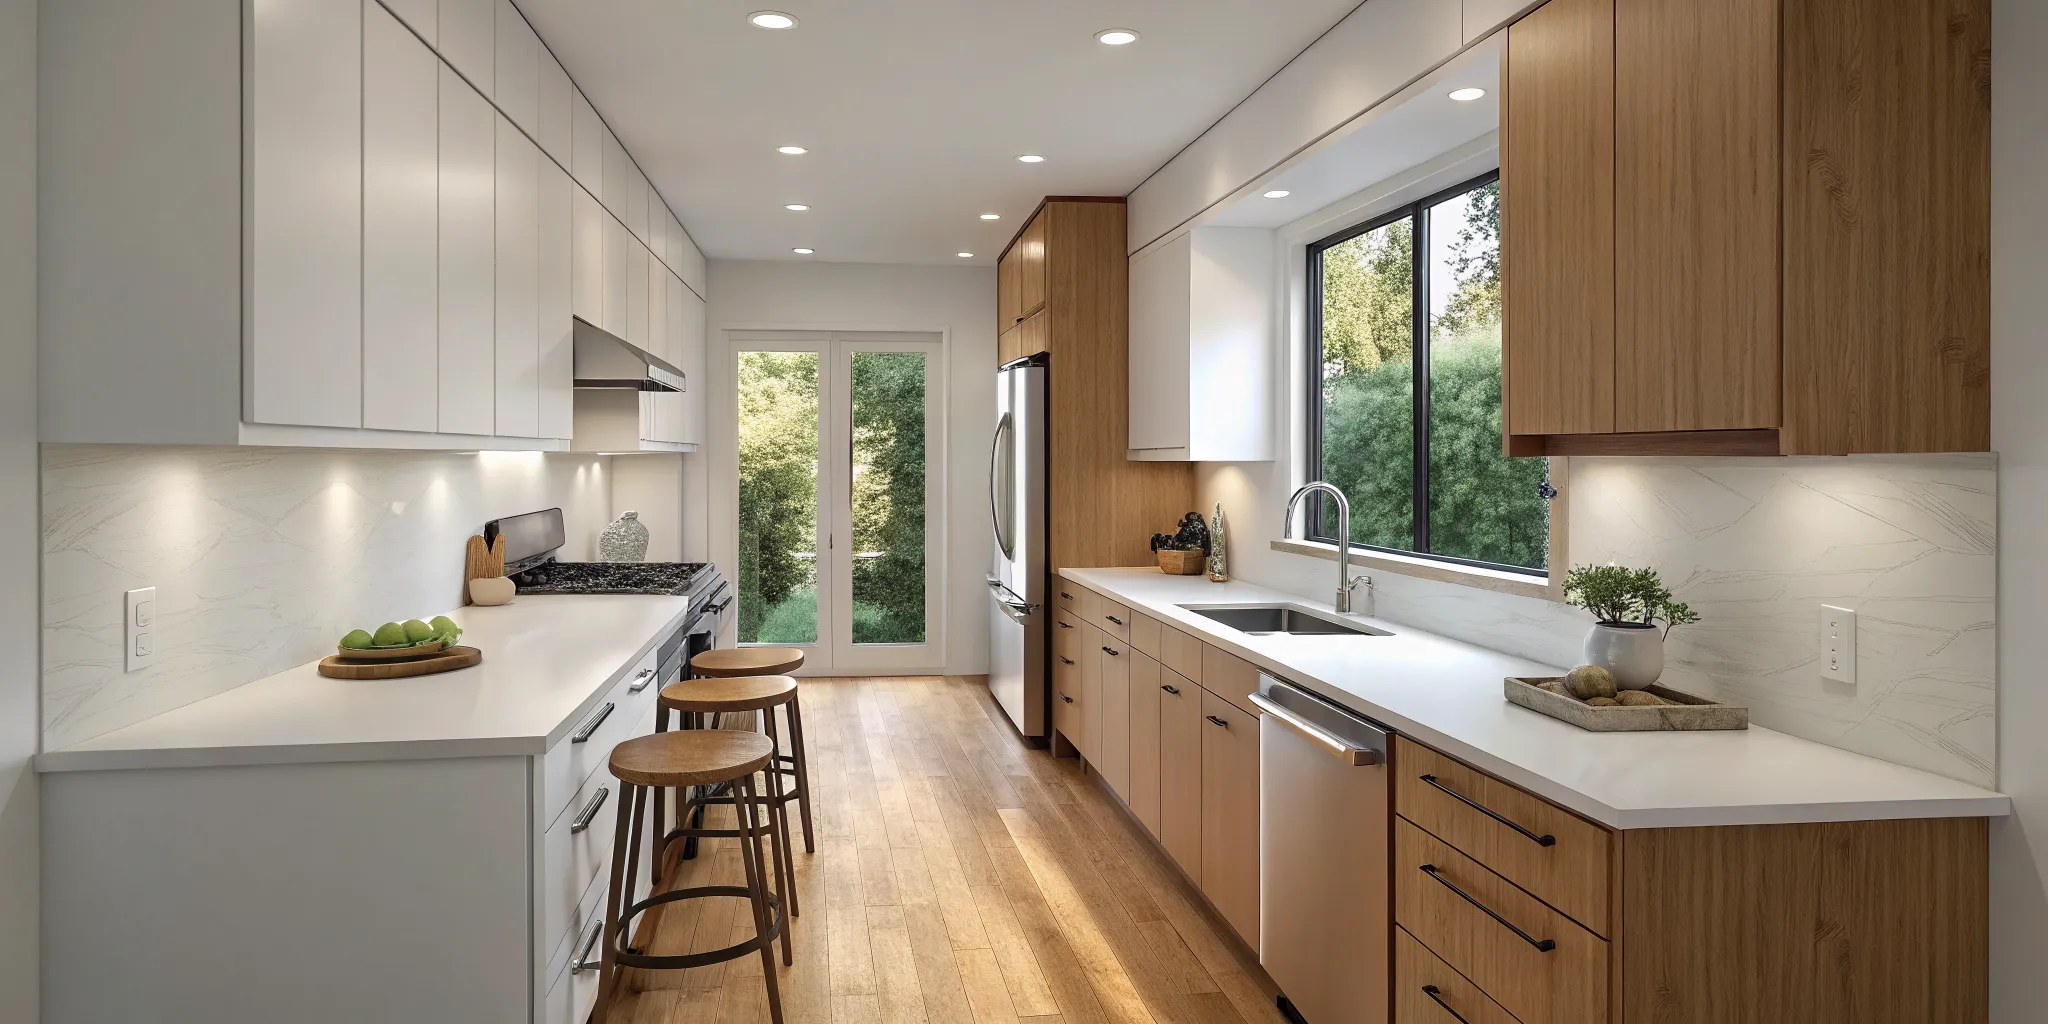
If you’ve spent any time looking at kitchen or bathroom inspiration, you’ve definitely come across quartz countertops. They’ve become a go-to choice for homeowners, and for good reason. Quartz offers the perfect blend of stunning looks and everyday practicality, making it a fantastic investment for any San Diego home. Unlike natural stones that are quarried in large slabs, quartz countertops are engineered, which gives them a unique combination of strength and design flexibility.
This engineered quality is what allows for such a wide range of colors and patterns, from bright, clean whites to dramatic, veined designs that look just like marble. But it’s not just about aesthetics. Quartz is one of the most durable and low-maintenance materials you can choose for a high-traffic area like a kitchen. It stands up to daily life beautifully, resisting stains, scratches, and heat without demanding the constant upkeep that other materials require. For busy families or anyone who wants a beautiful space without the extra work, quartz is a clear winner. It delivers that high-end feel while being incredibly forgiving.
How It’s Made
So, what exactly is an engineered stone? Quartz countertops are a composite material made from about 90-95% ground natural quartz, one of the hardest minerals on earth. The rest is a mix of polymer resins and pigments. This mixture is poured into a mold, compressed under high pressure, and then cured in an oven to create a solid, incredibly dense slab. This manufacturing process is what gives quartz its signature durability and non-porous surface. Because the process is so controlled, manufacturers can create a consistent color and pattern throughout the entire slab, eliminating the natural imperfections you might find in granite or marble. This predictability is a huge plus for any kitchen remodeling project.
The Benefits of Quartz vs. Other Materials
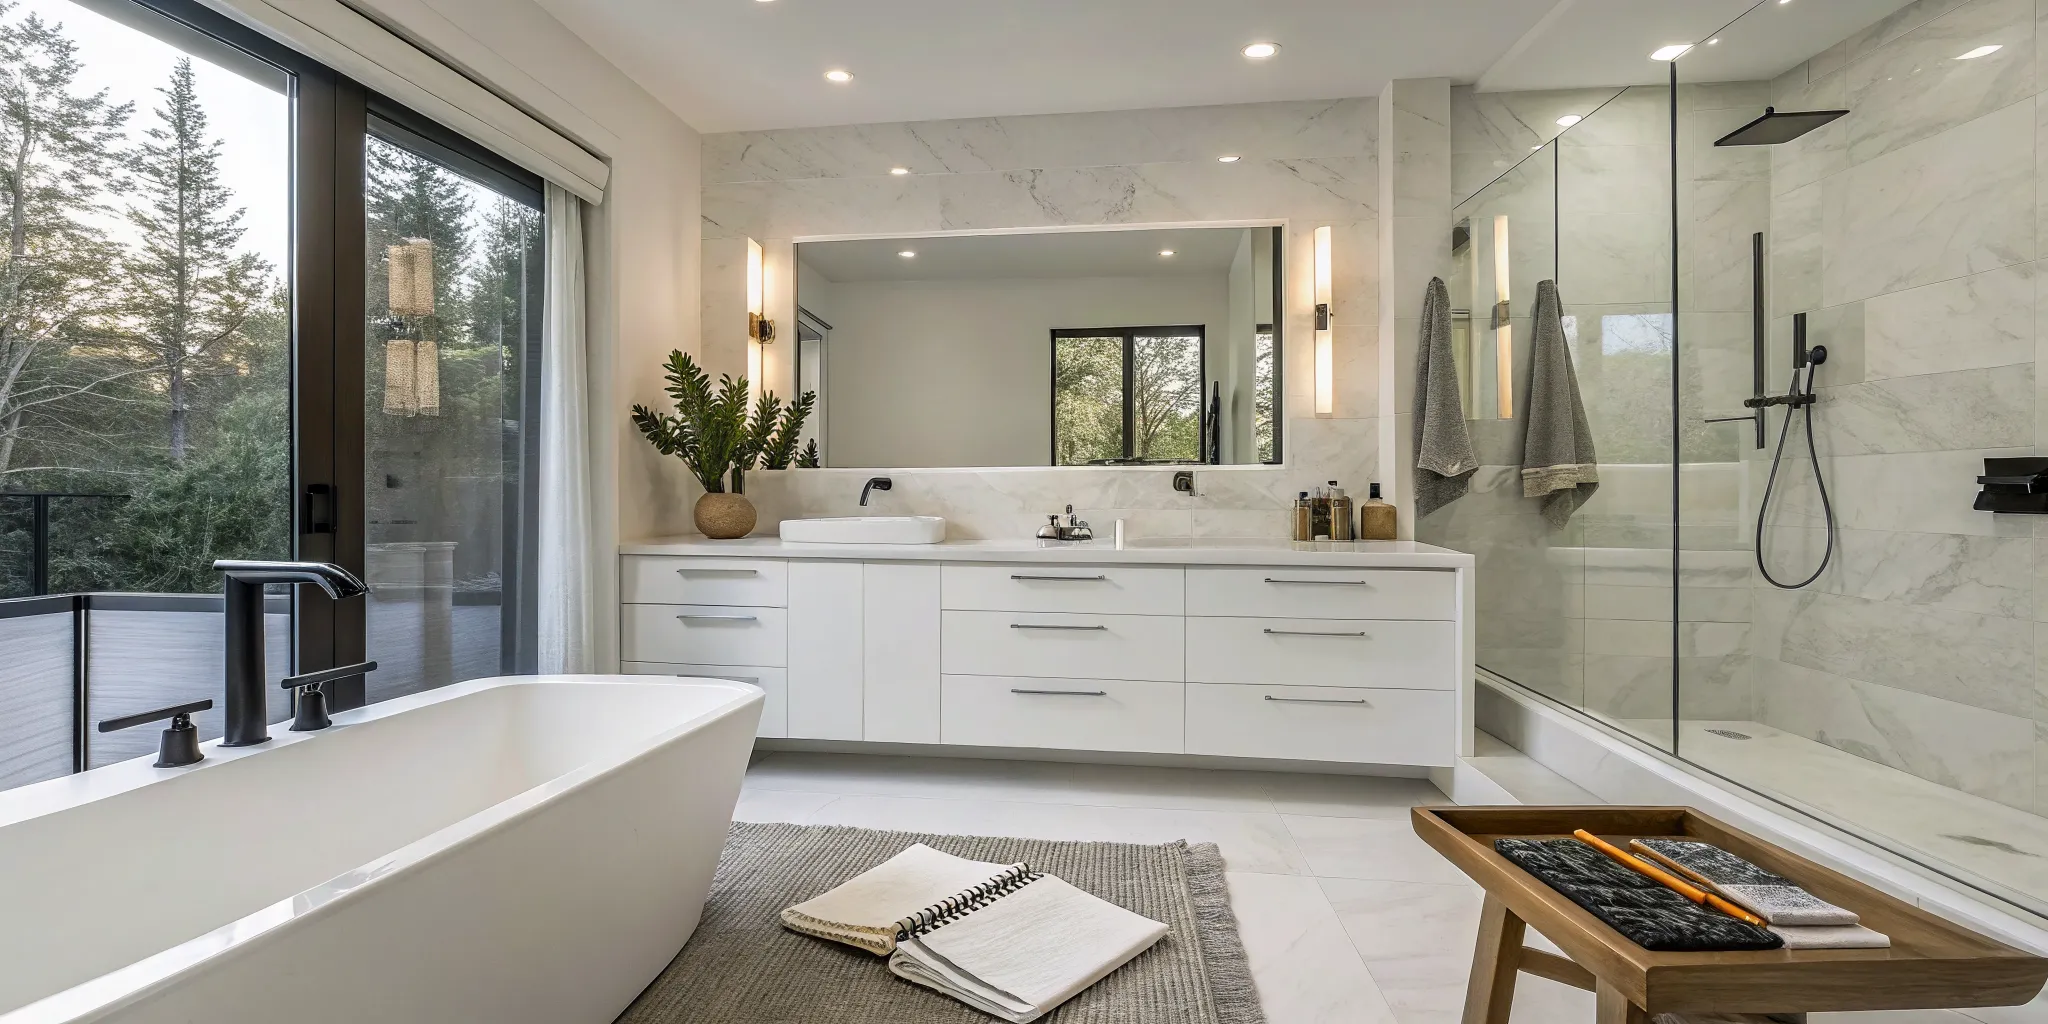
When you compare quartz to other popular countertop materials like granite or marble, its practical advantages really shine. The biggest benefit is that it’s non-porous. Unlike natural stone, which has tiny pores that can absorb liquids and lead to stains or bacteria growth, quartz is completely sealed by the resins used in its production. This means you never have to seal it, ever. Spills like wine, coffee, or oil wipe away easily without a trace. This hygienic quality makes it an ideal surface for both kitchens and bathroom remodeling projects where cleanliness is key. It’s also highly resistant to scratches and chipping, so it can handle the demands of a busy household with ease.
Popular Styles and Finishes
One of the best things about quartz is its incredible design versatility. The manufacturing process allows for a huge spectrum of colors, from subtle, solid neutrals to bold, vibrant hues. Many popular styles are designed to mimic the look of natural stone, giving you the gorgeous veining of Calacatta marble or the soft speckles of granite without the associated maintenance. You can see how we’ve used these styles in some of our featured projects. Finishes typically come in polished (shiny and reflective) or honed (matte and smooth), allowing you to customize the final look to match your home’s aesthetic. This ability to get a consistent, high-end look makes quartz a favorite among designers and homeowners alike.
The Professional Quartz Installation Process, Step-by-Step
Transforming your kitchen or bathroom with quartz countertops is exciting, but it’s a job that demands precision from start to finish. Unlike a simple paint job, installing quartz is a detailed craft that involves custom measurements, heavy materials, and specialized tools. A flawless result depends on a methodical, professional process. When you work with an experienced team, you can trust that every detail is handled correctly, ensuring your new surfaces look stunning and last for decades.
Our end-to-end process is designed to make this seamless for you. We manage every stage, from helping you select the perfect slab in our showroom to the final polish on installation day. Let’s walk through the four key steps that turn a raw slab of quartz into the beautiful, durable centerpiece of your room.
Step 1: Consultation and Precise Measurements
Everything starts with a plan. The first step is an in-home consultation where our team gets to know your space and your vision. We take meticulous measurements of your existing or new cabinets, noting the exact layout and the planned locations for your sink, cooktop, and faucets. This isn’t just about length and width; we check for wall straightness and cabinet levelness. From these measurements, we create a digital or physical template. This exact pattern of your countertop layout acts as the blueprint for the entire project, guaranteeing a custom fit that accounts for every corner and curve in your kitchen.
Step 2: Templating and Fabrication
With the template complete, the real fun begins: choosing your material. At our San Diego showroom, you can see and feel different quartz slabs to find the perfect color, pattern, and finish for your design. Once you’ve made your selection, we move to fabrication. Your chosen slab and the template are sent to our workshop, where skilled fabricators use advanced cutting equipment to shape the stone. They precisely cut the slab to size, create any custom edge profiles you’ve selected, and make the necessary cutouts for your sink and appliances. This step requires incredible accuracy to ensure every piece fits together perfectly.
Step 3: Preparing for Installation Day
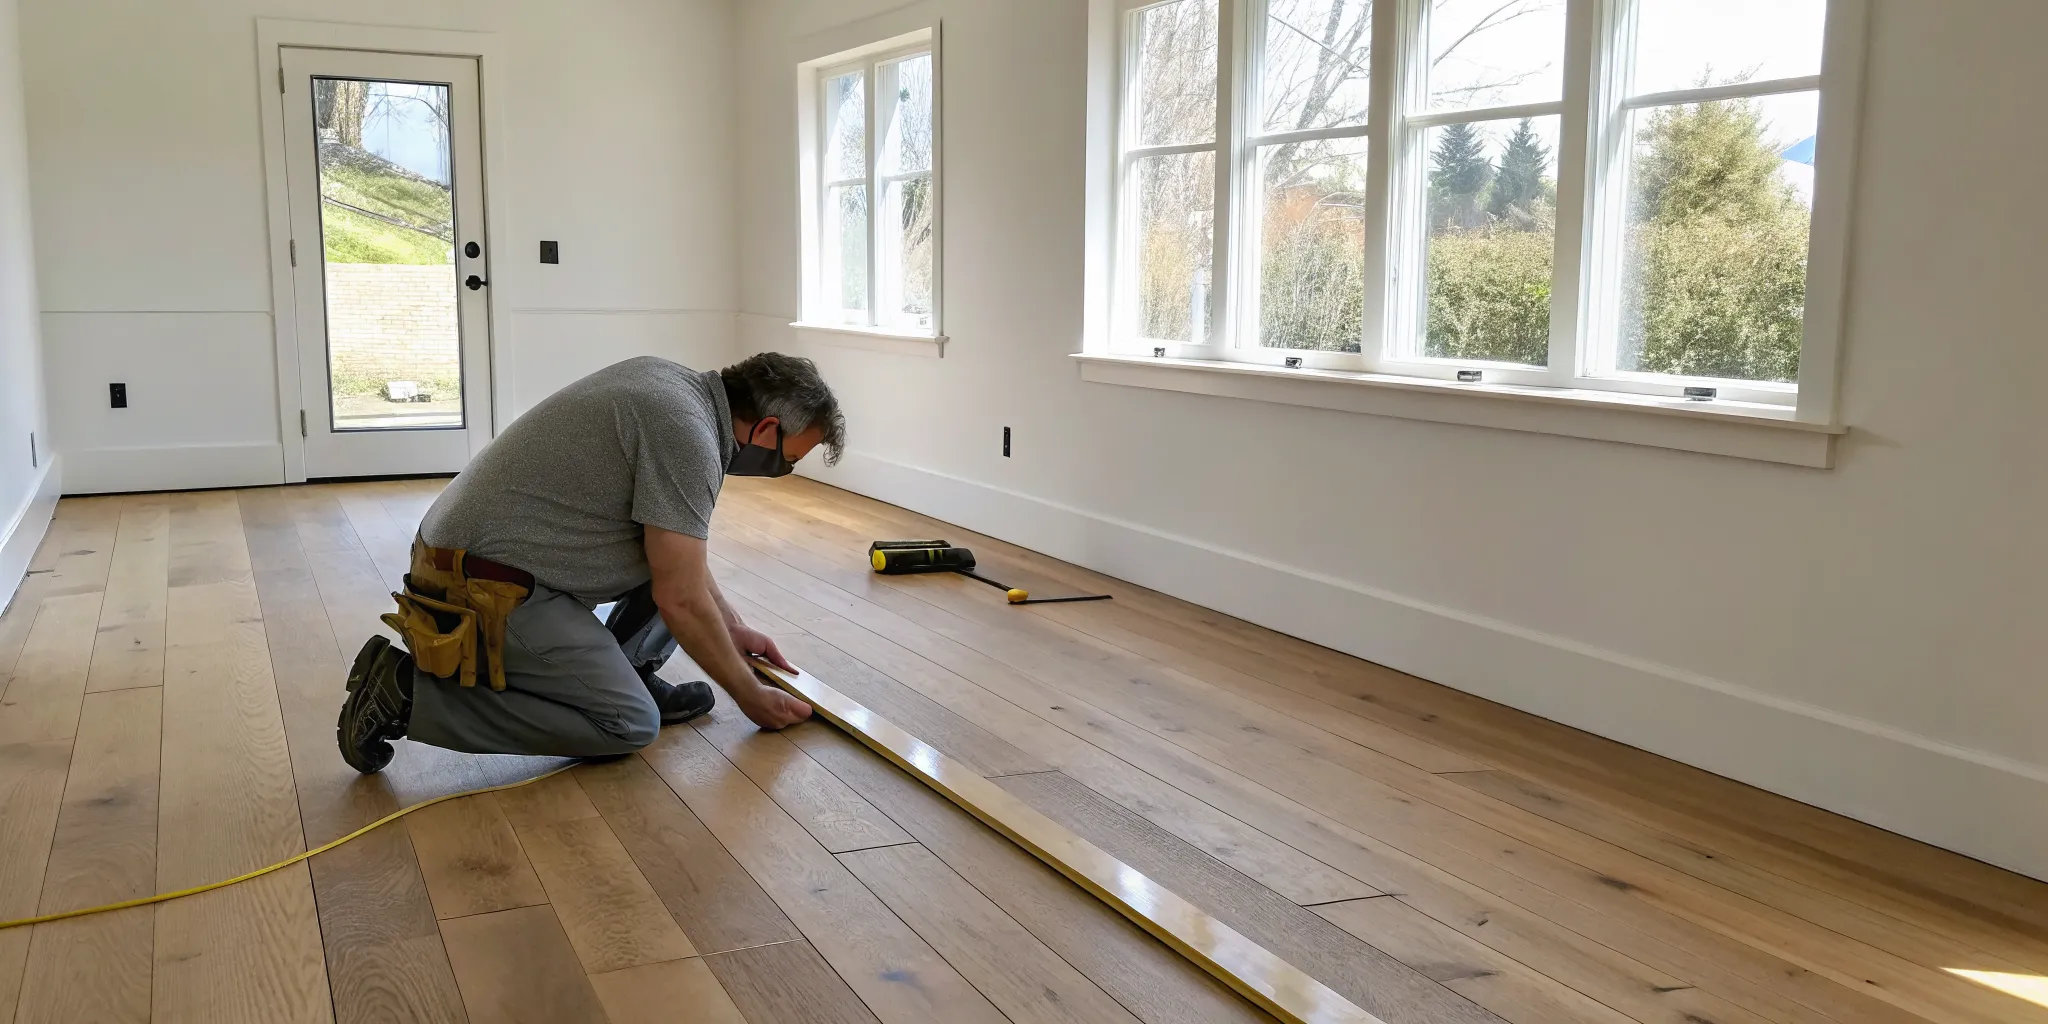
Before your new countertops can be installed, your home needs to be ready. The most critical element is ensuring your cabinets are perfectly level and structurally sound. Quartz is incredibly heavy, and the cabinets must be able to support the weight evenly without shifting. If they aren’t level, the slab could be stressed, leading to cracks over time. Our installation team will confirm your cabinets are secure and make any necessary adjustments. We also coordinate the disconnection of any plumbing and electrical fixtures and make sure the work area is clear and protected, paving the way for a smooth installation day.
Step 4: Setting, Seaming, and Final Touches
On installation day, our team carefully transports the fabricated quartz pieces into your home. We apply a strong, flexible adhesive to the top of the cabinets before gently lowering each slab into place. If your kitchen remodel requires more than one piece of quartz, we create seams where the slabs meet. Our installers use a specialized, color-matched epoxy to join the pieces, then polish the seam until it’s smooth and nearly invisible. This is where true craftsmanship shines. Finally, we mount the sink, clean the surfaces, and perform a final inspection to ensure every detail meets our high standards.
How to Prepare Your Home for New Countertops
A successful countertop installation is all about teamwork. While our crew handles the heavy lifting and technical details, a little preparation on your end makes installation day go incredibly smoothly. Think of it as setting the stage for your kitchen or bathroom’s big debut. Taking a few simple steps beforehand ensures our installers can work safely and efficiently, getting your beautiful new quartz surfaces set perfectly and on schedule. This isn’t just about making our job easier; it’s about protecting your home and investment. By clearing pathways and securing the work area, you prevent accidental bumps and scratches to your walls, floors, and belongings. Our team always takes great care to protect your space with floor coverings and dust barriers, but creating a clear work zone is the best way to guarantee a seamless experience from start to finish. It also helps us stick to the timeline we promised, getting you back to your routine in your newly updated space as quickly as possible. We’ll walk you through every step during the planning phase, of course. Consider this your head start—a quick guide on what to expect and how you can help prepare for the big day.
Make Sure Your Cabinets Are Level and Secure
This is the most critical foundation for your new countertops. Because quartz is so heavy and rigid, it needs a perfectly stable and flat surface to rest on. As one expert fabricator puts it, “Before quartz is installed, your cabinets need to be perfectly level, flush, and strongly screwed into the wall studs.” Any dips, sags, or wobbles in your cabinetry can create stress points in the stone, potentially leading to cracks down the road. As part of our kitchen remodeling process, we inspect and ensure all new and existing cabinets are structurally sound and perfectly level before we even think about placing the slabs. It’s a non-negotiable step for a lasting installation.
Clear the Space for the Install Team
To help our team work efficiently and safely, we’ll need a clear path from our truck to the installation area. Before we arrive, please clear away any furniture, rugs, or decor from hallways and entryways. Inside the kitchen or bathroom, completely clear off your old countertops and empty out the drawers and cabinets below, especially the sink cabinet. This gives our installers the room they need to move and work without risking damage to your belongings or the new countertops. Creating this open workspace is a key part of our process that helps us stay on schedule and keep your home protected throughout the installation.
Plan for Plumbing and Electrical Disconnects
Before we can install your new quartz, the old sink, faucet, garbage disposal, and cooktop must be disconnected and removed. This work should be handled by a licensed plumber and electrician, usually the day before installation. It’s also essential to have your new sink, faucet, and cooktop on-site when we arrive for the final templating. This allows us to create precise, custom cutouts for a perfect fit. Once the new countertops are installed and the adhesive has cured (typically 24 hours), you can schedule your plumber and electrician to return and hook everything up. This coordination is a standard part of any bathroom remodeling project and ensures every component fits flawlessly.
Common Installation Mistakes (and How to Avoid Them)
Even a premium material like quartz can look subpar if the installation isn’t handled correctly. While some mistakes are obvious, others can create hidden problems that lead to cracks or damage down the road. The good news is that they are all completely avoidable with the right team and process.
Hiring an experienced, detail-oriented installer is the single best way to sidestep these issues. A professional team not only has the right tools and training but also knows exactly what to look for before, during, and after the installation. They’ll ensure your cabinets are prepared, the measurements are perfect, and the final seams are nearly invisible. This attention to detail is what separates a standard job from a stunning, long-lasting countertop.
Inaccurate Measurements and Templates
This is the most critical step, and getting it wrong causes a domino effect of problems. Using a simple tape measure can lead to estimations that are just slightly off, resulting in countertops with awkward gaps against the wall, uneven overhangs, or a cooktop cutout that doesn’t quite fit. In the worst-case scenario, the entire slab might be fabricated incorrectly and have to be remade, causing major delays.
A professional installer avoids this by creating a precise digital template. Using laser measuring tools, they capture the exact dimensions of your cabinets, accounting for any wall imperfections. This digital blueprint ensures your quartz countertops are fabricated to fit your space perfectly.
Unprepared or Unlevel Cabinets
Your countertops are only as stable as the cabinets they sit on. Before any quartz is brought in, your base cabinets must be perfectly level, securely fastened to the wall studs, and strong enough to support the material’s weight. If cabinets are even slightly unlevel, they can create pressure points on the slab. Over time, this uneven stress can cause the quartz to crack, especially around sink or cooktop cutouts.
Our installation team always verifies that the cabinetry is level and structurally sound before setting the countertops. This simple check is a non-negotiable part of our process and is essential for protecting your investment and ensuring the longevity of your new surfaces.
Mishandling the Slabs
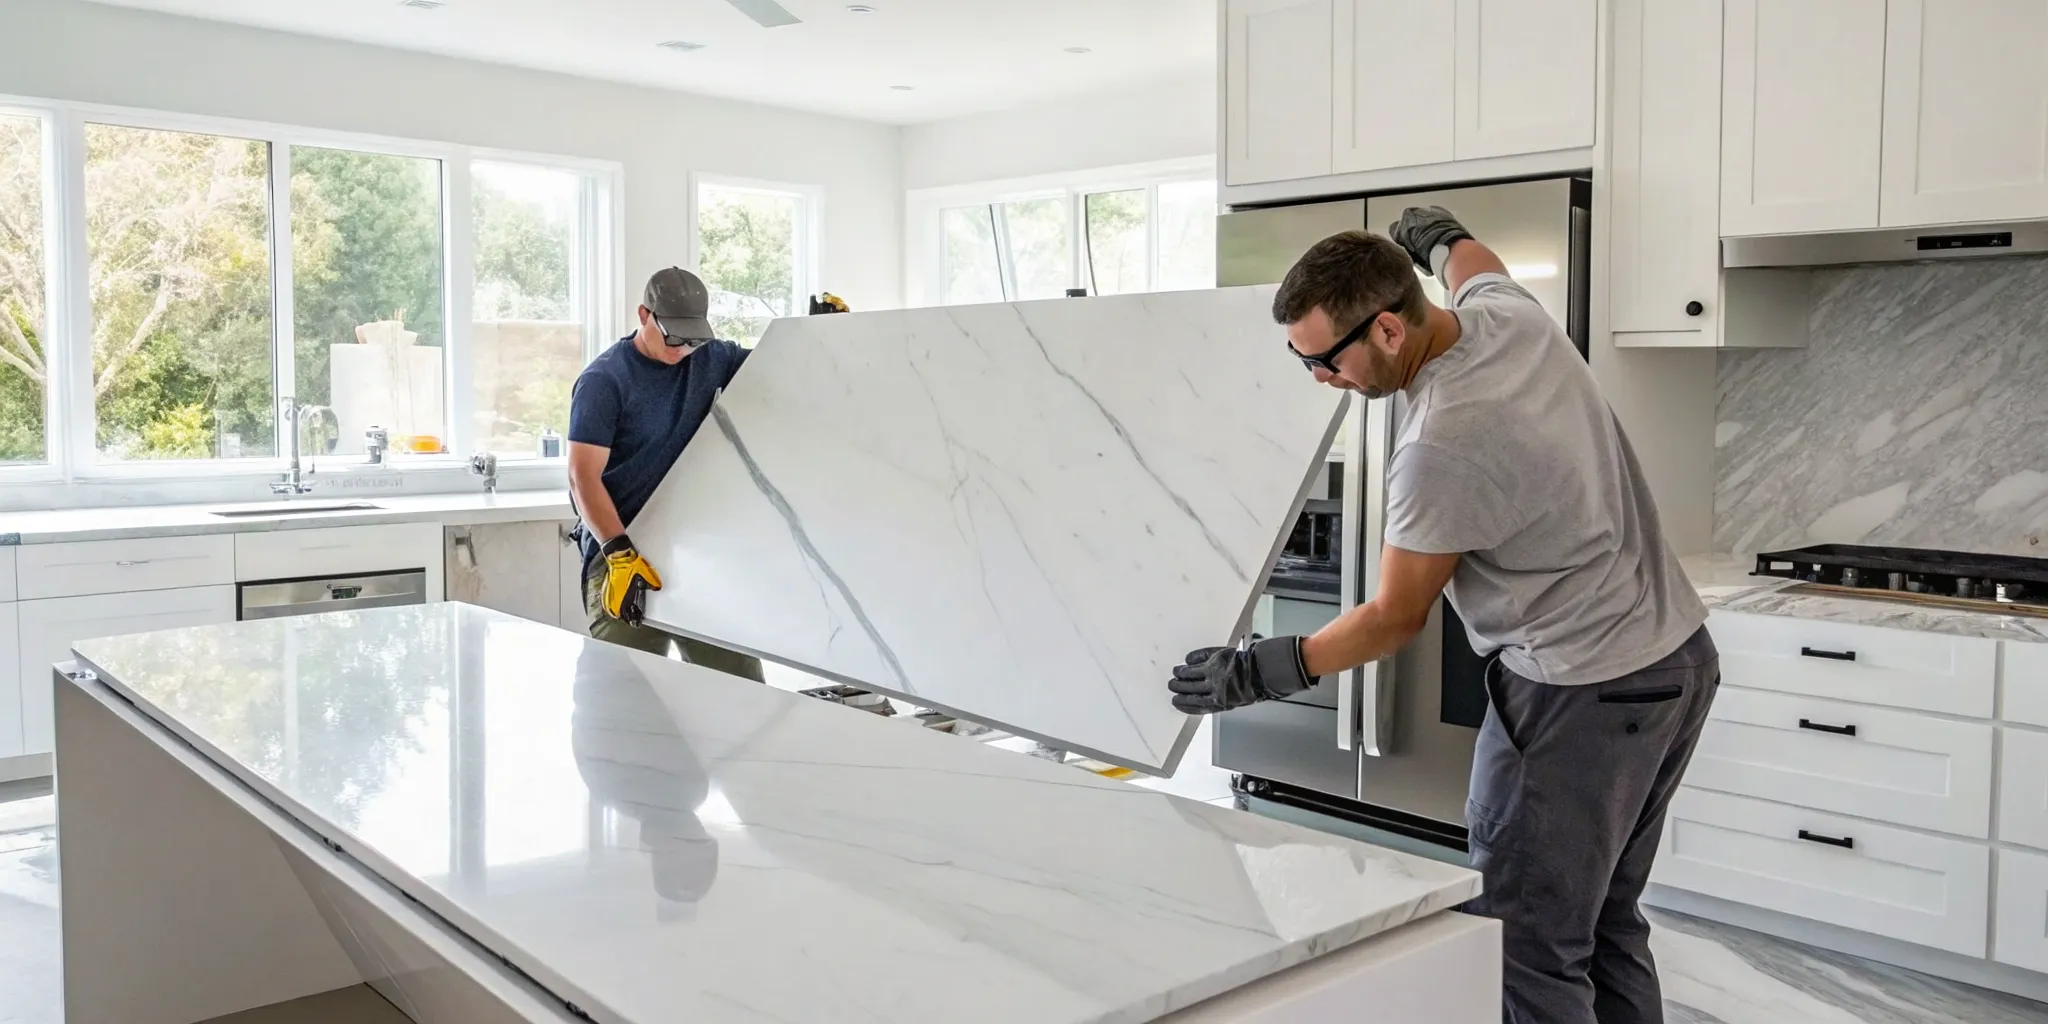
Quartz slabs are incredibly heavy and surprisingly fragile during transport and installation. Attempting to move them without the right equipment or technique can easily lead to chipped edges, surface scratches, or even a completely cracked slab. It also poses a significant safety risk to both the installers and your home, with the potential for damaged floors, walls, or cabinetry.
Professional crews use specialized equipment like suction cup lifters, dollies, and braces to move slabs safely. They are trained in proper lifting techniques to carry the material through your home without causing any damage. This expertise ensures your beautiful new countertop arrives and is set in place in pristine condition.
Poorly Aligned Seams
For kitchens with L-shaped layouts or long countertop runs, one or more seams are often necessary. A poorly executed seam can be a major eyesore, appearing as a wide, dark line or an uneven joint that you can feel with your hand. This happens when the two pieces aren’t perfectly level, the gap is too wide, or the wrong color epoxy is used to join them.
A skilled fabricator will plan seam locations strategically to make them less noticeable. During installation, the team uses specialized tools to pull the two pieces tightly together and ensure they are perfectly flush. They then use a color-matched epoxy that blends with your countertop’s pattern, creating a smooth, clean seam that is nearly impossible to spot. You can see examples of this craftsmanship in our featured projects.
Safety First: How Pros Handle Installation Safely
Installing quartz countertops isn’t just about precision; it’s about doing the job safely from start to finish. These slabs are incredibly heavy and surprisingly delicate before they’re secured in place, making professional handling essential. A professional team doesn’t just show up with the right tools for the installation; they come prepared with the right equipment and procedures to protect themselves, your home, and your beautiful new countertops. This includes everything from personal protective gear to specialized lifting tools and a methodical approach to job site management that prevents accidents and protects your property.
At King Remodeling, safety is a non-negotiable part of our process. We handle every step with care, from unloading the slabs off the truck to the final polish. This focus on safety ensures a smooth, predictable installation day without any costly or dangerous surprises. It’s one of the key reasons why bringing in an experienced team is so important for a project of this scale. Our commitment to a secure and clean job site is a core part of the white-glove experience we provide every client, giving you peace of mind from beginning to end.
Using the Right Protective Gear
When our team arrives, you’ll see them equipped with the proper personal protective equipment (PPE). This isn’t just for show; it’s essential for a safe installation. Heavy-duty gloves protect their hands from sharp edges, while steel-toed boots prevent injuries in case of a slip. Safety glasses are a must, especially when any on-site adjustments or drilling are needed, as they shield the eyes from dust and small debris. A professional crew understands these risks and comes prepared to manage them, ensuring everyone stays safe throughout the installation process.
Lifting Heavy Slabs Correctly
A single slab of quartz can weigh hundreds of pounds, making it impossible to move safely without the right technique and tools. Our installers use specialized equipment, like industrial-grade suction cups, to get a secure grip on the slab. This allows them to lift and maneuver the countertop into place with control and precision. It’s not about brute force; it’s about using leverage and professional-grade tools to prevent dropping the slab, which could damage your new countertop, your cabinets, or your floors. This careful handling is a critical step that pros never skip.
Keeping the Work Area Safe
A safe installation goes beyond the countertop itself. It involves creating a secure and organized work environment. Before we even bring the quartz inside, we protect your floors and nearby surfaces to prevent scuffs or damage. Our team keeps their tools and equipment organized to avoid creating tripping hazards. We also use properly maintained equipment and appropriately sized racks to support the slabs before they are installed. This attention to detail ensures the entire process is safe for our crew and respectful of your home, leaving you with nothing but a flawless new kitchen or bathroom.
Breaking Down the Cost of Quartz Countertops
Understanding the price of new quartz countertops can feel tricky because the final number on your quote is more than just the cost of the stone itself. Your total investment is a blend of three key things: the material you choose, the skilled labor needed for a perfect installation, and any project-specific extras like removing your old counters. When you get a quote from a design-build firm like us, we break everything down so you know exactly where your money is going. This transparency helps you plan your budget without any surprises along the way. Let’s walk through what goes into the final price tag for your beautiful new countertops.
Factors That Influence Material Costs
The first major component of your cost is the quartz itself. Pricing is typically calculated by the square foot, not per slab, which allows for a more accurate estimate based on your kitchen or bathroom’s unique layout. The quality and design of the quartz play a big role here. More intricate veining or a higher concentration of natural quartz crystals often means a higher price point.
Generally, you can expect the material to fall into one of these ranges:
- Standard Quartz: $50 to $60 per square foot
- Commercial-Grade Quartz: $60 to $80 per square foot
- Premium or Luxury Quartz: $80 to $100+ per square foot
Visiting a design showroom is the best way to see these differences up close and find a style that fits both your vision and your budget.
What’s Included in Labor and Installation Fees
Beyond the material, you have the cost of professional installation, which typically runs from $10 to $30 per square foot. This fee covers the expertise of the fabrication and installation team who handle everything from creating a precise digital template of your space to making exact cuts for your sink and cooktop. The complexity of your project can influence this cost. For example, a large island with a waterfall edge or numerous cutouts will require more time and skill than a simple, straight run of countertop. This is why professional installation is so critical; it ensures every seam is tight, every edge is polished, and the final result is flawless.
Potential Additional Costs
Finally, a few other services might be part of your total project cost. If you’re replacing old countertops, your quote will likely include line items for the demolition and responsible disposal of the existing material. You’ll also need to account for any plumbing or electrical work, like disconnecting your sink and faucet and then reconnecting them after the new counters are in place. Many homeowners also choose to add a matching quartz backsplash for a cohesive look, which would be an additional material and labor cost. A detailed remodeling plan will outline all these potential costs upfront, giving you a clear and complete picture of your investment.
Why Professional Installation Is Non-Negotiable
While the satisfaction of a DIY project is undeniable, installing quartz countertops is one job best left to the experts. This isn’t just about convenience; it’s about protecting your investment, your home, and yourself. Quartz is a heavy, expensive, and surprisingly delicate material to transport and fit. One wrong move can lead to a cracked slab, damaged cabinets, or even serious injury.
Think of professional installation as the final, critical step in ensuring your new countertops look flawless and last for decades. A seasoned team has the experience to anticipate challenges, the right tools to handle the material, and the skill to create nearly invisible seams. Our end-to-end process integrates design, fabrication, and installation, so every detail is managed by one cohesive team. Attempting to cut corners here often leads to bigger costs and headaches down the road. From the sheer weight of the slabs to the precision required for a perfect fit, this is a task that demands professional expertise.
The Weight and Fragility Factor
Quartz slabs are incredibly heavy. A single square foot can weigh over 20 pounds, meaning an average-sized kitchen island slab can easily top 500 pounds. This immense weight requires your cabinets to be perfectly level, structurally sound, and capable of supporting the load without shifting or sagging over time. A professional installer will assess and prepare your cabinetry to ensure it provides a stable foundation. Beyond the weight, the slabs are also fragile during transport. They can easily chip or crack if they are not handled with specialized equipment and techniques. Our crews use proper lifting methods and transport racks to move your custom-fabricated pieces safely from our workshop into your home.
The Need for Specialized Tools and Skills
Achieving a perfect quartz installation requires more than just a tape measure and some adhesive. Professionals use a specific set of tools, including diamond-bladed saws for clean cuts, laser levels for absolute precision, and specialized polishing pads to smooth edges. But the tools are only half the equation. The real difference lies in the skill of the craftsperson. An experienced installer knows how to create a flawless template that accounts for every wall imperfection, how to scribe the stone for a tight fit, and how to mix color-matched epoxy to make seams virtually disappear. These are techniques learned over years of practice, ensuring the kind of high-end finish you see in our featured projects.
Protecting Your Warranty
Most quartz manufacturers offer lengthy warranties that protect against defects, but these warranties come with a major condition: the countertops must be installed according to their specific guidelines. Attempting a DIY installation or hiring an uncertified installer almost always voids the manufacturer’s warranty. That’s because improper handling, inadequate cabinet support, or poorly executed seams can cause stress fractures and other damage that isn’t related to a material flaw. When you work with a trusted firm for your kitchen or bathroom remodel, you’re not just paying for labor. You’re investing in peace of mind, knowing your countertops are installed correctly and your warranty remains fully intact.
How Long Does Installation Take?
One of the most common questions we get is about the project timeline, and for good reason. You want to know how long your kitchen or bathroom will be a work in progress. The good news is that the on-site installation of your quartz countertops is surprisingly quick. It’s the final, exciting step in a much larger process that includes design, templating, and fabrication. While creating your custom slabs can take a few weeks, the actual installation day is a well-orchestrated event that brings your vision to life in just a matter of hours.
The key to a fast and flawless installation is the extensive prep work that happens beforehand. Our team handles every detail, from taking precise digital measurements to fabricating the stone at our facility. This ensures that when we arrive at your home, every piece is perfectly cut and ready to be set in place. This meticulous approach is a core part of our process and is designed to minimize disruption to your daily life, getting you back to enjoying your beautiful new space as soon as possible.
A Typical Project Timeline
On installation day, you can expect the entire process to take several hours. Once our professional crew arrives with your fabricated quartz slabs, they get straight to work. They’ll carefully carry the heavy pieces into your home, set them on top of the cabinets, and make any final adjustments to ensure a perfect fit. The most skilled part of the job is creating nearly invisible seams where two pieces of quartz meet. Our installers use specialized tools and adhesives to join the slabs, then polish the area until it’s smooth and seamless. It’s the moment your kitchen remodel truly starts to feel complete.
What Can Affect the Timeline?
While the installation itself is efficient, the timeline depends heavily on having a properly prepared foundation. Before we can even think about setting the quartz, your cabinets must be perfectly level, flush, and securely anchored to the wall. If they aren’t, it can cause delays and potentially lead to cracked countertops down the road. Our team also ensures that extra wood supports, called blocking, are installed in corners, behind appliance openings like dishwashers, and anywhere a seam will be located. Complex designs or large overhangs might also require additional support structures, but these are all details we plan for well ahead of installation day to keep your bathroom remodeling project on track.
Caring for Your New Quartz Countertops
Congratulations on your beautiful new countertops! One of the best things about quartz is how durable and low-maintenance it is. Unlike natural stones that require sealing, keeping your quartz looking brand new is refreshingly simple. With just a few easy habits, you can ensure your surfaces remain a stunning centerpiece in your home for years to come. These straightforward tips will help you enjoy your gorgeous new kitchen remodel without any stress.
Simple Daily Cleaning
For everyday cleaning, you don’t need any fancy products. Your best tools are warm water, a soft cloth, and a drop of gentle dish soap. Simply wipe down the surface to clear away crumbs, spills, and dust. This simple action is usually all it takes to keep your quartz pristine. There’s no need to buy specialized cleaners, as basic soap and water effectively cut through grease and grime without harming the non-porous surface. It’s a straightforward routine that takes just a minute but makes a world of difference.
How to Prevent Damage
While quartz is known for its toughness, it’s not indestructible. A few preventative measures will keep it flawless. First, always protect your countertops from heat by using trivets or hot pads under pans and slow cookers. Sudden temperature changes can cause thermal shock and damage the resin. You should also avoid harsh chemicals. Steer clear of bleach, oven cleaners, and abrasive scouring powders, as they can dull the polished finish. Finally, always use a cutting board. While quartz is scratch-resistant, chopping directly on the surface can damage your knives and potentially leave marks.
Long-Term Care Tips
The key to long-term beauty is consistency. Clean up spills as soon as they happen, especially from acidic substances like wine, coffee, or lemon juice. Because quartz is non-porous, it resists staining better than most materials, but letting spills sit is never a good idea. The best part? Your quartz countertops never need to be sealed. This is a major advantage over materials like granite or marble, saving you time and money. By following these simple steps, your countertops will look just as amazing as the day our team installed them. If you ever have questions, our team is always here to help.
Related Articles
- Replace Countertops, Not Cabinets: A Complete Guide
- Countertop Replacement Quote Guide: Costs, Materials & Tips | King Remodeling
- Best Material for Kitchen Countertops: Compare Quartz, Granite & More | King Remodeling
Frequently Asked Questions
Is quartz really as durable as people say? What do I actually need to worry about? Yes, it’s one of the most resilient materials you can choose for a kitchen or bathroom. Because it’s engineered to be non-porous, you don’t have to worry about spills like coffee or wine causing permanent stains. It also holds up incredibly well against scratches and chipping from daily use. The main things to remember are to always use a trivet for hot pans to avoid thermal shock and to use a cutting board instead of chopping directly on the surface. With those simple habits, your quartz will look fantastic for years.
How long will my kitchen actually be unusable during the installation? This is a great question, and the answer is usually much shorter than people think. The on-site installation itself is typically completed in just one day, often in a matter of hours. The majority of the work, like creating a precise template and fabricating the stone to your kitchen’s exact specifications, happens at our workshop beforehand. So, while the entire process from measurement to completion takes time, the disruption in your home is minimal.
Why is there such a big price range for quartz, and is the expensive stuff worth it? The price of quartz is mainly influenced by the complexity of its design and the brand. Slabs with intricate, multi-layered veining that mimics natural marble, for example, require a more involved manufacturing process and tend to be at a higher price point than simpler, more uniform patterns. It’s not necessarily about one being more durable than the other; it’s about the aesthetic. A premium slab offers a specific, high-end look, but you can find a beautiful and incredibly durable option at every price level.
I’m pretty handy. Can I save money by installing quartz countertops myself? While it can be tempting to DIY, this is one job we always recommend leaving to professionals. First, quartz slabs are extremely heavy, and moving them without the right equipment can lead to serious injury or damage to your home. Second, most manufacturer warranties are voided if the countertops aren’t installed by a certified professional. Finally, skills like creating invisible seams and ensuring the cabinets are perfectly level are learned over years, and getting them wrong can ruin the final look and even cause the stone to crack over time.
I love the look of marble but worry about the upkeep. Is quartz a good alternative? Absolutely. In fact, this is one of the main reasons quartz has become so popular. Many designs are specifically created to capture the beautiful, soft veining of natural stones like Calacatta or Carrara marble. The key difference is that quartz is non-porous, so you get that elegant look without the constant worry. You never have to seal it, and you don’t have to panic if you spill red wine or lemon juice, making it a much more practical choice for a busy kitchen.