A kitchen island can be the single most effective way to solve your kitchen’s biggest frustrations, from cluttered countertops to inefficient workflow. When planned correctly, it’s far more than just extra counter space; it’s an organizational powerhouse that creates dedicated zones for specific tasks. The secret lies in treating it like a custom piece of high-performance furniture. By focusing on function first, you can create a central hub that makes cooking, cleaning, and entertaining feel effortless. In this guide, we’ll explore the key strategies you need to design kitchen island cabinets for maximum efficiency, from integrating smart storage to planning for appliances.
Key Takeaways
- Define your island’s job first: Before you decide on style, clarify your island’s main purpose. Whether it’s for meal prep, casual dining, or appliance storage, knowing its function will guide every other decision and ensure it truly works for you.
- Respect your kitchen’s space and workflow: The right island fits your room’s proportions and enhances its flow. Keep its size to about 10% of your kitchen’s square footage and leave at least 42 inches of clearance on all sides to avoid creating a beautiful but frustrating obstacle.
- Plan for the practical details: A great island is more than just cabinets and a countertop. Thoughtful additions like deep drawers for pots, strategically placed outlets for appliances, and proper task lighting are what make it the hardworking heart of your kitchen.
How Are Island Cabinets Different from Standard Cabinets?
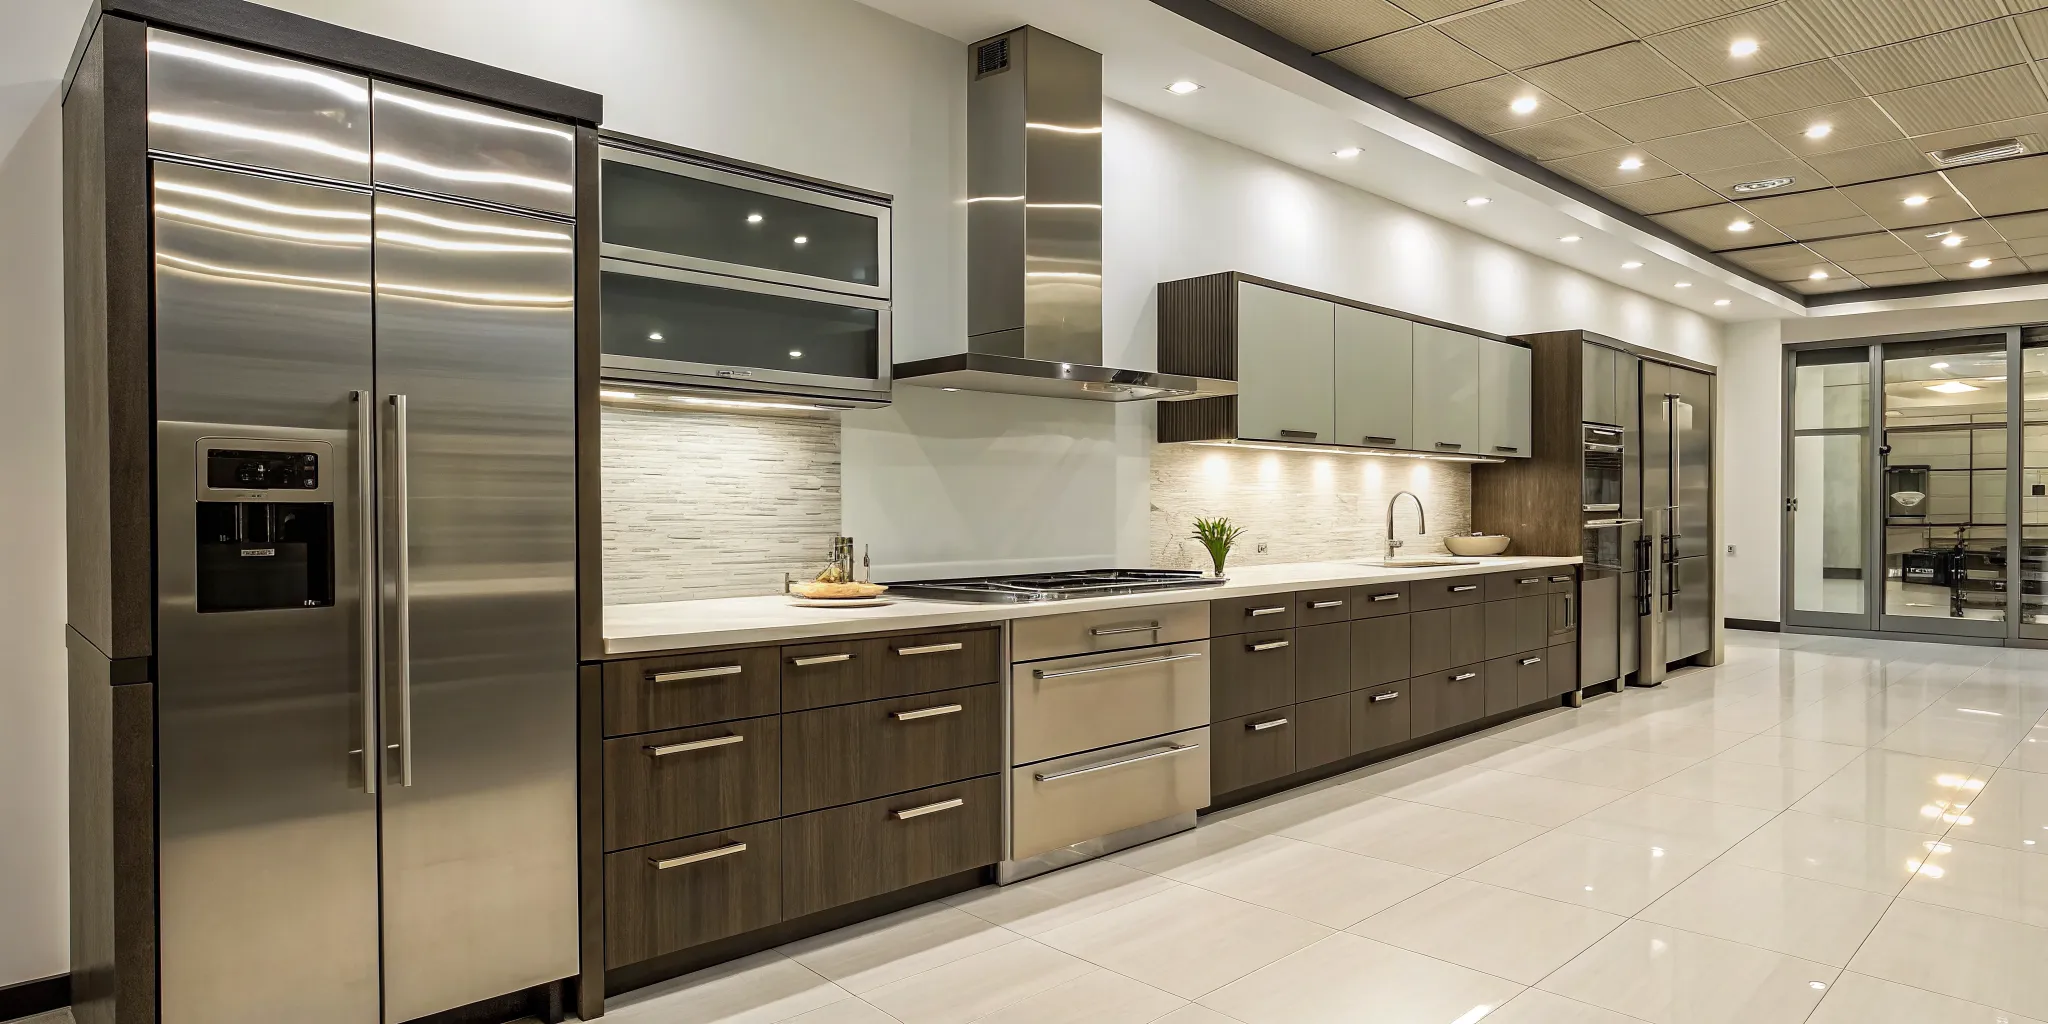
At first glance, a kitchen island might look like a set of standard cabinets dropped into the middle of the room, but they are designed quite differently. Unlike perimeter cabinets that are fixed to a wall, island cabinets are freestanding structures that need to be functional and beautiful from all angles. They are built to be the multi-purpose heart of your kitchen, handling everything from meal prep to homework. This requires a unique approach to their design, layout, and construction that sets them apart from their wall-bound counterparts.
Designing for multiple functions
Your standard wall cabinets have one primary job: storage. Island cabinets, however, are true multitaskers. A thoughtfully designed island can serve as your main food prep area, a casual dining spot for breakfast, a beverage station, and a central storage hub. The secret is to avoid trying to make it do everything. Instead, focus on two or three main functions that will genuinely improve your daily routine. This clarity will guide the entire design of your kitchen remodeling project, ensuring your island is a helpful centerpiece rather than a cluttered obstacle.
Planning for 360-degree access
Because an island is a freestanding feature, it has to be accessible and look polished from all sides. This means the back and side panels must be finished, unlike standard cabinets that have unfinished backs hidden against a wall. Just as important is the space around the island. We recommend leaving at least 42 inches of clearance on all sides. This creates comfortable traffic lanes, gives you enough room to fully open appliance doors, and allows more than one person to use the kitchen without bumping into each other. This careful spatial planning is key to a functional and inviting layout.
Integrating appliances and features
Islands are ideal for housing appliances and creating dedicated work zones. Many of our clients choose to build in features like a secondary prep sink, a dishwasher drawer, a microwave, or a wine fridge. This turns the island into a self-contained station for specific tasks. This level of integration is a major difference from standard cabinets and requires careful planning for plumbing, electrical, and ventilation right from the start. You can see how seamlessly these features can be included by looking through our featured projects, where islands often become the functional core of the entire kitchen.
How to Choose the Right Size for Your Kitchen Island
A kitchen island can be the heart of your home, but only if it’s the right size. Too big, and it will make your kitchen feel cramped and difficult to use. Too small, and it won’t provide the functional workspace or storage you need. The goal is to find that sweet spot where your island enhances your kitchen’s flow and beauty without getting in the way.
Sizing isn’t just about the island itself; it’s about how the island relates to the rest of your space. You need to consider your kitchen’s total square footage, its layout, and the pathways people will use to move around it. Getting these proportions right is the first step in a successful kitchen remodeling project. It ensures your new centerpiece is a helpful addition, not a frustrating obstacle. By planning carefully, you can create an island that feels like it was always meant to be there.
Finding the perfect proportions
A great rule of thumb is that your island should take up no more than 10% of your kitchen’s total square footage. For example, if your kitchen is 200 square feet, your island should be around 20 square feet. This guideline helps keep the island from visually and physically overwhelming the room. To be truly useful, an island also needs a certain amount of surface area. We generally recommend a minimum size of four feet long by two feet deep. This gives you enough space for simple meal prep without feeling too restrictive. Anything smaller might not be worth the space it occupies.
Working with your kitchen’s layout
The shape of your kitchen will heavily influence your island’s ideal size and placement. If your kitchen is less than 13 feet wide, adding an island of any significant size can make the space feel tight. For U-shaped layouts, you’ll want at least 10 feet of clearance between the two opposing sides to comfortably fit an island. It’s also critical that the island doesn’t block the natural workflow between your sink, stove, and refrigerator, often called the kitchen work triangle. You can see great examples of well-placed islands in our featured projects to get a better sense of how they fit into different layouts.
Ensuring proper traffic flow
Clearance is key to a functional kitchen. You need enough room to walk around the island, open appliance doors, and have more than one person working without bumping into each other. We recommend leaving at least 42 inches of open space on all sides of the island. This creates comfortable pathways for everyday traffic. If your island includes seating, you may want to increase that clearance to 48 inches on the seating side to give people enough room to pull out stools and walk behind someone who is seated. Balancing the island’s footprint with these essential walkways is what makes a kitchen feel effortless to use.
Smart Storage Ideas for Your Kitchen Island
A kitchen island is so much more than extra counter space; it’s the hardworking hub of your kitchen. To make the most of it, you need storage that is both clever and convenient. The right combination of drawers, shelves, and pull-outs can transform your island into an organizational powerhouse, keeping your countertops clear and your essential tools right where you need them. Thoughtful storage design makes daily tasks like cooking and cleaning feel effortless.
When planning your kitchen remodeling project, think about how you use your space. Do you need a spot for bulky pots and pans? A hidden place for trash and recycling? Or maybe a stylish way to display your favorite cookbooks? By customizing your island’s storage to fit your lifestyle, you create a kitchen that is not only beautiful but also perfectly functional for you and your family.
Add deep drawers for pots and pans
Tired of getting on your hands and knees to dig through a dark cabinet for the right pot lid? Deep, wide drawers are the perfect solution. Installing these in your kitchen island provides an accessible and organized home for bulky cookware, mixing bowls, and even small appliances. Unlike standard cabinets where items get lost in the back, full-extension drawers bring everything into view with a simple pull. This makes finding what you need quick and easy, streamlining your cooking process. It’s a simple change that makes a huge difference in your kitchen’s day-to-day usability.
Include pull-out organizers
Pull-out organizers are the secret to a clutter-free kitchen. These clever inserts turn narrow or awkward cabinet spaces into highly efficient storage. Imagine a vertical pull-out for spices and oils right next to your cooktop, or a slim organizer for baking sheets and cutting boards. You can also include tiered pull-outs for utensils or dividers for food storage containers. By giving every item a designated spot, you keep your tools organized and your countertops clear. Our design team can show you a variety of options in our San Diego showroom to help you customize your island for maximum efficiency.
Hide trash bins and wine storage
Nothing disrupts the look of a beautiful new kitchen like a freestanding trash can. Integrating your trash and recycling bins into your island cabinetry keeps them completely out of sight. A double pull-out bin system makes sorting waste simple and keeps odors contained. This feature is one of the most requested in our custom kitchen designs. On a more luxurious note, you can also build in wine storage. Whether it’s a simple lattice rack for a few of your favorite bottles or a dedicated beverage cooler, incorporating wine storage adds a sophisticated touch and makes entertaining a breeze.
Use open shelving for display
While closed cabinets are great for hiding clutter, open shelving adds personality and visual interest to your kitchen island. Adding a set of shelves to the end of your island creates the perfect spot to display cookbooks, decorative pottery, or your favorite serving dishes. This breaks up the visual bulk of solid cabinetry and makes the island feel more like a custom piece of furniture. It’s a great way to inject your personal style into the heart of your home. Open shelving also provides easy-to-grab access for everyday items, blending beautiful form with practical function.
What Appliances Can You Build into a Kitchen Island?
Your kitchen island can be much more than extra counter space. By integrating appliances, you can create dedicated zones for prepping, cooking, and entertaining, all while keeping your main countertops uncluttered. From a secondary sink for washing vegetables to a wine cooler for hosting guests, the right appliances transform your island into the hardest-working feature in your kitchen. The key is careful planning to ensure plumbing and electrical are perfectly placed to support your vision.
Prep sinks and dishwashers
A prep sink is one of the most popular additions to a kitchen island. It creates a convenient secondary station for rinsing produce or filling pots without getting in the way of the main cleanup zone. For even greater efficiency, consider placing a compact dishwasher or a dishwasher drawer right next to it. This setup is perfect for cleaning barware after a party or handling small loads throughout the day, preventing dishes from piling up. Planning for the necessary plumbing and electrical lines early in the design phase is essential for a seamless installation, turning your island into a highly functional prep and cleanup hub.
Beverage centers and wine coolers
If you love to entertain, a beverage center or wine cooler in your island is a brilliant move. It creates a designated drink station, allowing guests to help themselves without wandering into your primary cooking area. An under-counter beverage fridge keeps sodas and beer perfectly chilled, while a dedicated wine cooler maintains the ideal temperature for your collection. Integrating these features not only frees up significant space in your main refrigerator but also adds a touch of luxury to your kitchen design. It’s a simple way to make hosting feel effortless and keep your kitchen organized during gatherings.
Microwave and warming drawers
Getting the microwave off the counter is a common goal, and the island is the perfect place to hide it. A microwave drawer is a sleek, ergonomic alternative to a standard model. It slides out smoothly, making it easier and safer to access hot dishes. Another fantastic appliance for your island is a warming drawer. While it might seem like a luxury, it’s incredibly practical for keeping cooked food at the perfect temperature until you’re ready to serve. It’s also great for warming plates or proofing bread dough. You can explore these built-in options and see how they fit into a layout at our San Diego showroom.
How to Select the Right Style and Materials
Choosing the style and materials for your island is where your kitchen’s personality truly comes to life. This is your chance to create a functional centerpiece that reflects your taste, whether you want it to blend seamlessly with your existing design or stand out as a bold statement. The key is to find a balance between aesthetics, durability, and your daily routine. Think about how you’ll use the island. Is it a high-traffic prep zone for family meals, a casual spot for homework, or an elegant serving station for entertaining?
Your answers will guide your choices for everything from the cabinet door style to the countertop surface. Don’t feel like you have to make these decisions alone. Seeing and touching materials in person can make all the difference. Visiting a design showroom allows you to compare textures, test durability, and see how different colors and finishes look in real-world lighting. It’s the best way to feel confident in your selections before construction begins. Our team can guide you through our curated collection at the King Remodeling Showroom to help you find the perfect combination for your home.
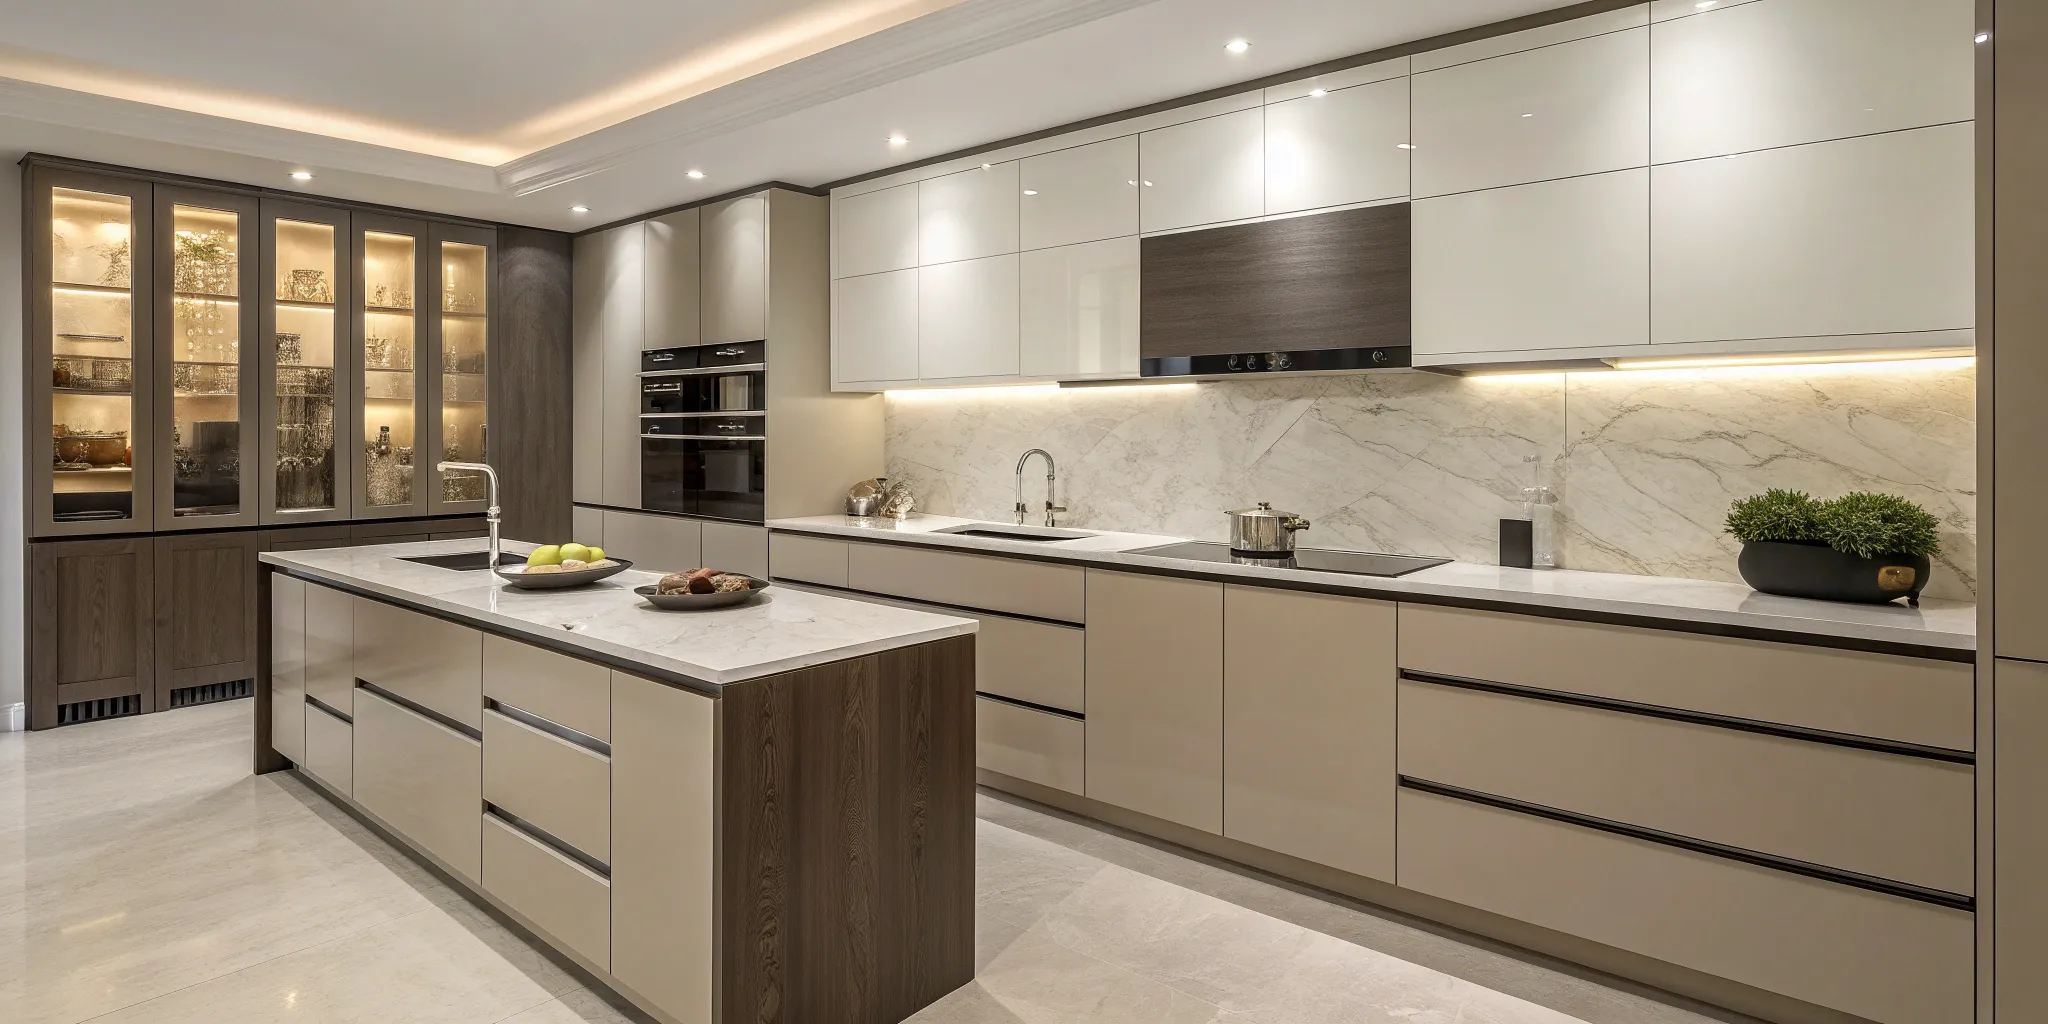
Match or contrast your existing cabinets
One of the first style decisions you’ll make is whether your island cabinets should match or contrast with your main perimeter cabinets. There’s no right or wrong answer; it just depends on the look you want to achieve. A matching island creates a cohesive, uniform feel that makes the kitchen look spacious and integrated. This is a classic approach that works well in almost any design.
On the other hand, a contrasting island can serve as a stunning focal point. You don’t have to match your island materials exactly. Think of a warm wood island in an all-white kitchen or a deep navy island that anchors a room with light gray cabinets. This “furniture-style” approach can add depth, character, and a custom feel to your space. You can see beautiful examples of both styles in our featured projects.
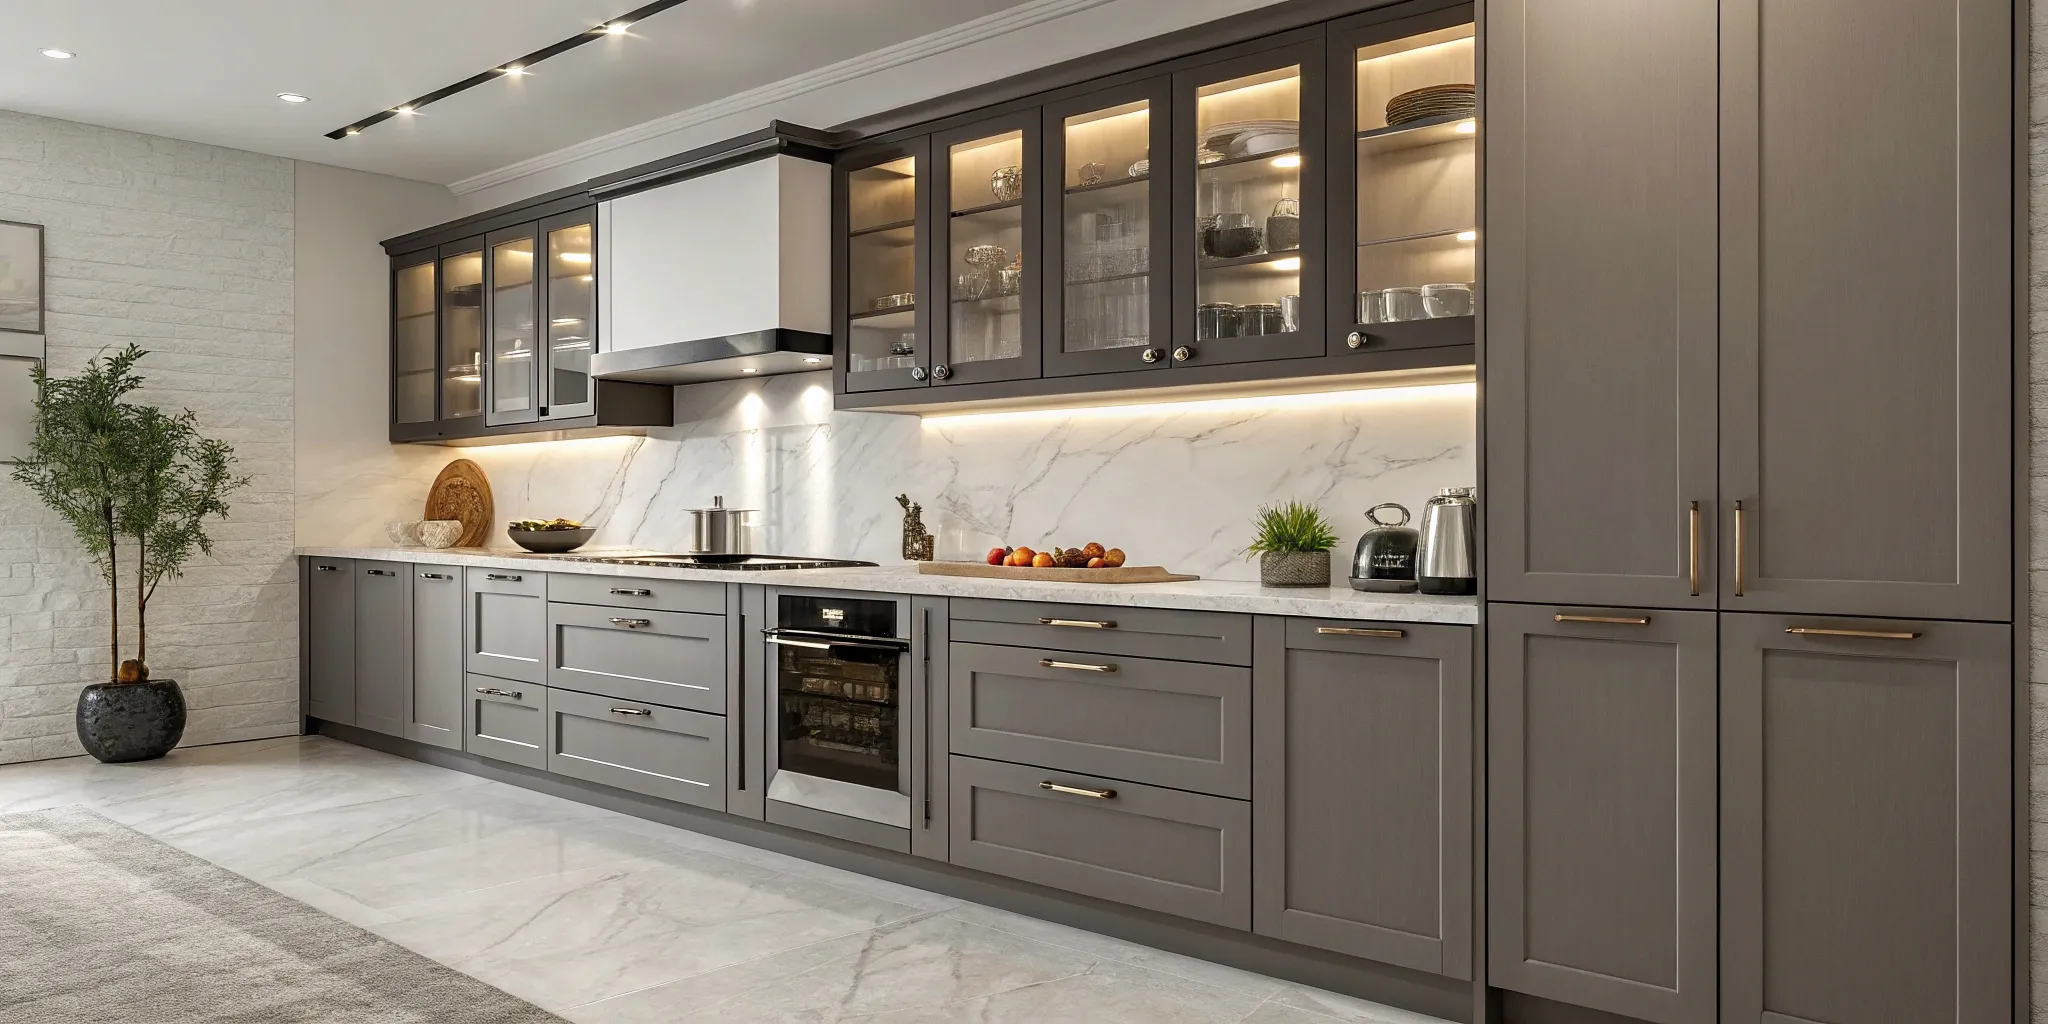
Explore popular door styles and finishes
The door style of your island cabinets sets the tone for your entire kitchen. By far, the most popular choice is the Shaker style. With its simple, clean lines (a flat center panel with a four-piece frame), it’s incredibly versatile and fits beautifully in modern, transitional, and even traditional kitchens. For a more contemporary look, you might opt for flat-panel doors, which are sleek and minimalist. If your style leans traditional, raised-panel doors offer more detail and dimension.
Once you’ve picked a style, you can explore finishes. A painted finish offers endless color possibilities, while a wood stain highlights the natural grain and texture of the material. Our kitchen remodeling team can walk you through all the options to find the perfect fit.
Consider durability and maintenance
Your kitchen island is a workhorse, so its surfaces need to be tough. When selecting a countertop, think about how it will stand up to spills, heat, and daily wear. Engineered quartz is a popular choice because it’s non-porous, scratch-resistant, and requires virtually no maintenance. Natural stones like granite and marble are beautiful and durable but typically need to be sealed periodically to prevent staining.
The cabinet finish is just as important. A high-quality paint or conversion varnish will resist chipping and scuffs from stray kicks, chairs, and cookware. The island is often the most-used part of a kitchen, so investing in durable materials from the start will keep it looking great for years to come.
Mix and match colors and materials
Don’t be afraid to get creative by mixing colors and materials. A two-toned kitchen is a fantastic way to add visual interest. You can pair classic white perimeter cabinets with an island in a darker color like espresso, navy blue, or a sophisticated shade of gray. This creates a beautiful contrast that draws the eye.
You can also mix your surface materials. For example, you could use a durable quartz on your main countertops and place a warm butcher block on the island for a dedicated chopping station. Combining different flooring and surfaces helps define zones in your kitchen and adds a layered, designer touch. The key is to ensure the different elements complement each other and contribute to a cohesive overall look.
Key Design Features for a Functional Island
A truly great kitchen island is more than just a block of cabinets with a countertop. It’s the thoughtful details that transform it from a simple workspace into the hardworking heart of your home. Integrating the right features from the start ensures your island is not only beautiful but also incredibly practical for cooking, entertaining, and everyday life. From comfortable seating to perfectly placed lighting, these are the elements that make all the difference.
Planning these features is a core part of our design-build process, where we map out every electrical, plumbing, and functional detail before construction begins. This foresight prevents costly changes later and guarantees your finished island works exactly how you need it to. Let’s look at the key features that will make your island both functional and inviting.
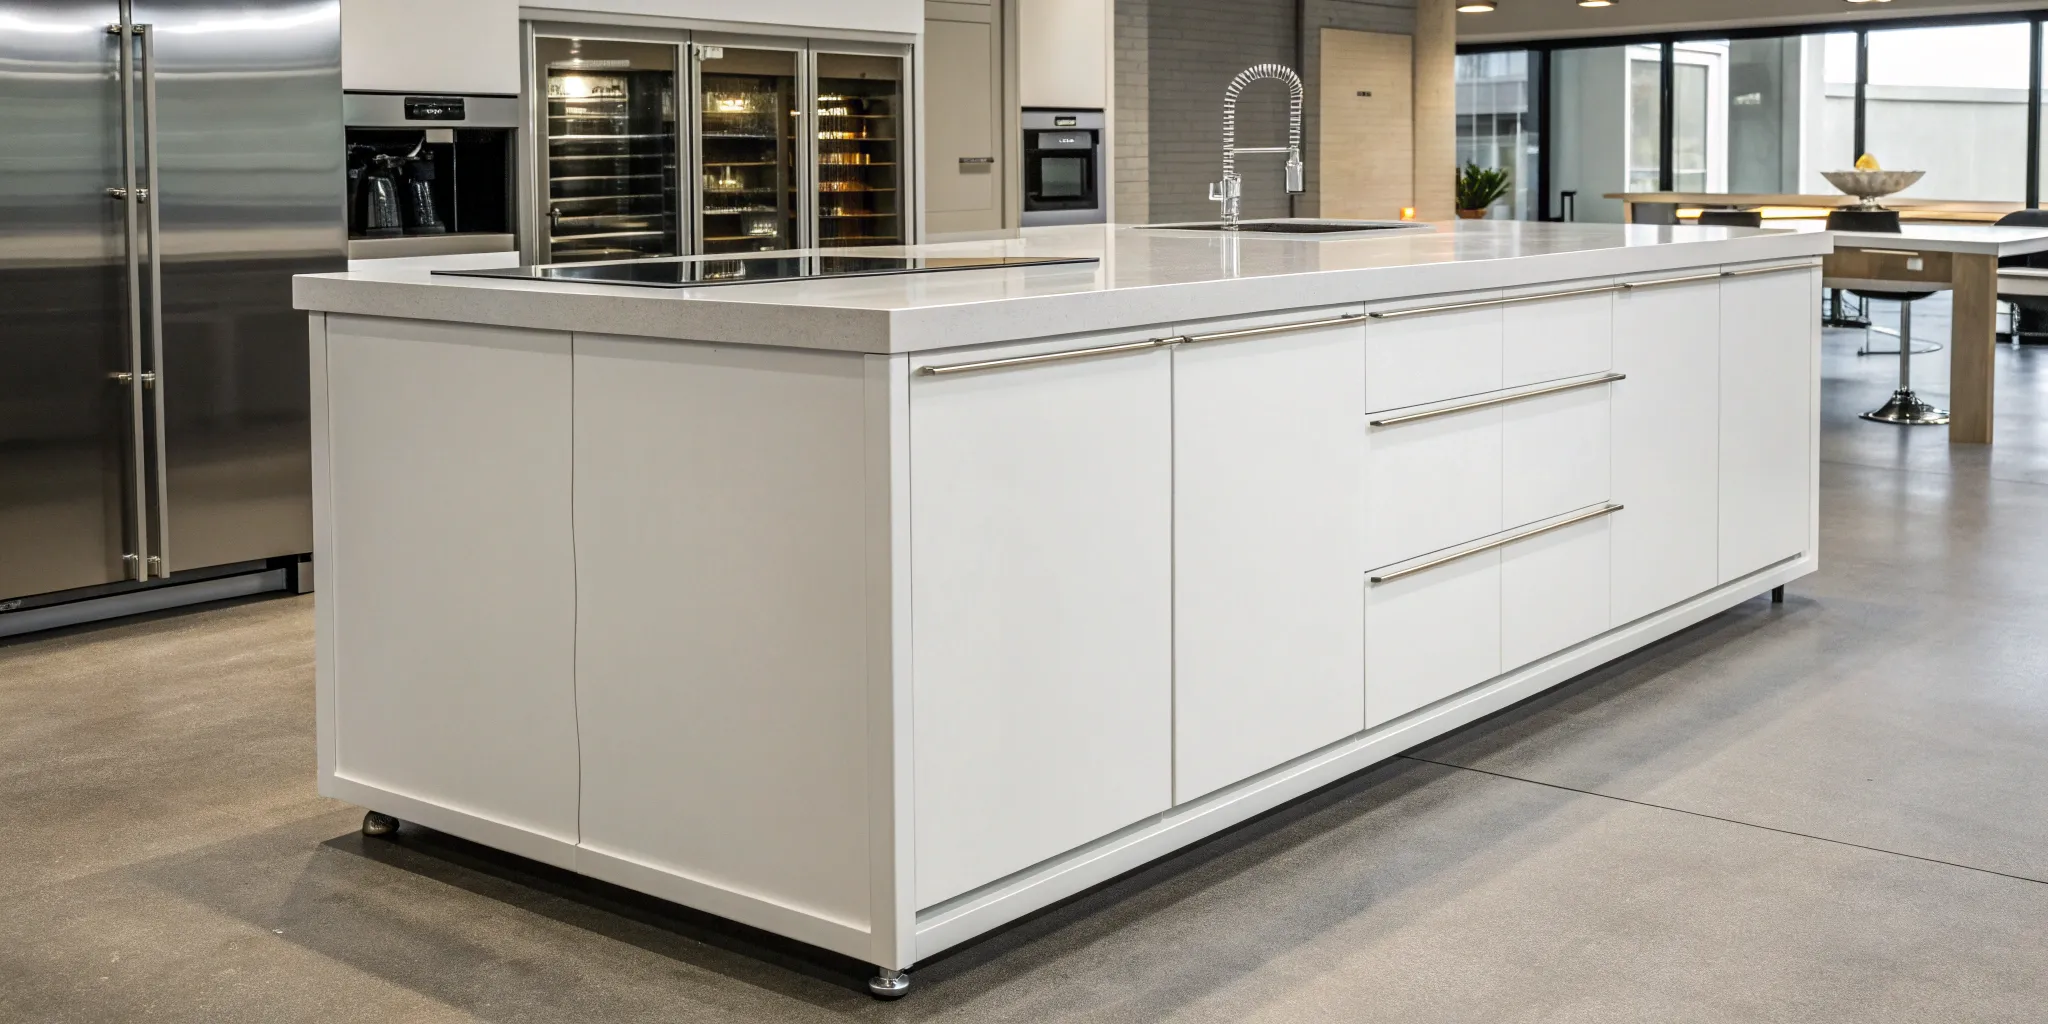
Plan for seating with a counter overhang
If you envision your island as a casual spot for breakfast, homework, or chatting with guests while you cook, comfortable seating is a must. The key is a countertop overhang that provides enough legroom. A good rule of thumb is to allow at least 24 inches of width for each seat to avoid bumping elbows. For depth, a 12 to 18-inch overhang gives you plenty of space to tuck your knees and sit comfortably. This simple addition turns your island into a social hub, making your kitchen remodel perfect for connection and conversation.
Place electrical outlets strategically
In a modern kitchen, accessible power is essential. Integrating electrical outlets directly into your island is a game-changer for using small appliances like stand mixers, blenders, or coffee makers without stretching cords across walkways. They’re also perfect for charging laptops and phones. We recommend placing outlets on the sides of the island or using pop-up outlets that sit flush with the countertop for a clean look. If you plan to include major appliances, our team ensures the proper electrical hookups are planned from day one, giving you a seamless and safe setup.
Map out plumbing for sinks
Adding a prep sink or even a primary sink and dishwasher to your island can seriously improve your kitchen’s workflow. However, it requires careful planning to run water supply and drain lines correctly. This is a job for professionals, as it involves routing plumbing through the floor and into the island cabinet structure. During the design phase, we map out the exact location to ensure it’s ergonomic and doesn’t interfere with storage or seating. You can see beautiful examples of islands with integrated sinks in our featured projects.
Integrate task and accent lighting
The right lighting makes your island more functional and sets the perfect mood. A combination of task and accent lighting works best. Pendant lights are a popular choice, providing focused light for chopping and prep work while also adding a major style statement. We always recommend installing them on a dimmer switch so you can adjust the brightness, from bright light for cooking to a soft glow for dining or entertaining. Visiting our San Diego showroom can help you visualize how different lighting fixtures and finishes will look together in your space.
How to Plan an Efficient Island Layout
A beautiful kitchen island is great, but a functional one is life-changing. The layout is the foundation of your island’s success, determining how easily you can move, cook, and entertain in your space. A well-placed island streamlines your workflow and creates a natural hub for activity. A poorly planned one, however, can become a major obstacle, creating traffic jams and making simple tasks feel clumsy.
Planning an efficient layout involves more than just dropping a rectangle in the middle of your room. It requires thinking about how you live and cook every single day. Do you need a prep station? A spot for the kids to do homework? A casual dining area? By mapping out clear pathways, dedicated work zones, and comfortable clearances, you ensure your new island works for you, not against you. A thoughtful layout is a key part of any successful kitchen remodeling project, transforming your space into one that’s as practical as it is beautiful.
Perfecting your kitchen work triangle
The “kitchen work triangle” is a classic design principle that connects your three main work areas: the sink, the stove, and the refrigerator. The goal is to create a clear, unobstructed path between these three points to make cooking and cleaning as efficient as possible. Your kitchen island should never block this path. Instead, it should work alongside it, either by housing one of the triangle’s points (like a prep sink or cooktop) or by sitting outside the main workflow. A well-designed layout ensures you can move seamlessly from rinsing vegetables at the sink to chopping them on the island and then to cooking them on the stove.
Creating dedicated work zones
Think of your island as a multi-purpose workstation. By planning for different activities, you can create dedicated zones that serve specific functions. For example, one end could be a designated food prep area with a cutting board and easy access to a trash pull-out. The other end might feature an overhang for seating, creating a casual spot for breakfast or coffee. Common features to consider include storage cabinets for cookware, a small sink for food prep, or stools for casual meals. You can see great examples of this in our featured projects, where islands are tailored to fit each homeowner’s unique lifestyle.
Focusing on ergonomics and access
Ergonomics is all about designing for comfort and ease of use. In the kitchen, this means leaving enough space for people to move around and work without feeling cramped. As a rule of thumb, you should leave at least 42 inches of clearance on all sides of the island. This gives you enough room to open appliance doors, walk past someone, and work comfortably. If you’re planning for seating, allow at least 24 inches of width for each person. This ensures everyone has enough elbow room to sit and eat without bumping into their neighbor. Following our design-build process helps guarantee these details are handled correctly from the start.
Common Island Design Mistakes to Avoid
A kitchen island can be the heart of your home, but a few design missteps can turn it into a daily frustration. Planning ahead helps you create a feature that is both beautiful and perfectly suited to your space. By thinking through scale, workflow, and function from the start, you can ensure your island works for you, not against you. Let’s walk through the most common mistakes we see and how you can easily sidestep them.
Getting the size and scale wrong
One of the trickiest parts of island design is getting the proportions just right. An island that’s too large can overwhelm the room and make it feel cramped, while one that’s too small won’t offer much practical use. A good guideline is to keep your island’s footprint to no more than 10% of your kitchen’s total square footage. To be truly functional, it should be at least four feet long and two feet deep. If your kitchen is less than 13 feet wide, adding an island might disrupt the flow more than it helps. A well-planned kitchen remodeling project always starts with a layout that respects the room’s natural scale.
Obstructing your kitchen’s workflow
Your island should be a bridge, not a barrier. A common mistake is placing it in a way that blocks the natural path between your sink, stove, and refrigerator, often called the kitchen work triangle. This forces you to take extra steps around the island every time you cook, which can quickly become annoying. We recommend leaving at least 36 to 42 inches of clearance on all sides of the island. This gives you enough room to move freely, open appliance doors, and work alongside someone without bumping elbows. Following a clear design and build process ensures your new layout is efficient and intuitive.
Forgetting smart storage solutions
An island is a golden opportunity to add much-needed storage, so don’t let that space go to waste. Simply filling it with standard, empty cabinets is a missed chance for better organization. Think about how you use your kitchen and what you need to store. Deep drawers are perfect for heavy pots and pans, while narrow pull-out cabinets can neatly house spices, oils, or baking sheets. You can also integrate hidden trash and recycling bins, a wine fridge, or even open shelving for your favorite cookbooks. Looking through featured projects can give you great ideas for clever and customized storage.
Overlooking plumbing and electrical needs
Functionality goes beyond storage. If you dream of having a prep sink, dishwasher, or beverage center in your island, you’ll need to plan for plumbing from the very beginning. The same goes for electricity. Outlets are essential for using small appliances like stand mixers or blenders, and they’re also handy for charging phones and laptops. Forgetting to map out these utilities early on can lead to costly changes or a less functional island. It’s always best to work with a professional team that can handle the technical requirements safely and ensure everything is up to code. If you have questions about what’s possible in your space, it’s a good idea to consult an expert.
What’s the Cost of a New Kitchen Island?
One of the first questions homeowners ask when planning a kitchen remodel is, “How much will a new island cost?” It’s a great question, because the island is often the centerpiece of the room. The truth is, the price can vary quite a bit. While a simple, small-scale island might start around $3,000, a large, feature-rich island with premium materials can cost upwards of $35,000. Most projects we see in San Diego land somewhere in the middle.
Think of it less as a single price and more as a collection of choices. The final cost depends entirely on what you want your island to do. Is it a simple prep space, or is it the command center of your kitchen with a sink, dishwasher, and seating for four? The size, materials, appliances, and level of custom work all play a role in the final number. Understanding these components is the first step toward designing an island that fits your budget and your lifestyle perfectly.
What influences the final price?
Several key factors determine your island’s final price tag. Size is the most obvious one; a compact prep station will naturally cost less than a sprawling, 10-foot island designed for dining and cooking. Materials are another major driver. Your choice of countertop, from durable quartz to luxurious marble, will have a significant impact, as will the wood species and finish you select for the cabinetry. Finally, features and complexity add to the cost. Integrating a prep sink, dishwasher, or wine fridge requires plumbing and electrical work, while custom paneling and decorative details increase the labor involved.
Custom vs. semi-custom cabinets
When it comes to cabinetry, you’ll generally choose between custom and semi-custom options. Custom cabinets are built from scratch to your exact specifications, offering unlimited design possibilities and a perfect fit for your space. This is the best route for unique layouts or very specific storage needs. Semi-custom cabinets provide a fantastic balance of personalization and value. They start with standard cabinet sizes but allow for modifications in dimensions, finishes, and styles. This gives you a tailored look without the full price tag of a completely custom build, making it a popular choice for many kitchen renovations.
The value of professional installation
While it might be tempting to cut costs on installation, this is one area where professional expertise is worth every penny. A kitchen island isn’t just a piece of furniture; it’s a permanent fixture that often houses plumbing and electrical wiring. Professional installation ensures your island is perfectly level, securely anchored to the floor, and that all appliances and utilities are connected safely and correctly. Following a clear design-build process guarantees that the team installing your island understands the full plan, preventing costly mistakes and ensuring your new centerpiece functions flawlessly for years to come.
Related Articles
Frequently Asked Questions
How much space do I really need to comfortably fit a kitchen island? The most important measurement isn’t the island itself, but the space around it. We recommend leaving at least 42 inches of clearance on all sides. This creates comfortable walkways, allows you to fully open appliance doors without hitting anything, and lets two people work in the kitchen without constantly bumping into each other. If you plan to have seating, you may want to increase that to 48 inches on that side so people can walk behind someone who is seated.
Can I add an island to my kitchen later, or does it have to be part of a full remodel? You can certainly add an island to an existing kitchen, but it comes with a few challenges. The biggest hurdles are matching your current cabinetry and flooring, which can be difficult if they are older. It’s also much more complex and costly to run new plumbing for a sink or electrical for outlets after the fact. For these reasons, incorporating an island into a full kitchen remodel is usually the most seamless and cost-effective approach.
What’s more important for an island: storage or seating? This completely depends on your lifestyle and what your kitchen currently lacks. If your main frustration is clutter and a lack of cabinet space, then maximizing storage with deep drawers and pull-outs should be your priority. However, if you dream of a casual spot for your kids to do homework or for guests to gather while you cook, then seating is essential. A great design often finds a smart way to include both, but it helps to know your top priority from the start.
Does my island countertop have to match my other countertops? Not at all. In fact, choosing a different material for your island is a fantastic way to turn it into a statement piece. A contrasting countertop adds visual interest and character to the entire room. You could pair a durable quartz on your main counters with a warm butcher block on the island, or use a simple, solid surface along the perimeter to let a beautifully veined marble on the island stand out. The key is to ensure the colors and textures complement each other.
How do I make sure my island lighting is right? It seems complicated. Lighting can feel tricky, but it doesn’t have to be. The best approach is to layer your lighting. For task lighting directly over the island, a pair or trio of pendant lights works beautifully and adds a major style element. Just make sure they are hung high enough so they don’t block sightlines across the room. We always recommend putting them on a dimmer switch, which gives you the flexibility to have bright light for food prep and a soft glow for entertaining.