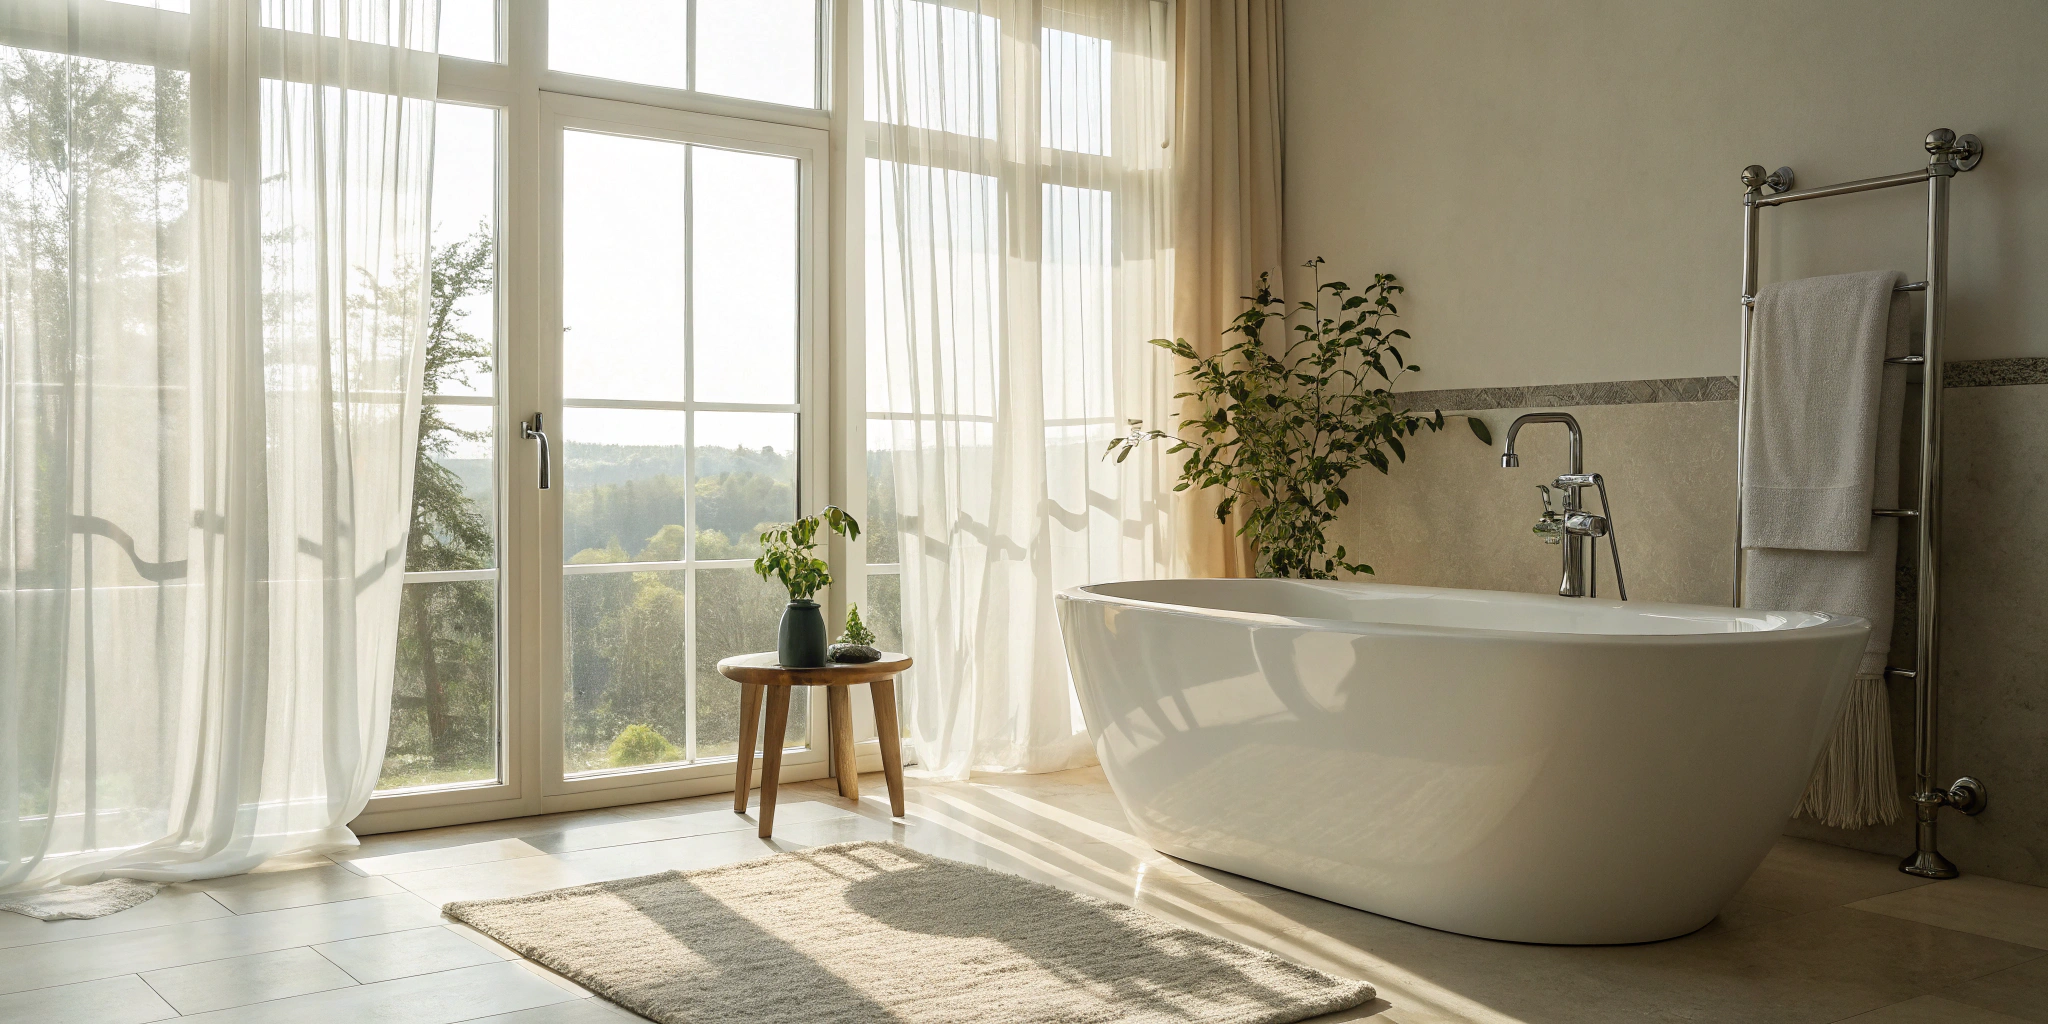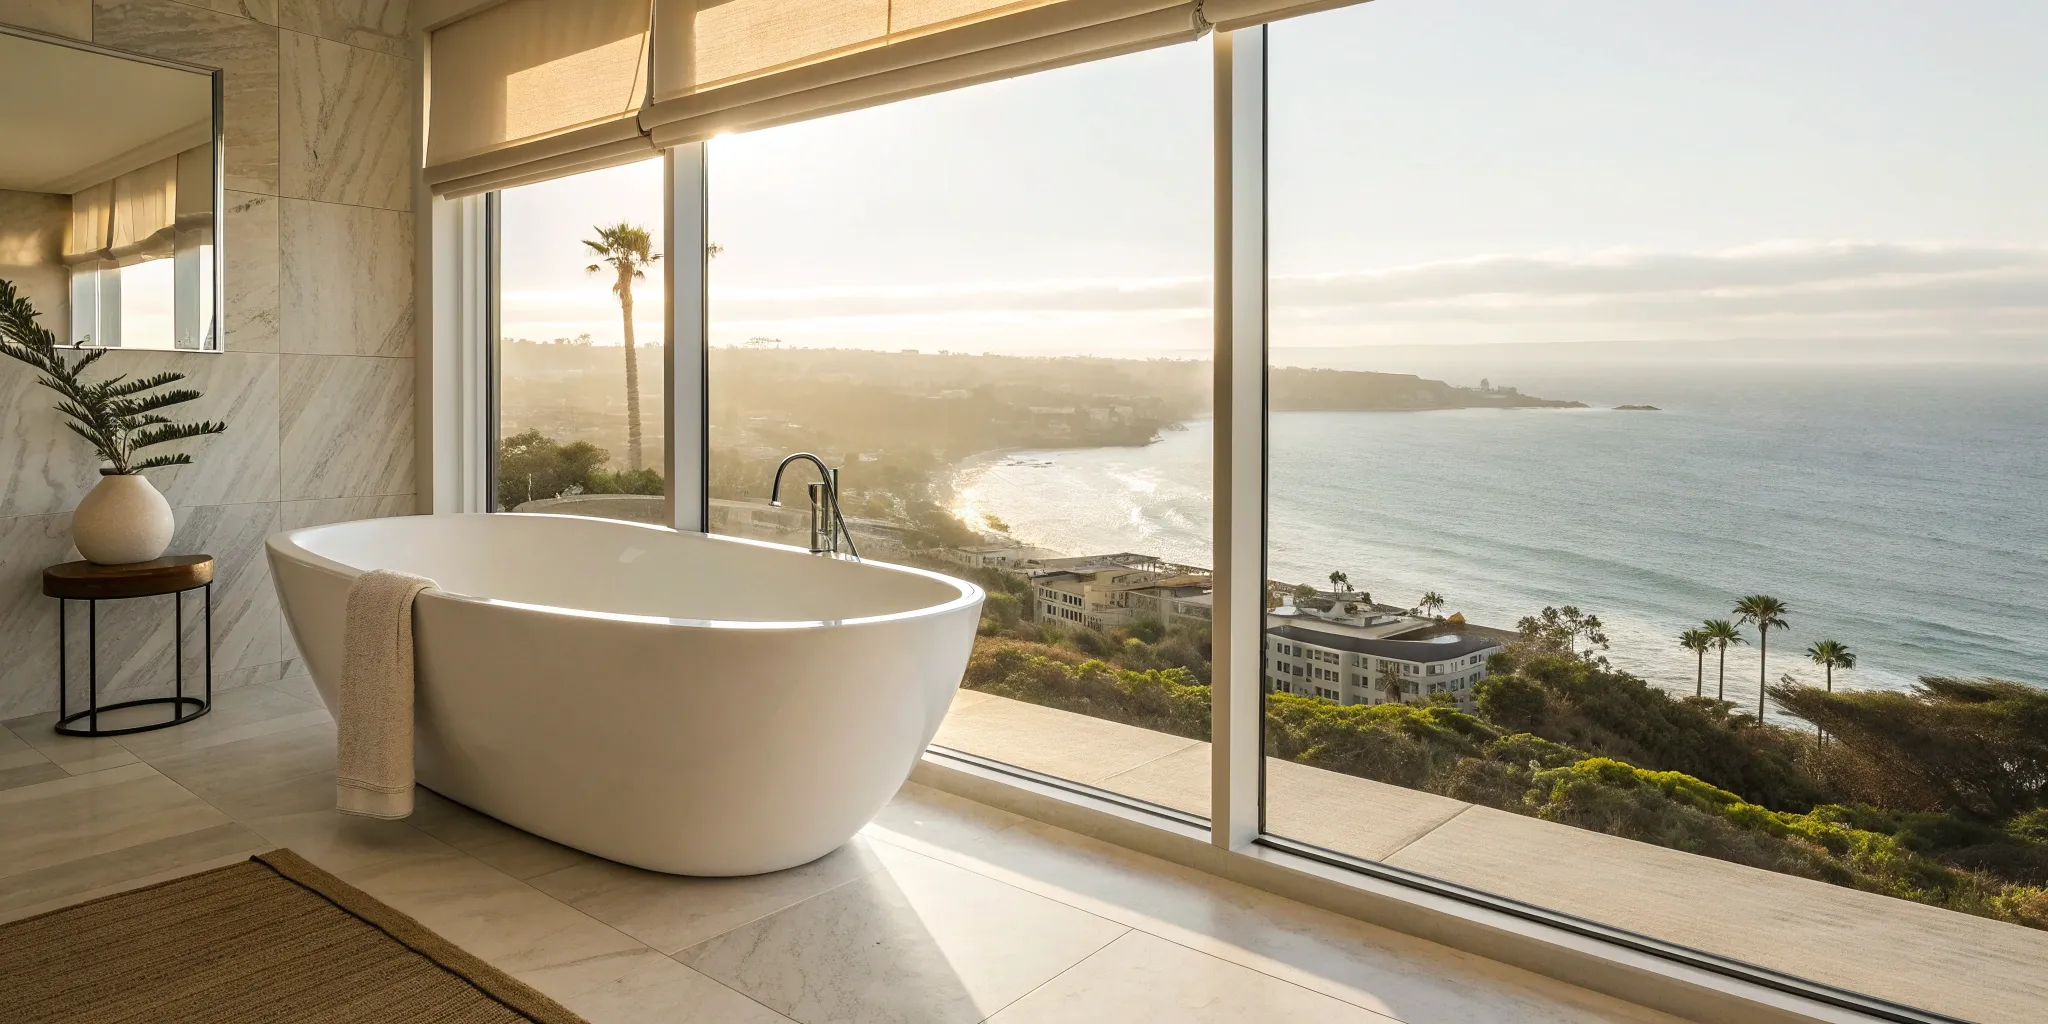
A freestanding tub can completely change the character of a bathroom, turning it from a basic utility room into a luxurious escape. Unlike an alcove tub designed to blend in, a freestanding model is meant to be seen. It acts as a piece of sculpture, immediately drawing the eye and setting the tone for the entire design. When you replace an alcove tub with a freestanding one, you’re not just upgrading a fixture; you’re commissioning a focal point. This single element anchors your design, making the whole room feel more intentional. Let’s explore how to plan for this beautiful upgrade, from choosing the right style to styling the space around it.
Key Takeaways
- Treat it as a construction project, not just a fixture swap: Replacing an alcove tub with a freestanding model means moving plumbing through the floor and reinforcing joists to support the extra weight, so plan accordingly.
- Give your tub room to breathe: Before you fall in love with a specific model, measure your space to ensure at least a foot of clearance on all sides. This is essential for both the high-end look and for practical cleaning.
- Hire a pro to avoid costly mistakes: The technical work of relocating drains, leveling the tub perfectly, and ensuring a watertight seal is critical. A professional installation protects your home from leaks and structural damage down the road.
Why Make the Switch to a Freestanding Tub?
If you’re planning a bathroom remodel, the tub is one of the biggest decisions you’ll make. For years, the built-in alcove tub-and-shower combo has been the standard, but more San Diego homeowners are choosing to replace it with a freestanding tub. Why the change? A freestanding tub does more than just hold water; it completely transforms the look and feel of your space, turning a purely functional room into a personal retreat.
This simple switch can redefine your bathroom’s entire layout and style. Instead of being tucked away, the tub becomes a deliberate design statement. It signals a shift from a room of necessity to a space designed for relaxation and comfort. Whether you’re aiming for a modern spa-like atmosphere or a classic, elegant vibe, a freestanding tub provides a foundation for a truly custom bathroom remodel. It’s an investment in your home’s value and your daily well-being, offering a beautiful escape right where you need it most.
Create a Beautiful Focal Point
Think of a freestanding tub as a piece of sculpture for your bathroom. Unlike an alcove tub, which is designed to blend into the walls, a freestanding tub is meant to be seen. It immediately draws the eye, acting as the room’s centerpiece and setting the tone for the entire design. As one designer noted, “Freestanding tubs look fancy and make your bathroom stand out.” This single element can anchor your design, whether you choose a vintage-inspired clawfoot or a sleek, modern basin. By pulling the tub away from the wall, you create a dynamic and luxurious focal point that makes the whole room feel more intentional and thoughtfully designed. You can see how different tub styles create stunning centerpieces in our project gallery.
Make Your Bathroom Feel More Spacious
It might seem counterintuitive, but placing a large object in the middle of a room can actually make it feel bigger. Because a freestanding tub has space around it, more of your flooring is visible, creating an illusion of openness. This simple visual trick prevents the room from feeling boxed in, which is a common issue with wall-to-wall alcove tubs. The airiness a freestanding tub provides can be a game-changer, especially in bathrooms that aren’t exceptionally large. It allows light to move more freely and makes the layout feel less rigid. By lifting the tub off the floor, even just slightly on feet, you enhance that sense of space and give your bathroom a lighter, more inviting atmosphere.
Turn Your Bathroom into a Personal Spa
Beyond its visual appeal, a freestanding tub is all about the experience. The deeper, more ergonomic designs are made for long, comfortable soaks, inviting you to slow down and relax. It’s your ticket to creating an “at-home spa experience.” Imagine ending your day in a deep soaking tub, perhaps with jets for a true hydrotherapy session. This is the kind of everyday luxury that transforms a house into a home. When you visit our San Diego showroom, you can explore different styles and materials to find the perfect tub to serve as the heart of your personal sanctuary. It’s not just a bath; it’s a destination for unwinding.
What to Know Before You Start
Swapping an alcove tub for a freestanding model is an exciting upgrade, but it’s not a simple one-for-one exchange. A little prep work upfront will ensure your project goes smoothly and you end up with a bathroom that’s as functional as it is beautiful. Before you start browsing for that perfect soaking tub, let’s walk through the four most important things you need to consider. Getting these details right from the beginning will save you from unexpected costs and headaches down the road. Think of this as your pre-remodel checklist to set your project up for success.
Measure Your Space and Clearance
A freestanding tub makes a statement, and it needs room to breathe. Unlike an alcove tub tucked against three walls, a freestanding model requires open space on all sides to create that airy, luxurious feel. As a general rule, you should plan for at least a foot of clearance around the entire tub. This isn’t just for looks—it’s practical for cleaning and moving around the bathroom comfortably. Before you get too attached to a specific model, grab a tape measure and map out exactly where it will go. This simple step will help you choose a tub that fits your room’s scale and makes your bathroom remodeling project feel balanced and intentional.
Check Your Floor’s Structural Support
This is a big one, and it’s all about safety. Freestanding tubs, especially cast iron or natural stone models, are incredibly heavy on their own. Now, add the weight of water and a person, and you’re putting a significant load on your floor joists. You need to be certain your floor can handle the weight. If you live in an older San Diego home or your bathroom is on an upper level, you may need to add new support structures underneath. This isn’t a DIY guess—it’s a critical step that often requires a professional assessment to prevent serious structural damage. It’s one of the key details our team always verifies at the start of a project.
Set a Realistic Budget and Timeline
The price tag on the tub itself is just one piece of the puzzle. To create a realistic budget, you need to factor in all the associated costs. This includes the tub filler (which can be surprisingly expensive), new plumbing supplies, and labor for demolition, installation, and finishing work like tiling. A full tub replacement is more than a weekend project, so it’s also important to plan your timeline. Our Process involves creating a detailed, fixed-price proposal so you know exactly what to expect for every part of the job, from material costs to the final installation schedule. This clarity helps you plan without worrying about surprise expenses.
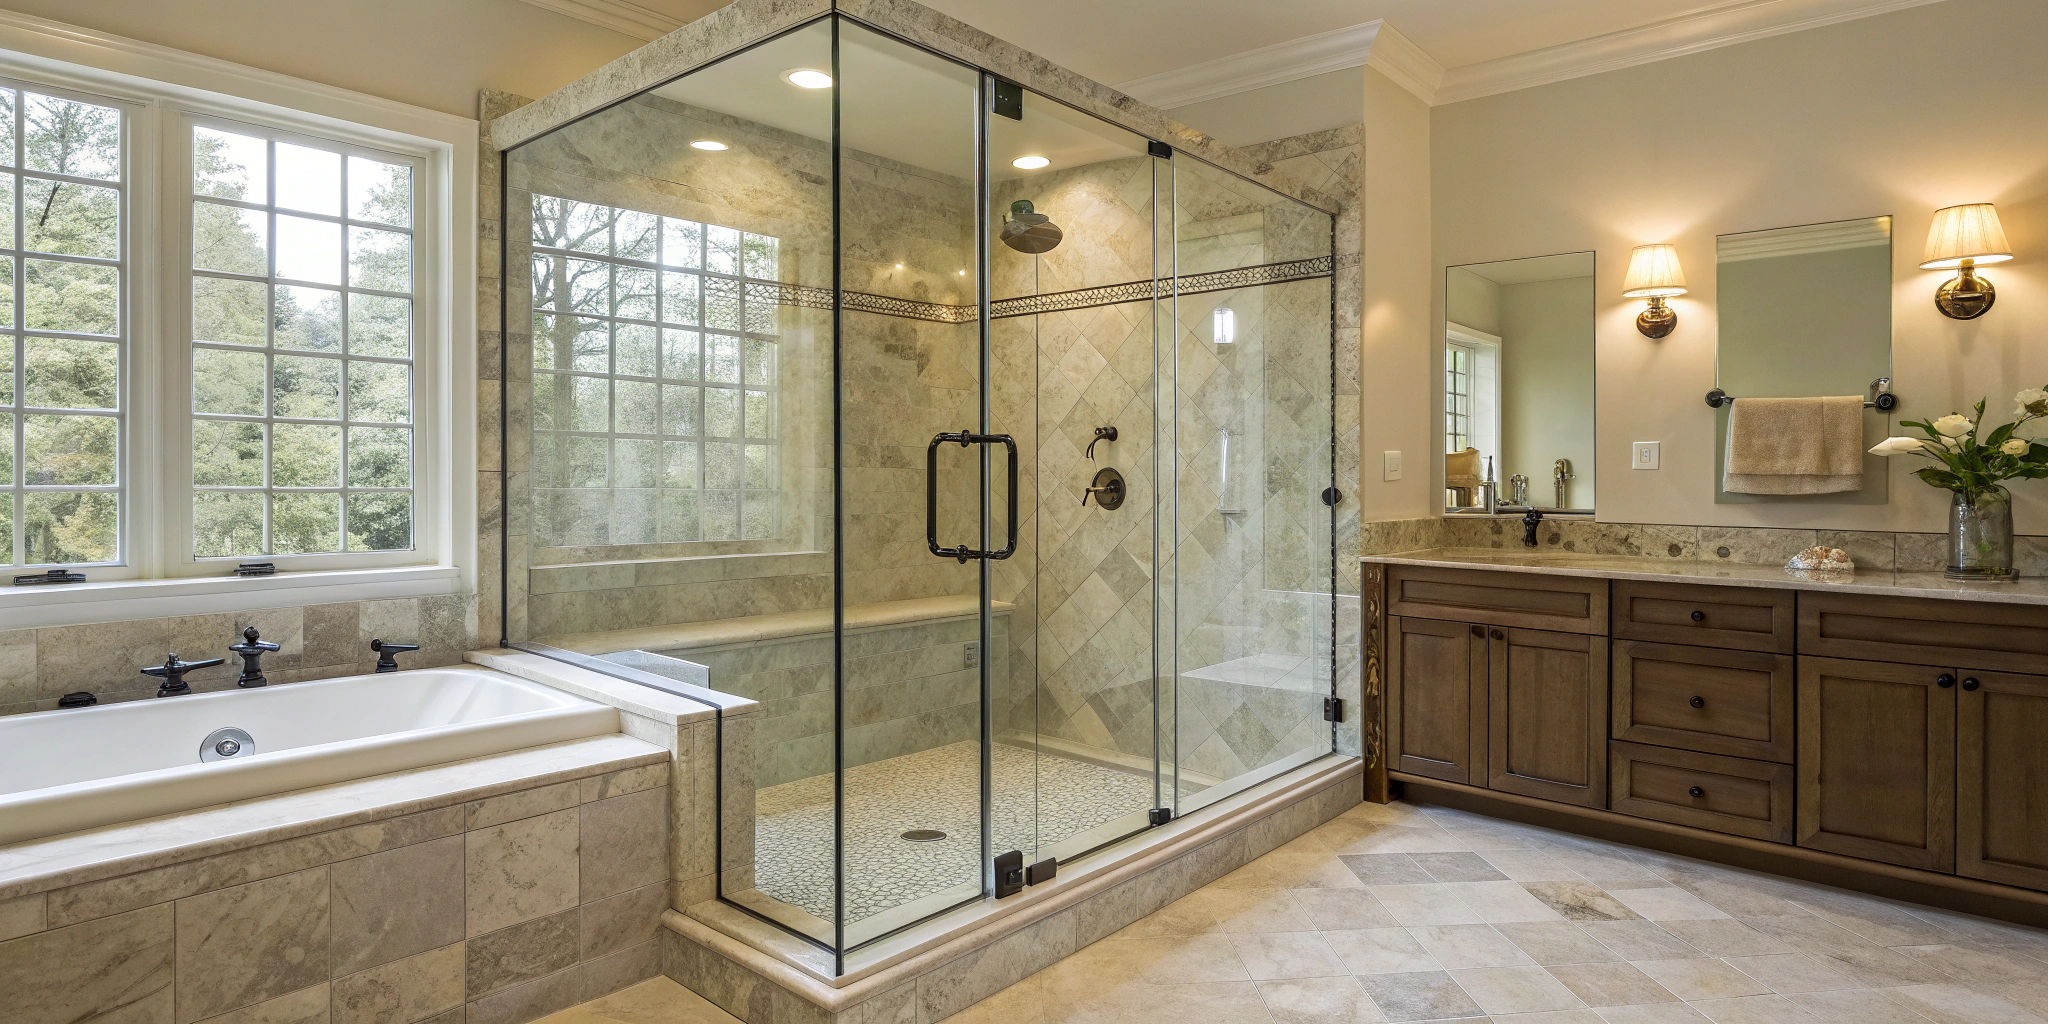
Plan for Your Shower
If your alcove tub currently doubles as your primary shower, you’ll need a new plan. Freestanding tubs are designed for soaking, and they can be awkward and impractical to use for daily showers. You’ll need to decide if you want to add a separate walk-in shower—a popular choice in many full bathroom remodels—or install a dedicated circular shower curtain system around the tub. Thinking about this now ensures your new bathroom meets all your daily needs. You can browse our featured projects to see how we’ve designed beautiful layouts that include both a stunning freestanding tub and a functional walk-in shower.
Your Game Plan for a Smooth Replacement
Once you’ve decided to make the switch, the next step is creating a solid plan. A little forethought here goes a long way toward ensuring your project is seamless and stress-free. Moving from a built-in alcove tub to a statement-making freestanding model involves more than just picking a new fixture; it requires careful consideration of your space, style, and the technical details that bring it all together. Think of this as your roadmap. By mapping out your measurements, exploring different styles, and understanding the necessary permits, you can move forward with confidence and get one step closer to the bathroom you’ve been dreaming of.
Get Your Measurements Right
Before you fall in love with a specific tub, grab your tape measure. A freestanding tub needs room to breathe to create that open, airy look. As a rule of thumb, you’ll want at least one foot of clearance on all sides. This isn’t just for aesthetics—it’s also practical for cleaning and moving around the space comfortably. Measure the total area where you plan to place the tub, and don’t forget to account for doorways and pathways to make sure you can actually get it into the room. Proper space planning is the foundation of a functional and beautiful bathroom layout, ensuring your new tub fits perfectly without overwhelming the room.
Find the Perfect Tub Style for You
Now for the fun part: choosing a style that reflects your taste. Modern freestanding tubs are popular for their clean, minimalist lines and streamlined rims that fit beautifully in contemporary homes. But there are so many other shapes to explore. A single-slipper tub, with one end raised for back support, is perfect for solo soaks. A double-ended tub, with two sloped sides, is ideal for sharing. The best way to decide is to see them in person. Visiting a design showroom lets you compare materials, sit in different tubs, and truly visualize how a style will look and feel in your home.
Understand Local Permit Requirements
Swapping an alcove tub for a freestanding one is a significant upgrade that often requires a building permit, especially here in San Diego. This is because the project is more complex than a simple replacement. It almost always involves relocating the drain, reconfiguring the water supply lines, and sometimes even reinforcing the floor to support the new tub’s weight and water. A professional assessment is key to understanding the full scope of work. Handling permits and inspections is a standard part of our bathroom remodeling process, so you never have to worry about navigating the paperwork or ensuring your project is up to code.
What Plumbing Changes Will You Need?
Swapping an alcove tub for a freestanding one is more than a simple fixture exchange—it’s a plumbing puzzle. Your alcove tub has its drain and faucet neatly tucked against the wall, but a freestanding tub sits out in the open, requiring a whole new configuration. Because it isn’t anchored to any walls, all of its plumbing—the drain, the hot water line, and the cold water line—must come up through the floor in a precise location. Understanding these changes is key to planning a successful bathroom remodel.
This is where the project moves from a cosmetic update to a more involved, structural one. The floor will need to be opened up to move pipes, and everything must be perfectly placed and sealed to prevent leaks down the road. It’s not as simple as pulling out the old tub and dropping in a new one. Getting the plumbing right from the start ensures your new tub functions flawlessly and protects your home from water damage. While it sounds complex, a clear plan makes all the difference. Let’s walk through the essential plumbing adjustments you can expect.
Moving the Drain
The biggest plumbing task is relocating the drain. Your current tub drain is likely positioned in a corner or along the back wall. A freestanding tub, however, needs the drain to be located directly beneath its drain hole, which is often near the center of the tub. This means your contractor will need to open the floor to move the drainpipe from its old spot to the new one. This is often the most complex part of the installation, as it involves cutting into the subfloor and re-routing the pipe to ensure it connects perfectly with your home’s main drain line.
Adjusting Water Supply Lines
Just like the drain, the water supply lines need a new home. Alcove tubs typically use a wall-mounted faucet and showerhead combo. For a freestanding tub, you’ll likely be installing a floor-mounted or wall-mounted tub filler. To do this, the hot and cold water lines must be extended from the wall and run under the floor to the new faucet location. This process requires careful planning to ensure the pipes are placed correctly before the new flooring goes down. It’s a critical step that sets the stage for your tub’s final placement and function.
Installing a New Tub Filler
Once the water lines are in their new position, it’s time to install the tub filler. This is the beautiful, statement-making faucet that will fill your new tub. Whether it’s a sleek, floor-mounted model that rises elegantly beside the tub or a long-reach, wall-mounted filler, it needs to be installed with precision. The filler must be anchored securely to the floor or wall to prevent any wobbling or movement during use. This step is where the new plumbing becomes visible, tying the whole look together and giving you a functional, beautiful fixture.
Navigating Common Plumbing Hurdles
A few technical details can make or break your installation. First, after cutting a new hole for the drain, the surrounding subfloor may need new wood blocking for support. This ensures the drain assembly is stable and secure. Second, the new drainpipe must be installed with a slight downward slope. This is crucial for ensuring water drains completely and doesn’t sit in the pipe. An experienced plumber knows how to handle these details, which are essential for a leak-free, long-lasting remodeling project.
The Step-by-Step Installation Guide
Swapping an alcove tub for a freestanding model is a significant upgrade, but it’s more involved than a simple replacement. The process requires careful demolition, structural checks, and precise plumbing work to get it right. While every project is unique, the installation generally follows a clear path from removing the old to revealing the new. Understanding these steps helps you know what to expect when you partner with a professional team for your bathroom remodeling project. Here’s a look at how our experts transform your space.
Step 1: Remove the Old Alcove Tub
First things first: the old alcove tub has to go. This demolition phase involves more than just lifting the tub out. Our crew will carefully remove the surrounding wall materials, like tile or drywall, that enclosed the tub. This step requires precision to protect the rest of your bathroom from unnecessary damage. Once the tub is out, we’ll have a clear view of the existing plumbing and subfloor, allowing us to assess what needs to be updated for your new freestanding tub’s placement and drain configuration. It’s a messy but essential first step toward creating your dream bathroom.
Step 2: Prep the Floor for Your New Tub
With the old tub gone, the focus shifts to the foundation. A freestanding tub, especially when filled with water and a person, is incredibly heavy. We’ll inspect your floor joists to ensure they can handle the load and add reinforcement if needed—a critical step for safety and longevity. Next, we’ll relocate the plumbing to align with your new tub’s drain location. This often involves cutting into the subfloor. After the pipes are set, we’ll repair the floor, creating a solid, level surface ready for your new flooring and the beautiful tub that will sit on top of it.
Step 3: Set and Level the Freestanding Tub
This is the moment your vision starts to become a reality. Carefully, our team will bring your new freestanding tub into the bathroom and position it precisely over the new drain. Getting the tub perfectly level is non-negotiable; even a slight tilt can prevent it from draining correctly and cause water to pool. We use professional-grade levels and make micro-adjustments to the tub’s feet until it’s perfectly balanced. This meticulous attention to detail ensures your tub not only looks stunning in our featured projects but also functions flawlessly for years to come.
Step 4: Connect Plumbing and Test for Leaks
The final step is connecting the tub’s drain and the new tub filler to your home’s plumbing lines. This is intricate work that requires a skilled plumber to create watertight seals. Once everything is connected, we don’t just pack up and leave. We rigorously test the system by filling the tub and checking every connection point for even the smallest drip. This quality assurance check is a core part of our process, giving you complete peace of mind that your new spa-like retreat is ready for you to enjoy without any worries about leaks or water damage down the road.
Common Mistakes to Avoid
Swapping an old alcove tub for a stunning freestanding model is one of the most impactful upgrades you can make in a bathroom. But this project involves more than just picking a beautiful tub; it requires careful planning to sidestep a few common pitfalls. Getting the technical details right is what separates a spa-like retreat from a project plagued by leaks, creaks, and costly fixes.
As a design-build team, we’ve seen it all, and we always guide our clients through these technical checks early in our process. A little foresight ensures your new tub is a source of relaxation, not stress. Let’s walk through the three biggest mistakes we see homeowners make so you can be sure to avoid them.
Forgetting to Check Floor Support
This is a big one, especially if you’ve fallen in love with a heavy cast iron or natural stone tub. Your old, lightweight alcove tub was likely supported by the surrounding wall studs, but a freestanding tub puts its entire weight—plus the weight of the water and you—directly onto the floor. Without proper reinforcement, this can lead to sagging floors, cracked tiles, or even serious structural damage. Before you finalize your tub selection, it’s essential to have a professional assess your floor joists to confirm they can handle the load. This step is a non-negotiable part of a safe and successful bathroom remodeling project.
Misplacing the Drain
The drain location for an alcove tub is almost always in a corner, tucked against the wall. A freestanding tub’s drain, however, is typically centered. This means your plumbing has to move, and getting that new drain placement exactly right is critical. If it’s off by even a small amount, it can prevent the tub from sitting correctly, create drainage issues, or lead to leaks. This isn’t just a simple fix; it often involves cutting into your subfloor and re-routing pipes. Planning the precise location during the design phase saves you from expensive plumbing surprises and ensures a clean, seamless installation.
Improperly Leveling or Sealing the Tub
A perfectly level tub isn’t just about aesthetics—it’s about function. If your tub is even slightly tilted, water won’t drain completely, leaving annoying puddles behind after every bath. Over time, this can lead to staining and mildew. Just as important is creating a watertight seal around the base of the tub and the drain. A poor seal is an open invitation for water to seep underneath, causing hidden water damage to your subfloor and ceiling below. Taking the time to meticulously level the tub and apply a high-quality silicone sealant is key to protecting your investment and your home.
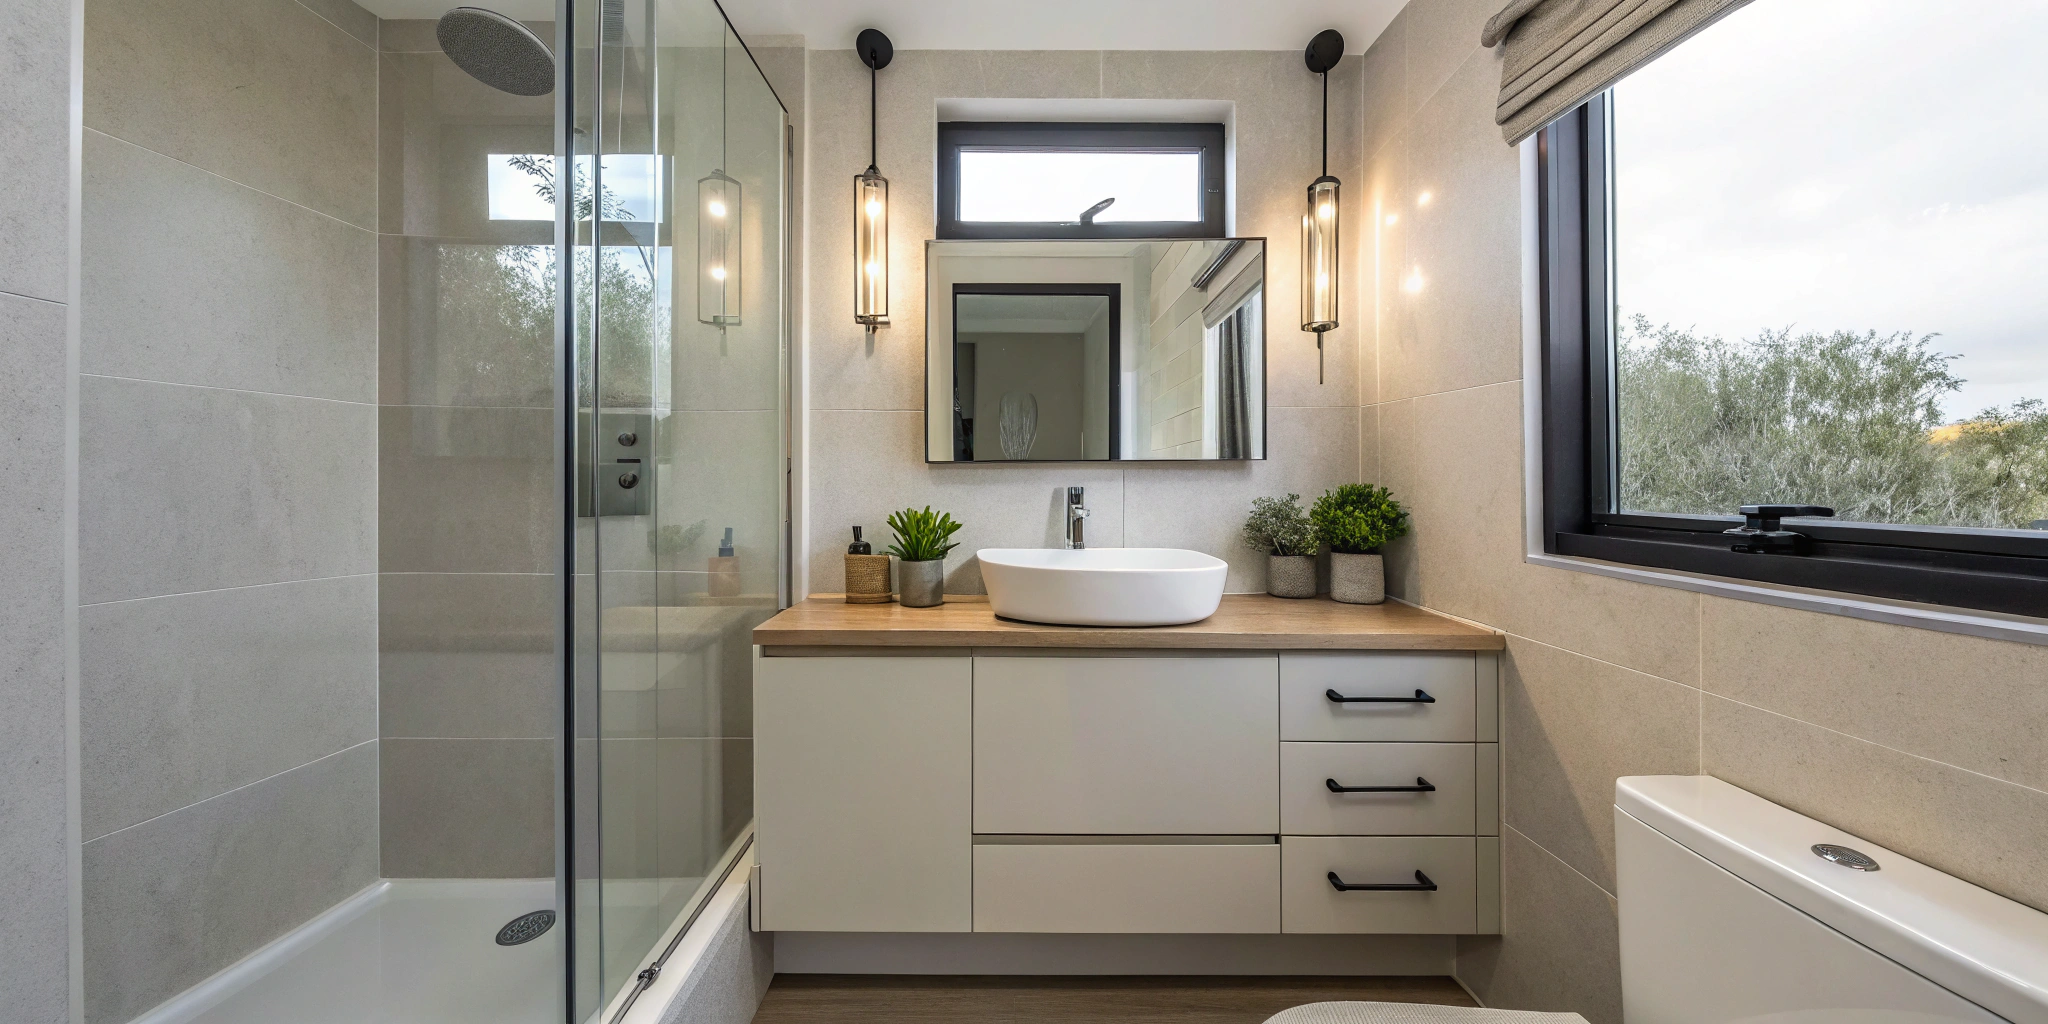
Styling the Space Around Your New Tub
Once your beautiful new freestanding tub is in place, the real fun begins: styling the space around it. This is your chance to transform your bathroom from a purely functional room into a true sanctuary. The right finishes, textures, and decor will frame your tub, making it the undeniable star of the show. Think of your tub as the centerpiece of a beautiful painting; the surrounding elements are the colors and brushstrokes that bring the entire composition to life. A well-styled space feels intentional, cohesive, and deeply personal, turning your daily routine into a spa-like ritual. Let’s look at how to pull all the pieces together for a stunning result.
Choosing a Tub Style and Material
The tub itself sets the tone for the entire bathroom. Are you drawn to the clean, minimalist lines of a modern freestanding tub, or do you prefer the gentle curves of a single-slipper design? The shape you choose is the foundation of your bathroom’s aesthetic. Materials play an equally important role. A tub with a soft matte finish can beautifully mimic the look of natural stone, giving your space an organic, high-end feel. At our San Diego showroom, you can see and touch these different materials to find the one that feels right for you. The goal is to select a tub that not only fits your space but also reflects your personal style.
Pairing Your Tub with the Right Finishes
The details make all the difference, and your tub’s hardware is a perfect place to make a statement. The tub filler, drain, and overflow are key functional pieces that double as jewelry for your bathroom. You can create a cohesive look by matching these finishes to your sink faucets and shower fixtures, or you can mix metals for a more curated, eclectic vibe. For example, elegant accents like brushed gold fixtures can add a charming, warm glow to a crisp white tub. Looking through our past projects can give you great ideas for how different combinations come together. Whether you choose matte black, polished chrome, or oil-rubbed bronze, be sure the finish complements both your tub and your overall design vision.
Creating a Balanced, Cohesive Look
To make your freestanding tub feel truly integrated, consider the space around it. Creating a feature wall behind the tub is a fantastic way to add depth and visual interest. You can use a dramatic tile, a slab of marble for a rich, seamless look, or even waterproof shiplap for a touch of coastal charm. The flooring is also key; a beautiful tile that flows throughout the space will make the room feel larger and more unified. Finally, add thoughtful accessories like a small wooden stool for your book and tea, a plush bath mat for a soft landing, and perhaps a potted plant to bring a bit of nature indoors. These finishing touches complete your bathroom remodeling project, ensuring the final space is both beautiful and functional.
How to Care for Your Freestanding Tub
Your new freestanding tub is the star of your bathroom, and with a little attention, you can keep it looking stunning for years. Unlike built-in tubs, they require a slightly different approach to cleaning and maintenance since all sides are exposed. But don’t worry—caring for your tub is straightforward. A simple routine will protect your investment, prevent damage to your floors, and ensure your personal spa retreat remains pristine and ready for your next soak.
Think of it less as a chore and more as preserving the centerpiece of your beautiful new bathroom. From weekly wipe-downs to long-term checks, these simple habits will make all the difference. We’ll walk through exactly what you need to do to keep your tub sparkling, your floors protected, and your plumbing working perfectly.
Keep It Sparkling: Cleaning Tips
Because your freestanding tub is exposed on all sides, cleaning around and underneath it can feel a bit tricky. The key is having the right tools. A flexible duster or a slim mop can easily reach the floor space beneath the tub to grab dust and hair. For the tub itself, stick to gentle, non-abrasive cleaners and a soft cloth or sponge. Harsh chemicals or scrubbers can scratch acrylic or damage specialty finishes. A simple solution of warm water and mild dish soap is often all you need for a regular clean, keeping that beautiful surface flawless.
Protect Your Floors and Finishes
A proper installation is your first line of defense in protecting your bathroom floors. During your bathroom remodeling project, your team should anchor the tub filler securely to the floor to prevent any wobbling that could strain the plumbing. They should also apply a thin, clear bead of silicone around the base of the tub where it meets the floor. This not only helps hold the tub firmly in place but also creates a watertight seal, preventing any stray splashes from seeping underneath and causing water damage over time.
Long-Term Care and Maintenance
Long-term care starts with what’s underneath. Freestanding tubs are often heavier than standard alcove models, so ensuring your floor has the right structural support is a critical step in the installation process. A professional will also ensure all drain pipes have the proper slope, so water drains away efficiently instead of pooling. Periodically, it’s a good idea to check the tub filler and drain connections for any signs of leaks. Catching a small drip early can save you from a much bigger headache down the road and is a key part of our meticulous installation process.
DIY vs. Hiring a Pro: When to Call for Help
Deciding to tackle a tub replacement yourself can feel empowering. You get to control the timeline, learn new skills, and potentially save on labor costs. For smaller updates, a DIY approach can be a great fit. But converting an alcove tub to a freestanding one is a major project with several moving parts that can quickly become overwhelming. It often involves complex plumbing, structural considerations, and detailed finish work that requires a high level of precision.
Before you start swinging a sledgehammer, it’s worth taking an honest look at the scope of the project and your own experience level. A mistake with plumbing or floor support can lead to costly water damage or even structural failure down the road. That’s why it’s so important to know when to call in a professional. A design-build team can manage every detail, from initial design and permitting to the final walkthrough, ensuring your bathroom remodel is completed safely and to the highest standard. Let’s break down a few key moments when bringing in an expert is the smartest move.
When the Plumbing Gets Complicated
Switching from an alcove tub to a freestanding model isn’t a simple swap. Your old tub’s plumbing is likely hidden in the walls, but a freestanding tub requires the drain and water supply lines to be moved into the floor. As one guide notes, moving the drain is often “the most complex part of the installation.” This involves cutting into your subfloor, re-routing pipes to the new location, and ensuring everything is properly sloped and sealed to prevent leaks. It’s a job that requires a deep understanding of local plumbing codes and precision work. A licensed plumber or experienced remodeler can handle these adjustments correctly, giving you peace of mind that your beautiful new tub won’t cause hidden water damage.
When You’re Unsure About Structural Support
Freestanding tubs are heavy—especially cast iron or solid surface models. When you add the weight of water and a person, the total load can easily exceed what your floor was originally designed to handle. Before you buy, you need to “determine if your floor can support the weight.” This often means inspecting the floor joists beneath the bathroom to see if they need reinforcement. Getting this wrong can lead to sagging floors, cracked tiles, or in the worst-case scenario, structural damage. A professional contractor can assess your home’s framing and add new support structures if needed, ensuring your bathroom floor is safe and sound for years to come.
When You’re Short on Time or Experience
A tub replacement is more than just the installation itself. The process starts with careful demolition of the old tub and surround, followed by floor prep, plumbing work, setting the new tub, and finishing the surrounding walls and flooring. Each step requires specific tools, skills, and a significant time commitment. If you’re juggling a busy schedule or are new to major home renovations, the project can drag on for weeks. Working with an experienced team streamlines our process, ensuring every detail is handled efficiently and correctly. This not only saves you time and stress but also guarantees a polished, professional finish you’ll love.
Related Articles
- How to Get a Quote for Bathtub to Shower Remodel
- How Much Is a Master Bath Remodel? A 2025 Guide
- Cost to Remodel a Small Bathroom: A 2025 Guide
Frequently Asked Questions
How much space do I really need for a freestanding tub? While there isn’t a single magic number, a good starting point is to plan for at least six inches of open space on all sides, with a foot being even better. This gives the tub room to breathe and makes a visual statement. More importantly, it gives you enough clearance to comfortably clean around it. The goal is to make your tub feel like an intentional centerpiece, not something squeezed into a corner.
Do I have to give up my shower if I get a freestanding tub? Not at all, but you do need a plan. Freestanding tubs are designed for soaking, not showering. The most popular solution is to design a separate walk-in shower as part of your bathroom remodel. This creates a truly functional and luxurious space. If you don’t have room for that, you can install a circular shower curtain rod, but it’s a less common choice that can feel a bit cumbersome for daily use.
What’s the biggest unexpected cost I should plan for? The most significant cost outside of the tub itself is usually the plumbing work. Unlike an alcove tub where pipes are in the wall, a freestanding model requires moving the drain and water lines under the floor to a new location. This involves opening up the subfloor, re-routing pipes, and ensuring everything is perfectly sealed. This is why getting a detailed, all-inclusive quote from the start is so important.
Can I put a freestanding tub on my second floor? Yes, you absolutely can, but it requires a crucial safety check first. Freestanding tubs, especially stone or cast iron models, are extremely heavy when filled with water. Before installation, your floor joists must be inspected by a professional to confirm they can support the weight. Sometimes, reinforcement is needed. This is a standard part of our process to ensure your home’s structure is sound.
Is a freestanding tub harder to clean than a regular one? It’s not harder, just different. You’ll need to clean the floor underneath and behind the tub, which you can’t see with a built-in model. A duster with a long handle or a slim mop makes this easy to manage. For the tub itself, a simple wipe-down with a soft cloth and a non-abrasive cleaner is all it takes. It’s a small change in your routine for a major upgrade in style.