Is your morning routine a battle against a cramped layout, poor lighting, and zero counter space? You’re not alone. Most remodels start with the simple desire to fix what isn’t working. The key is turning those daily frustrations into a functional design that truly serves your lifestyle. This transformation doesn’t happen by accident; it requires a thoughtful strategy. This guide provides a complete framework for how to plan a bathroom remodel that solves real problems. We’ll show you how to assess your needs, design a smarter layout, and select materials that make your life easier, creating a space that works as beautifully as it looks.
Key Takeaways
- Establish Your Vision and Scope Upfront: Get clear on your must-haves, nice-to-haves, and budget before you start. This initial planning is your best defense against scope creep and ensures the final result aligns perfectly with your lifestyle and investment.
- Choose a Partner Who Manages Everything: Partnering with a design-build firm streamlines the entire process. With one team handling design, materials, and construction, you get clearer communication and a more predictable timeline, avoiding the stress of juggling multiple vendors.
- Make All Selections Before Construction Starts: Finalize every material choice—from tile to faucets—before demolition day. This is the single best way to prevent delays caused by backordered items and keep your project on schedule.
Step 1: Define Your Vision and Scope
Before you think about tile or paint, the first step is getting clear on what you want to achieve. This is the dreaming phase, where you define your vision and set the project’s scope. A solid plan is your best defense against scope creep, budget surprises, and decision fatigue later on. Taking time to think through your goals ensures the final space not only looks beautiful but functions perfectly for your lifestyle. A great bathroom remodel starts with a clear vision, turning frustrations with the old space into a functional plan for the new one.
Assess Your Current Bathroom
Start by taking a hard look at your current bathroom. What are the daily pain points? Is it the cramped shower, lack of storage, or a dated vanity with no counter space? List everything that isn’t working. Note functional issues first—poor lighting, an awkward layout—then list aesthetic elements you want to change, like old tile. This isn’t about finding solutions yet; it’s about identifying the problems. This assessment gives you a clear “why” for your remodel and helps you articulate your needs to a designer.
Create Your Wish List
Now for the fun part. With your list of problems, start dreaming up solutions. This is where you create your wish list of features and finishes. Gather inspiration from design magazines, Pinterest, or our gallery of featured projects. Do you envision a spa-like retreat with a soaking tub or a sleek space with a walk-in shower? To stay organized, divide your list into “must-haves” (like a double vanity) and “nice-to-haves” (like heated floors). This exercise is incredibly helpful when you start aligning your dreams with your budget.
Decide on Structural Changes
A big decision is whether to change the bathroom’s layout. Moving walls or plumbing can dramatically improve function, but it adds significant cost and complexity. As a rule, keeping your existing plumbing locations is the most budget-friendly approach. However, if the current layout is the main source of frustration, a change might be worth it. This is a critical conversation to have early in the design phase. A design-build firm can help you explore the possibilities and understand the cost implications. Our design-build process is built to handle these big decisions from the start.
Step 2: Set a Realistic Budget
Okay, let’s talk numbers. Setting a budget might not feel as exciting as picking out tile, but it’s the single most important step for a smooth, stress-free remodel. A realistic budget acts as your roadmap, guiding every decision from layout changes to fixture selections. It helps you and your remodeling partner stay on the same page and ensures the final result is a space you love, without any financial surprises. The goal isn’t just to set a number, but to understand what that number can achieve and to build a plan that honors both your vision and your investment.
Know the Remodeling Costs in San Diego
Understanding the typical investment for a bathroom remodel in our area is the best place to start. In San Diego, project costs can range from around $15,000 for a smaller, more straightforward update to over $40,000+ for a large, custom primary suite. The final price tag depends on the size of your space, the quality of materials you choose, and the complexity of the job—like whether we need to move plumbing or walls. A clear scope of work is essential, which is why we provide a detailed, fixed-price proposal that breaks everything down for you.
Plan for a 10-15% Contingency Fund
Think of a contingency fund as your project’s safety net. No matter how carefully you plan, remodeling can sometimes reveal surprises hiding behind the walls, like old plumbing that needs updating or hidden water damage. Setting aside an extra 10% to 15% of your total budget gives you the flexibility to handle these unexpected issues without derailing your project or forcing you to compromise on your vision. This is a standard part of any well-planned remodeling guide and provides essential peace of mind from demolition day to the final walkthrough.
Prioritize Your Spending
Now for the fun part: deciding where you want to make the biggest impact. Start by making a “wish list” of all the features and finishes you’re dreaming of. Then, sort it into “must-haves” and “nice-to-haves.” Is that freestanding tub non-negotiable? Have you been dreaming of a specific artisan tile for the shower? Knowing your priorities helps you allocate your budget effectively, so you can splurge on the elements that matter most to you. Our designers can help you explore options in our showroom to find beautiful materials that align with your goals and budget.
Step 3: Design the Layout and Style
With your vision and budget in place, it’s time for the fun part: designing a space that looks beautiful and works perfectly for your daily routine. This is where your dream bathroom starts to take shape on paper. A thoughtful layout is the foundation of a successful remodel. It dictates how you move through the space, where you store your essentials, and how the room feels—from cramped and chaotic to open and serene.
Before you fall in love with a specific tile or vanity, map out the floor plan. Think about your current pain points. Is the doorway awkward? Do you wish you had a double vanity? Is the shower too small? Answering these questions now ensures your new bathroom isn’t just a cosmetic update but a true functional upgrade. This is also the stage where you define your aesthetic, choosing the colors, materials, and finishes that will create a cohesive and relaxing atmosphere.
Focus on Function and Flow
The best bathroom designs are centered on how you actually use the space. Think through your morning and evening routines. Where do you need outlets for your hairdryer or electric toothbrush? Where will you place towels so they’re easy to grab after a shower? A great layout minimizes awkward steps and makes the room feel intuitive. Start by listing everything you want in the space, from a walk-in shower with a bench to better vanity lighting. This wish list will guide every decision, helping you and your design partner create a floor plan that supports your lifestyle and makes everyday tasks feel a little more seamless.
Work with Existing Plumbing to Save Costs
One of the biggest factors in a bathroom remodeling budget is the plumbing. While moving a toilet or shower drain is certainly possible, it significantly adds to the cost and complexity of the project. It involves opening up walls and floors, which requires more labor, materials, and time. If you’re looking for ways to manage your budget, keeping the main fixtures in their current locations is one of the smartest moves you can make. This allows you to allocate more of your funds toward things you’ll see and touch every day, like beautiful tile, high-quality countertops, and upgraded fixtures.
Plan for Storage and Accessibility
Clutter is the enemy of a relaxing bathroom. That’s why planning for smart storage is non-negotiable. Think beyond just a standard vanity. Could you incorporate a recessed medicine cabinet for a sleek look? Or maybe a tall linen cabinet could provide the extra space you need for towels and backstock toiletries. Drawer organizers, pull-out shelves, and custom-built niches in the shower can create a dedicated spot for everything, keeping your countertops clear and your space feeling organized. Thoughtful storage makes a bathroom more functional and contributes to a clean, spa-like atmosphere that’s easy to maintain.
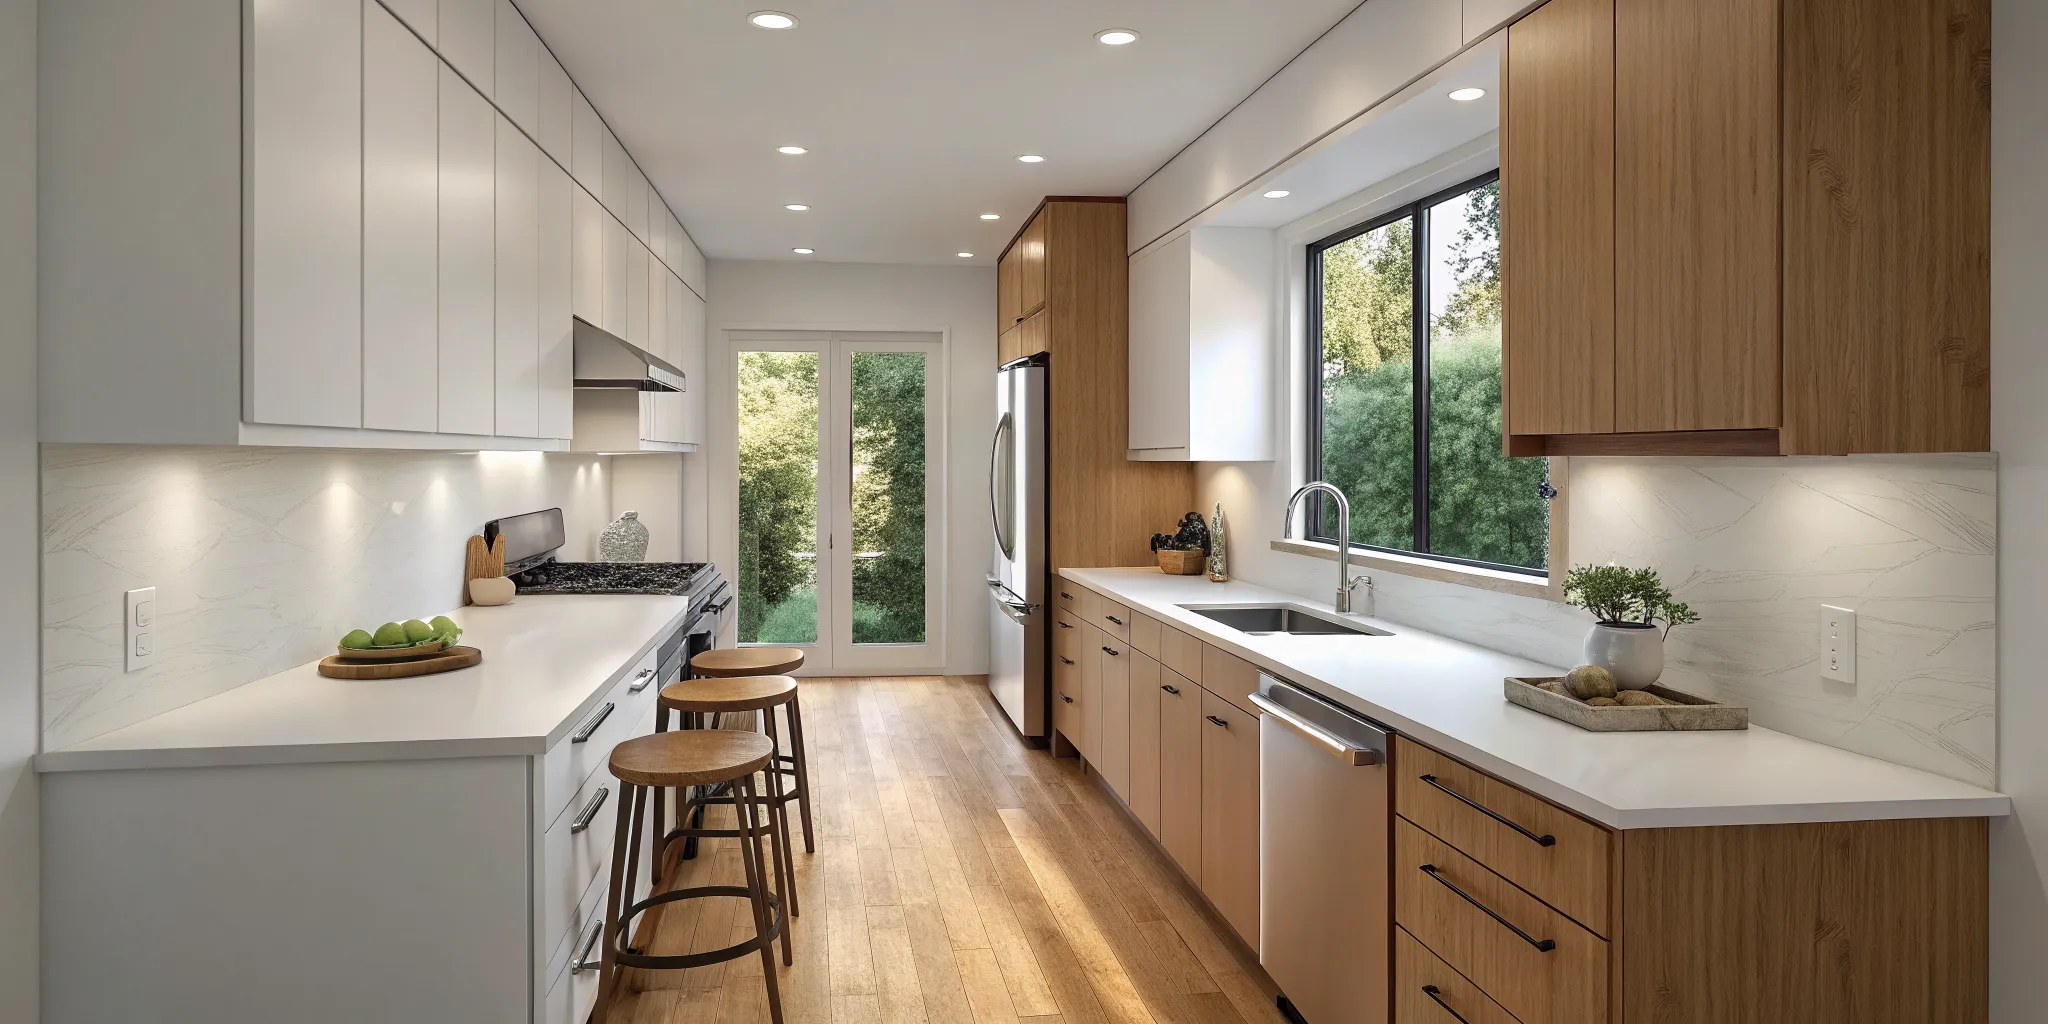
Choose Your Design Style and Color Palette
Now you can focus on the aesthetic. What vibe are you going for? A serene, spa-like retreat with natural stone and wood tones? Or a bold, modern space with deep colors and metallic accents? Your color palette sets the entire mood. We’re seeing a lot of homeowners embrace warm, earthy tones like forest green and charcoal to create a cozy, inviting feel. The best way to finalize your choices is to see them in person. Visiting our Design Center / Showroom allows you to touch the materials, compare finishes side-by-side, and build a cohesive palette with expert guidance.
Step 4: Select Materials and Fixtures
This is where your bathroom’s personality truly comes to life. Choosing materials can feel like the most exciting part of the process, but with endless options, it can also be the most overwhelming. The key is to balance aesthetics with long-term performance. Think about how you use the space daily and select finishes that are not only beautiful but also practical for a wet, high-traffic environment.
Making these decisions is much easier when you can see and touch the materials in person. Visiting a curated space like our San Diego showroom allows you to compare tiles, countertops, and fixtures side-by-side, ensuring every element works together to create a cohesive design. A guided selection process helps you finalize your palette with confidence, preventing costly second-guessing down the road.
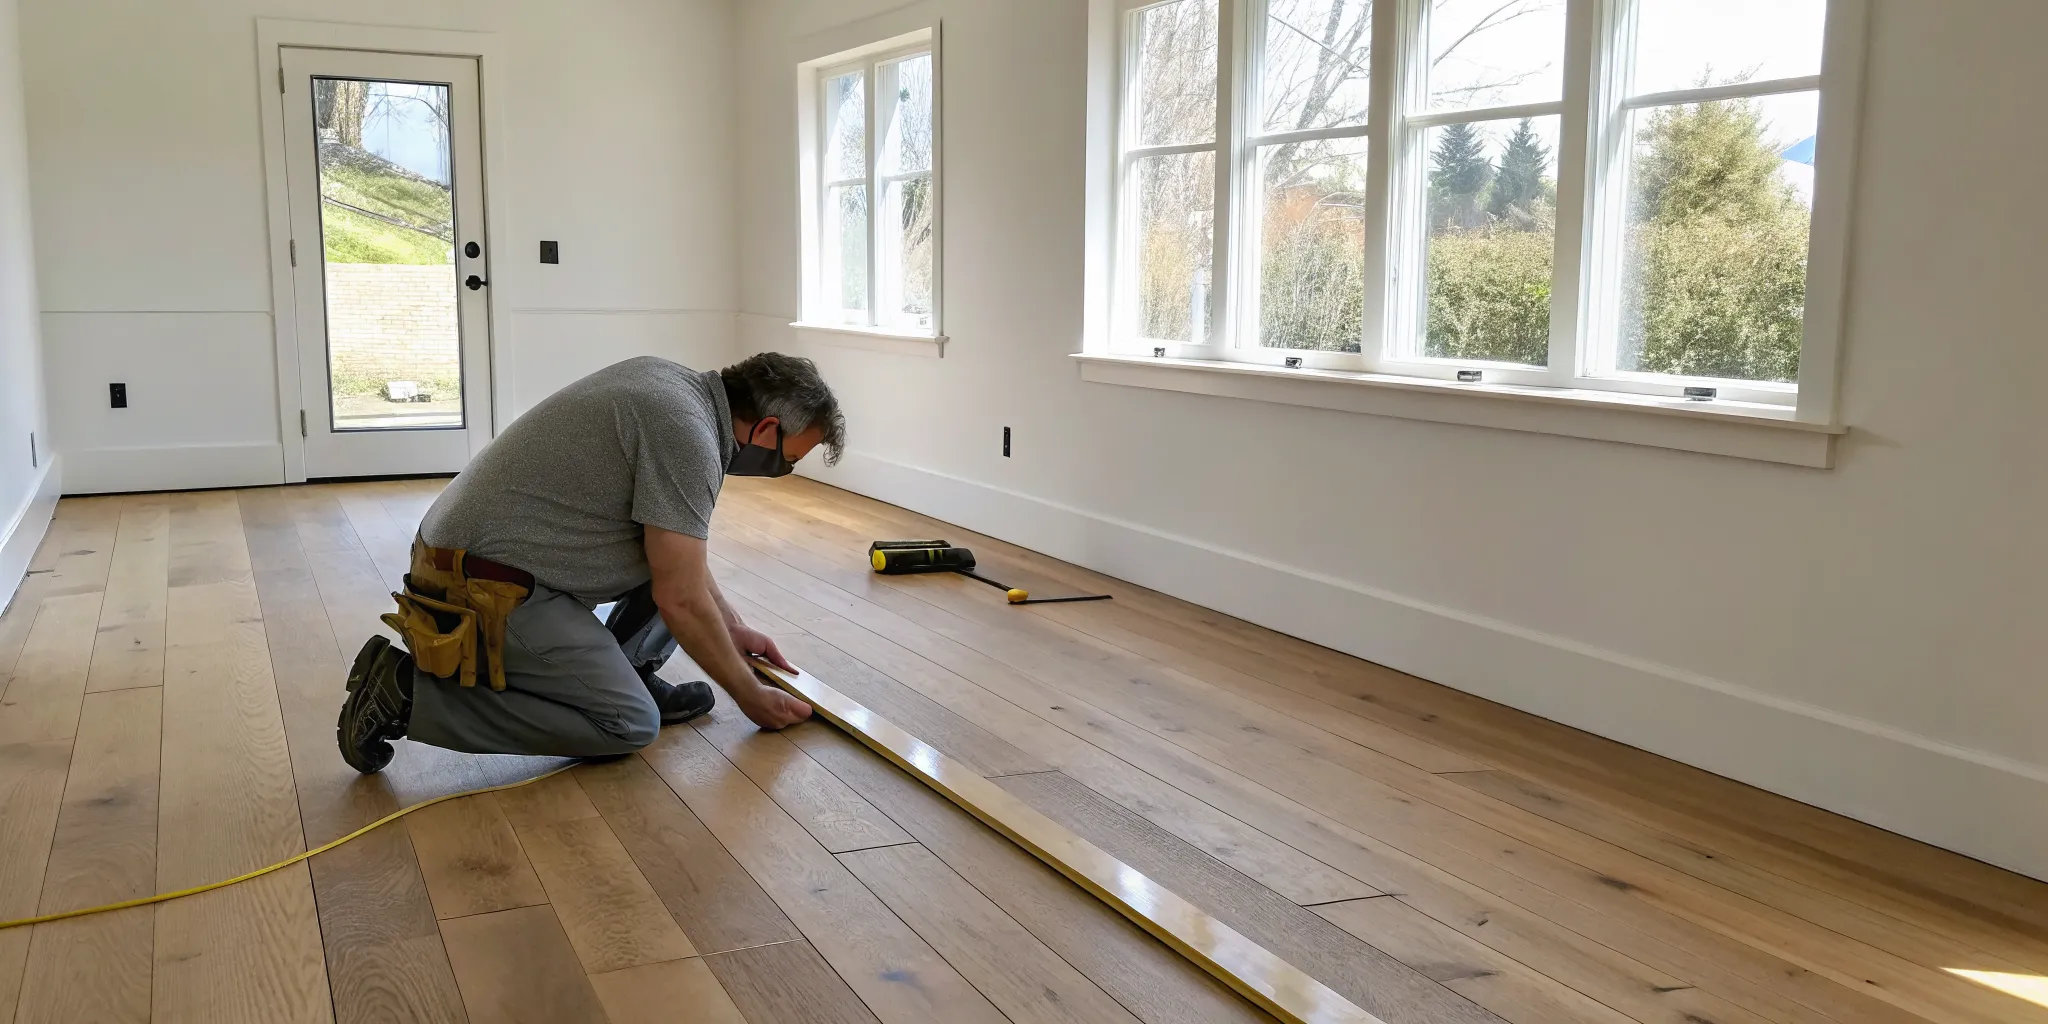
Choose Durable, Waterproof Flooring
Your bathroom floor takes a lot of abuse—from water splashes to foot traffic—so durability and water resistance are non-negotiable. Porcelain tile is a classic choice for a reason; it’s incredibly dense, waterproof, and comes in countless styles, from realistic wood looks to modern concrete finishes. Another fantastic option is luxury vinyl plank (LVP), which offers a slightly softer, warmer feel underfoot and is 100% waterproof. Both are easy to clean and will stand up to the demands of a busy bathroom for years. When you explore different flooring and surface options, prioritize materials designed specifically for wet environments to protect your subfloor and prevent issues like mold or warping.
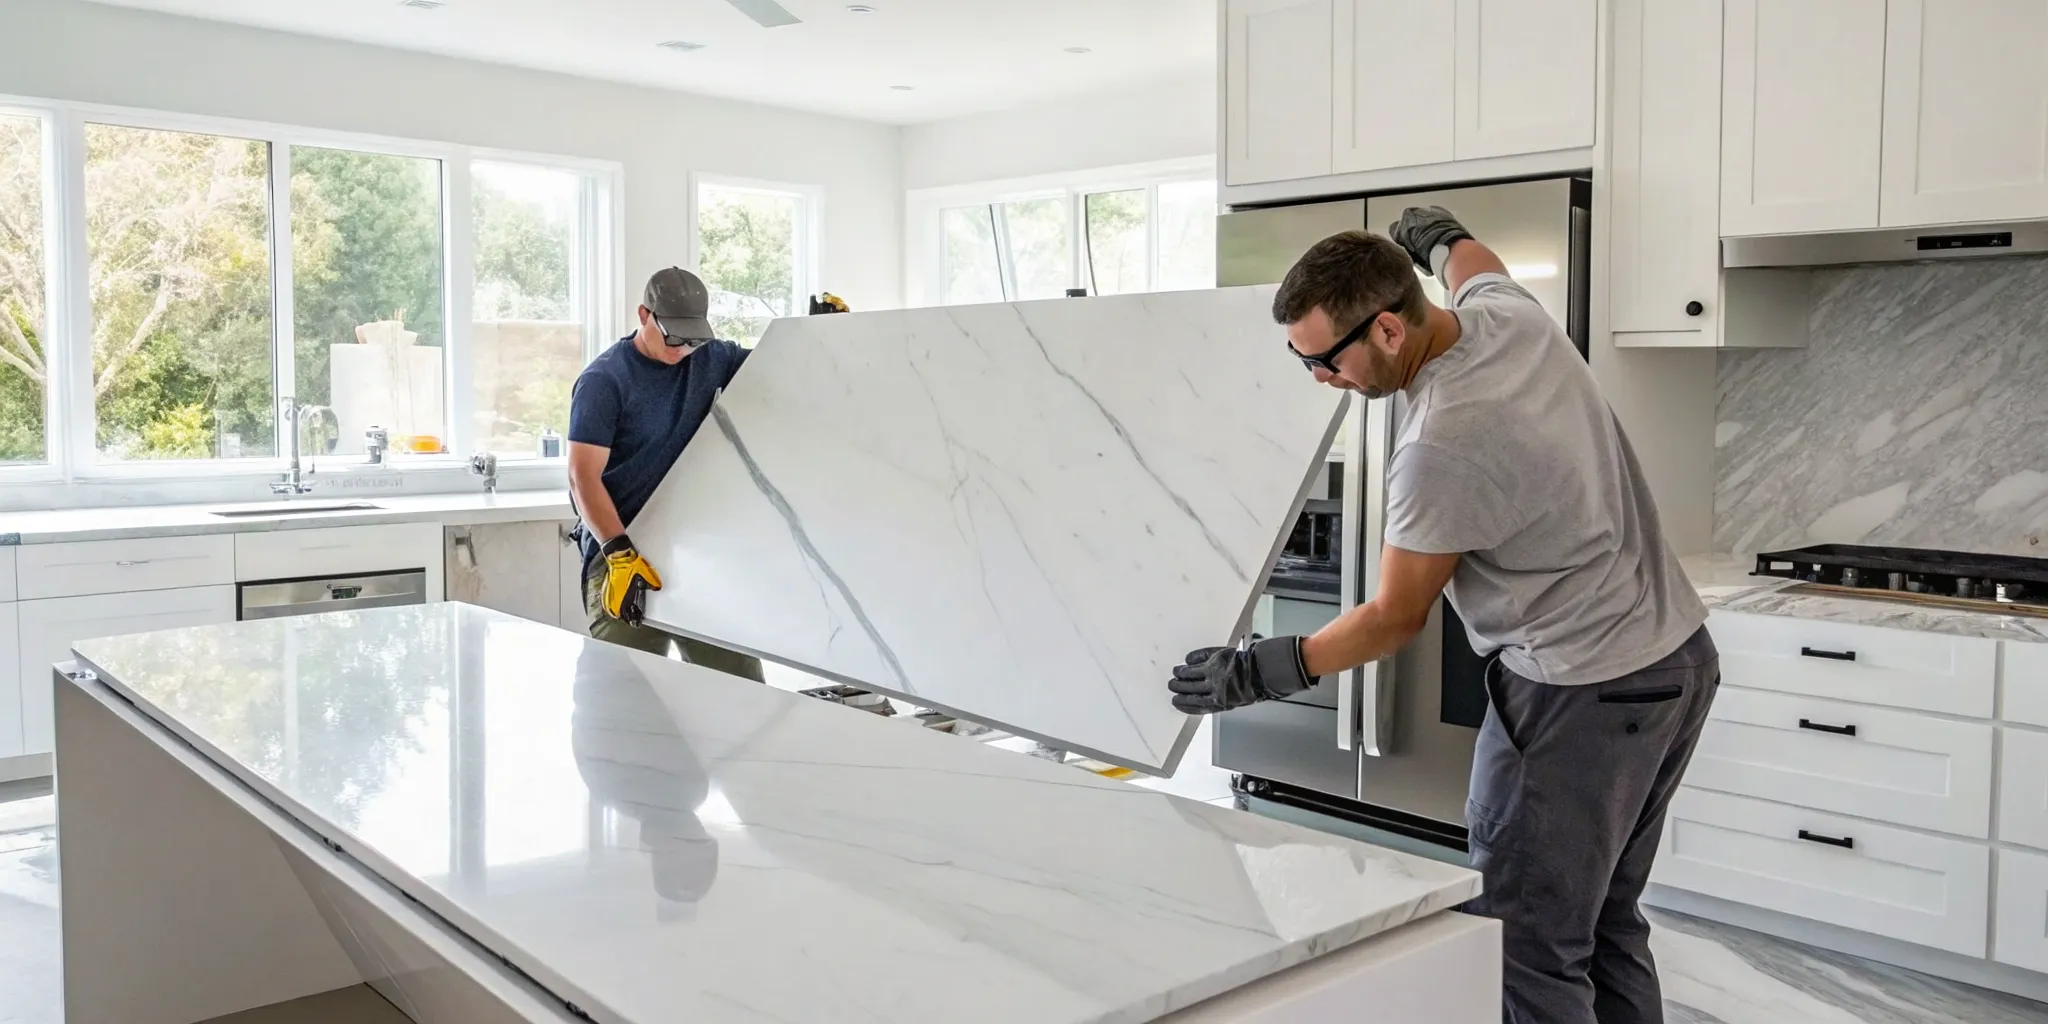
Select Tile, Countertops, and Surfaces
Beyond the floor, your choice of tile and countertops sets the tone for the entire room. For shower walls, you can create a statement with a bold pattern or keep it serene with a large-format neutral tile, which also minimizes grout lines for easier cleaning. When it comes to the vanity countertop, quartz is a top performer. It’s a non-porous, engineered material that resists stains, scratches, and bacteria without needing to be sealed. It’s the perfect surface for a functional and stylish bathroom remodel. Coordinating these surfaces is key to achieving a polished look, so try to view samples together in the same light to see how they interact.
Pick Fixtures and Hardware That Last
Faucets, showerheads, and cabinet hardware are the finishing touches that can tie your whole design together. While it’s tempting to choose based on trends, it’s smarter to invest in high-quality fixtures from reputable brands. In a humid bathroom environment, a durable finish like PVD (physical vapor deposition) will resist tarnishing, scratching, and corrosion far better than a cheaper alternative. Whether you prefer the timeless appeal of polished chrome, the modern edge of matte black, or the warmth of brushed brass, focus on solid construction. You can see how high-quality fixtures elevate a space by looking through our featured projects for inspiration.
Consider Smart Tech and Water-Saving Options
Modern bathrooms can do more than just look good—they can make your daily routine more efficient and enjoyable. Integrating smart technology doesn’t have to be complicated. Simple additions like a quiet, high-efficiency ventilation fan with a humidity sensor can prevent moisture buildup automatically. Heated floors are a touch of luxury that San Diego homeowners love on cooler mornings. You can also opt for water-saving toilets and showerheads that reduce consumption without sacrificing performance. Thoughtful additions like these are seamlessly integrated into our design-build process, adding long-term value and comfort to your home.
Step 5: Find the Right Remodeling Partner
With your vision, budget, and materials in mind, it’s time to find the professional who will bring it all to life. The right partner can make your remodel a smooth, exciting experience, while the wrong one can lead to stress and costly mistakes. This isn’t just about finding someone who can do the work; it’s about finding a team you can trust in your home, who understands your goals, and communicates clearly every step of the way. Taking the time to properly vet your options is the single most important thing you can do to ensure your project’s success. Think of it as building a short-term relationship—you want a partner who is reliable, respectful, and aligned with your vision for your new bathroom.
How to Vet Contractors and Check References
Start your search by asking friends, family, and neighbors for recommendations. From there, aim to interview at least three different contractors to get a feel for their approach, expertise, and pricing. During this process, do your homework. Verify that they have a valid contractor’s license and are fully insured—this protects you from liability. Don’t just take their word for it; ask to see their portfolio of featured projects to assess the quality of their work. Reading online reviews can provide insight, but a conversation with a past client is even better. Ask for references and call them to learn about their experience, from communication to how the team handled challenges. Finally, always request a detailed, written quote to ensure you’re comparing apples to apples.
The Advantage of a Design-Build Firm
Instead of juggling a separate designer, architect, and builder, consider partnering with a design-build firm. This integrated approach means one team handles your entire project from the initial concept to the final walkthrough. With a single point of contact, communication is streamlined, reducing the chances of misunderstandings that can cause delays and budget overruns. Because the design and construction teams work together from day one, they can identify potential issues early, value-engineer solutions, and create a more efficient timeline. This cohesive model ensures everyone is on the same page, resulting in a smoother, more predictable remodeling experience. You can see exactly how this works by exploring our process and how it keeps projects on track.
Key Questions to Ask in a Consultation
Your initial consultation is more than just a sales pitch; it’s your chance to interview a potential partner. Come prepared with a list of questions to understand their process and determine if they’re the right fit for you. Start with the basics: How long have you been in business? Can you share examples of bathroom remodels similar to mine? Then, dig deeper into their operations: Who will be my main point of contact? How often will I receive updates on the project’s progress? How do you handle unexpected issues or changes? A professional and transparent contractor will welcome these questions and provide clear, confident answers. This conversation is the foundation of your working relationship, so make sure you feel heard and respected before you schedule a consultation.
Set Clear Expectations for Communication
A successful remodel depends on clear, consistent communication. Before signing a contract, make sure you and your remodeling team are aligned on how you’ll stay in touch. Establish a communication plan from the outset. Will you have weekly check-in meetings? Do they prefer email, phone calls, or a project management app for updates? Who should you contact with questions or concerns? A reputable firm will already have a system in place to keep you informed and will proactively let you know what to expect each week. This transparency minimizes surprises, manages expectations, and ensures you feel comfortable and in the loop throughout the entire construction phase. Don’t be afraid to ask for the communication structure you need to feel confident in the process.
Step 6: Understand Permits and Regulations
Let’s talk about the not-so-glamorous but absolutely essential part of your remodel: permits and regulations. I know, it sounds like a headache, but think of it as quality control for your home. Following the rules ensures your new bathroom is not only beautiful but also safe, structurally sound, and up to code. A properly permitted project protects your home’s value and gives you peace of mind. Plus, when you work with an experienced design-build team, we handle all the paperwork and inspections, so you don’t have to get bogged down in the details. It’s just one part of creating a seamless and predictable remodeling experience.
Know When You Need a Permit
So, when exactly do you need a permit for a bathroom remodel? The general rule of thumb is that if you’re making cosmetic changes, you can probably skip it. Think painting, replacing a faucet in the same spot, or swapping out a light fixture. However, the moment you decide to move walls, change the layout, or alter any plumbing or electrical systems, you’ll need a permit. Relocating a toilet, converting a tub to a shower, or adding new outlets all fall into this category. Securing the right permits ensures the work is done correctly and safely, which is critical for passing inspections and for any future home sale.
Follow San Diego County Building Codes
Every city has its own set of rules, and San Diego is no exception. Local building codes are in place to guarantee safety and functionality, covering everything from the specific distance required between a toilet and a wall to proper ventilation and waterproofing standards. For example, the City of San Diego’s Development Services Department outlines all the requirements your project must meet. This is where hiring a local expert really pays off. A contractor who understands San Diego’s specific codes will ensure your project is compliant from day one, preventing costly tear-outs or failed inspections down the road.
Factor in Time for Permit Approval
One of the biggest mistakes homeowners make is underestimating how long it takes to get a permit approved. This isn’t an over-the-counter process that happens in a day. Depending on the complexity of your project and the city’s workload, the review and approval process can take several weeks. That’s why it’s so important to build this waiting period into your project timeline. A great remodeling partner will submit the permit applications early in the design phase. This way, the approval process can happen while materials are being ordered, ensuring there’s no unnecessary downtime once construction is ready to begin. It’s all part of our process to keep your project moving forward smoothly.
Step 7: Prepare Your Home for Construction
With your design finalized and materials on the way, it’s time to get your home ready for the main event: construction. This phase is where your vision starts to take shape, but it also means a temporary disruption to your daily life. A little preparation can make a world of difference in keeping your home comfortable and the project running smoothly.
A professional design-build team will handle the heavy lifting, including job site protection and daily cleanup. At King Remodeling, our process is designed to minimize the impact on your family by sealing off the work area, protecting your floors, and maintaining clear communication from day one. Still, there are a few things you can do to prepare your space and your routine for the work ahead. Taking these steps ensures you, your family, and your pets are ready for the transformation.
Set Up a Temporary Bathroom
First things first: figure out your bathroom situation. If you’re remodeling a secondary bathroom, this is as simple as moving your toiletries to the primary bath. But if your one and only bathroom is going under the knife, you’ll need a solid plan. For a few days during demolition and major plumbing work, the toilet and shower will be out of commission. Talk to your project manager about the exact timeline. You might arrange to use a neighbor’s shower, get a temporary gym membership, or plan a short staycation. It’s a brief inconvenience that pays off with a beautiful new space.
Protect Your Home from Dust and Debris
Even the cleanest crew creates dust. While your contractor should take steps to contain the mess—like putting up plastic dust barriers and covering floors—you can do your part to protect your belongings. Clear the counters and shelves in rooms adjacent to the bathroom, as vibrations can cause items to shift or fall. It’s also a good idea to cover nearby furniture with plastic sheeting or old blankets. If you have an HVAC system, check with your contractor about covering vents in the work area to prevent dust from circulating throughout your home. These small actions help keep the rest of your house clean and comfortable.
Plan for Daily Disruptions
A remodel introduces new sounds and people into your home. Expect noise from demolition and power tools, especially during the first week. It’s helpful to know the crew’s typical start and end times so you can plan your day, especially if you work from home. Establish a clear path for the workers to enter and exit, and designate a spot for their tools and materials. Most importantly, maintain an open line of communication with your project manager. A quick daily check-in can keep you informed of progress and help you manage expectations for what’s happening next.
Step 8: Understand the Remodel Timeline
One of the biggest questions homeowners have is, “How long will this actually take?” A clear timeline is essential for your peace of mind, and it’s something a professional partner should provide from the very beginning. While every project is unique, a well-managed remodel follows a predictable sequence of events. Working with a design-build firm helps streamline this schedule because the design, materials, and construction are all coordinated by one team. This integrated approach minimizes the chances of miscommunication and delays that often happen when you’re juggling separate designers, suppliers, and contractors.
A realistic timeline isn’t just a guess; it’s a carefully planned roadmap. It accounts for everything from design approvals and material lead times to inspections and final installations. Understanding this roadmap helps you know what to expect each week and prepares you for the temporary disruption to your daily routine. At King Remodeling, we map out our process with clear milestones, so you’re always informed about what’s happening and what comes next. This transparency is key to a low-stress experience and ensures your project stays on track from demolition day to the final walkthrough.
The Phases of a Bathroom Remodel
A bathroom remodel isn’t a single event—it’s a series of carefully orchestrated phases. A full renovation involves many steps, but they generally fall into a logical order. First comes demolition and preparation, where we remove old fixtures and prepare the space. Next is the “rough-in” stage, where our crews handle the hidden-but-critical plumbing and electrical work. After inspections, we move on to installing drywall, waterproofing, and tile. Finally, we set the vanity, countertops, and fixtures, followed by painting and the final finishing touches. Knowing these phases helps you visualize the journey and appreciate the progress being made, even when it’s behind the walls.
What Can Affect Your Project’s Schedule?
Even with the best planning, remodels can face unexpected hurdles. It’s a common reality that renovations sometimes take longer than anticipated. Delays can stem from special-order materials arriving late, discovering hidden issues like water damage during demolition, or waiting for city permit approvals. Homeowner-driven changes to the plan, known as change orders, can also extend the timeline. A good contractor anticipates these possibilities by building buffer time into the schedule and performing critical checks along the way, like testing a new shower drain for leaks before any tile is installed. This proactive approach helps minimize surprises and keeps the project moving forward smoothly.
Manage Expectations from Start to Finish
The secret to a successful and low-stress remodel is managing expectations through clear communication. Your remodeling team should establish effective and transparent communication from day one. Before any work begins, you should have a firm understanding of the timeline, the specific products and materials you’re receiving, and how the final design will function for your lifestyle. This alignment prevents misunderstandings down the road. We believe in consistent updates and having a single point of contact, so you always know who to call with questions. A clear plan and an open line of communication ensure everyone is on the same page, turning a potentially stressful process into an exciting transformation.
Step 9: Avoid Common Remodeling Pitfalls
A successful remodel is about a smooth process, not just beautiful finishes. Knowing the common pitfalls helps you sidestep them entirely. From budget surprises to communication gaps, a little foresight keeps your project on track and stress-free. Here’s how to avoid the four biggest issues.
Prevent Budget Mistakes and Scope Creep
Unexpected costs can derail a project. Protect your investment by finalizing a budget with a 10-15% contingency fund for surprises like hidden plumbing issues. Also, be mindful of “scope creep”—small additions that pile up. Our design-build process prevents this by defining the full scope and locking in a fixed price before work begins. This gives you a clear financial picture from day one, eliminating guesswork and preventing budget blowouts.
Avoid Planning Errors That Cause Delays
Poor planning is the top cause of delays. To keep your timeline predictable, finalize every design and material selection before demolition. Order items with long lead times, like custom vanities, well in advance. Visiting a Design Center early on lets you confirm all materials in one place. This simple step helps avoid delays from backordered products or last-minute changes, ensuring a smooth transition from design to construction.
Sidestep Communication Breakdowns
Clear communication holds a project together. When expectations aren’t aligned, it creates anxiety and mistakes. Before starting, establish how and when you’ll communicate with your project manager. A single, reliable point of contact makes the experience feel controlled and less chaotic. We believe in proactive updates because an informed client is a happy client. Our team ensures you always know what’s happening, what’s next, and who to call with questions.
Dodge Material and Measurement Mistakes
In remodeling, a quarter of an inch makes all the difference. Inaccurate measurements lead to costly errors, like a vanity that won’t fit. Always double-check everything. When ordering tile, buy 15% extra to account for cuts and to ensure all tiles come from the same color batch. An experienced bathroom remodeling team takes these technical details off your shoulders. We handle precise measurements and manage material quantities, so every piece fits together perfectly.
Step 10: Ensure a High-Quality Result
As your project nears the finish line, the final details are what truly define the quality of your new bathroom. This last step is all about making sure the execution matches the vision and that you’re set up to love your space for years to come. A great remodeling partner will lead this process, but knowing what to look for ensures nothing gets missed. It’s the difference between a bathroom that just looks good and one that feels right and functions perfectly.
From monitoring the final stages of construction to completing a meticulous final walkthrough, this is your opportunity to confirm every detail is just as you planned. It’s also the time to learn how to care for your new materials and fixtures to protect your investment. At King Remodeling, we manage this entire phase through our proven process, ensuring a seamless transition from construction zone to personal sanctuary. This final quality check is essential for turning a successful project into a space you’ll enjoy every single day.
Monitor Progress and Quality Standards
Throughout the remodel, clear and consistent communication is the best tool for ensuring high standards. You shouldn’t feel like you need to supervise the work, but you should always feel informed. A professional team will provide regular updates and have a dedicated point of contact to answer your questions. This open dialogue builds trust and allows for any issues to be addressed quickly, long before they become bigger problems.
At King Remodeling, we believe that maintaining open lines of communication is the key to client satisfaction. Our project managers ensure you know what’s happening on-site and that our crews are meeting our high standards for craftsmanship and cleanliness. Because our design, materials, and build teams all work together, we can maintain quality control at every step, ensuring the final product reflects the care and expertise of our entire team.
Complete a Final Walkthrough Checklist
Before the tools are packed away and the final payment is made, it’s time for the final walkthrough. This is a formal tour of your newly remodeled bathroom with your project manager to inspect the work and create a “punch list”—a list of any remaining items that need correction. This could be anything from a small paint touch-up to adjusting a cabinet door. Don’t be shy; this is your chance to review every detail.
Come prepared with your own checklist. Confirm that the products installed are the ones you selected. Test every fixture: turn on the shower, flush the toilet, and check the faucets for leaks. Open and close every drawer and door. Look closely at the tile, grout lines, and paint. A reputable contractor will expect this detailed review and will be eager to address every item on the list to ensure your complete satisfaction with the finished project.
Maintain Your New Bathroom for Years to Come
Once the punch list is complete, your remodeler should provide you with all the information you need to care for your new space. Different materials require different types of care, so make sure you understand the best practices for cleaning your new countertops, tile, and fixtures to keep them looking brand new. Knowing how to maintain natural stone versus engineered quartz, for example, can prevent costly damage down the road.
Ask for all warranty information for your new fixtures, fans, and any other installed products. It’s also a good idea to periodically check for small leaks around faucets and toilets to catch issues early. The durable, high-quality materials you selected at our San Diego showroom were chosen for their longevity, and with a little routine care, they will serve you beautifully for decades.
Related Articles
- How to Plan a Bathroom Remodel – King Remodeling
- Bathroom Remodeling Contractor in San Diego
- Cost to Remodel a Small Bathroom: A 2025 Guide
- All-in-One Bathroom Remodel San Diego: A Complete Guide
- Top 5 Bathroom Design & Build Firms in San Diego
Frequently Asked Questions
How long will my bathroom remodel actually take? While a smaller, cosmetic update might take a few weeks, a full gut remodel in San Diego typically lasts between four to eight weeks. This timeline accounts for everything from demolition and plumbing rough-ins to tile setting and final inspections. The biggest variables are the scope of your project, lead times for custom materials like vanities or special-order tile, and the city’s permit approval process. A detailed schedule provided by your remodeling partner is the best way to know what to expect.
What happens if you find unexpected problems like mold or old plumbing? This is a common homeowner worry, and it’s exactly why we recommend a contingency fund. If our team uncovers an issue behind the walls, we stop work in that area immediately. We’ll assess the problem, explain the situation to you clearly, and present you with straightforward options and costs for the solution. No additional work is ever done without your full understanding and approval, ensuring you remain in control of the project and budget.
Can I save money by buying my own materials? While it might seem like a good way to cut costs, sourcing your own materials can often lead to delays and costly mistakes. It puts the responsibility on you to ensure everything is measured correctly, is compatible, arrives on time, and is free from damage. Using a firm with an integrated showroom means we handle all the ordering and logistics. We verify quantities and quality, manage warranties, and ensure every piece fits the plan perfectly, which saves you from logistical headaches and keeps the project on schedule.
Do I need to change my bathroom’s layout? Not at all. The decision to change your layout should be driven by function, not just for the sake of change. If your current floor plan works well for your daily routine, keeping the plumbing in the same locations is the most budget-friendly approach. However, if the layout is the primary source of frustration—like a cramped shower or an awkward doorway—then investing in a new configuration can completely transform how you use and enjoy the space.
What’s the main benefit of using a design-build firm over a general contractor? The biggest advantage is having one team responsible for your entire project, from the first design sketch to the final coat of paint. With a traditional approach, you might hire a designer and then a separate contractor, which can lead to communication gaps or disagreements over the plans. A design-build firm integrates the design and construction phases, ensuring the design is beautiful, functional, and buildable within your budget from the very beginning. This creates a much smoother, more accountable, and less stressful experience for you.