The space between your vanity countertop and mirror is a small but mighty canvas for design. It’s the perfect place to make a statement, whether you’re dreaming of a serene slab of natural stone, a vibrant mosaic tile, or a sleek, modern panel of glass. Your backsplash choice can define the entire mood of your bathroom. But turning that vision into reality requires careful execution. This guide covers everything you need to know about bathroom vanity backsplash installation, from planning your layout and making precise cuts to applying adhesive and creating a perfect waterproof seal, ensuring your creative choice becomes a stunning and functional focal point.
Key Takeaways
- A Backsplash is Both a Shield and a Style Statement: It’s an essential barrier that protects your walls from water damage and a key design element that ties your vanity, countertop, and mirror together into a cohesive focal point.
- Choose Materials Based on Maintenance and Aesthetics: Select a material like quartz for easy upkeep or natural stone for a unique, high-end look, but always balance your style goals with how much cleaning you’re willing to do.
- Meticulous Prep is Key to a Flawless Finish: For a professional-looking result, always start with a clean, smooth wall, use the correct adhesive for your chosen material, and finish by sealing all seams with waterproof caulk to block out moisture.
What is a Vanity Backsplash (And Why Your Bathroom Needs One)
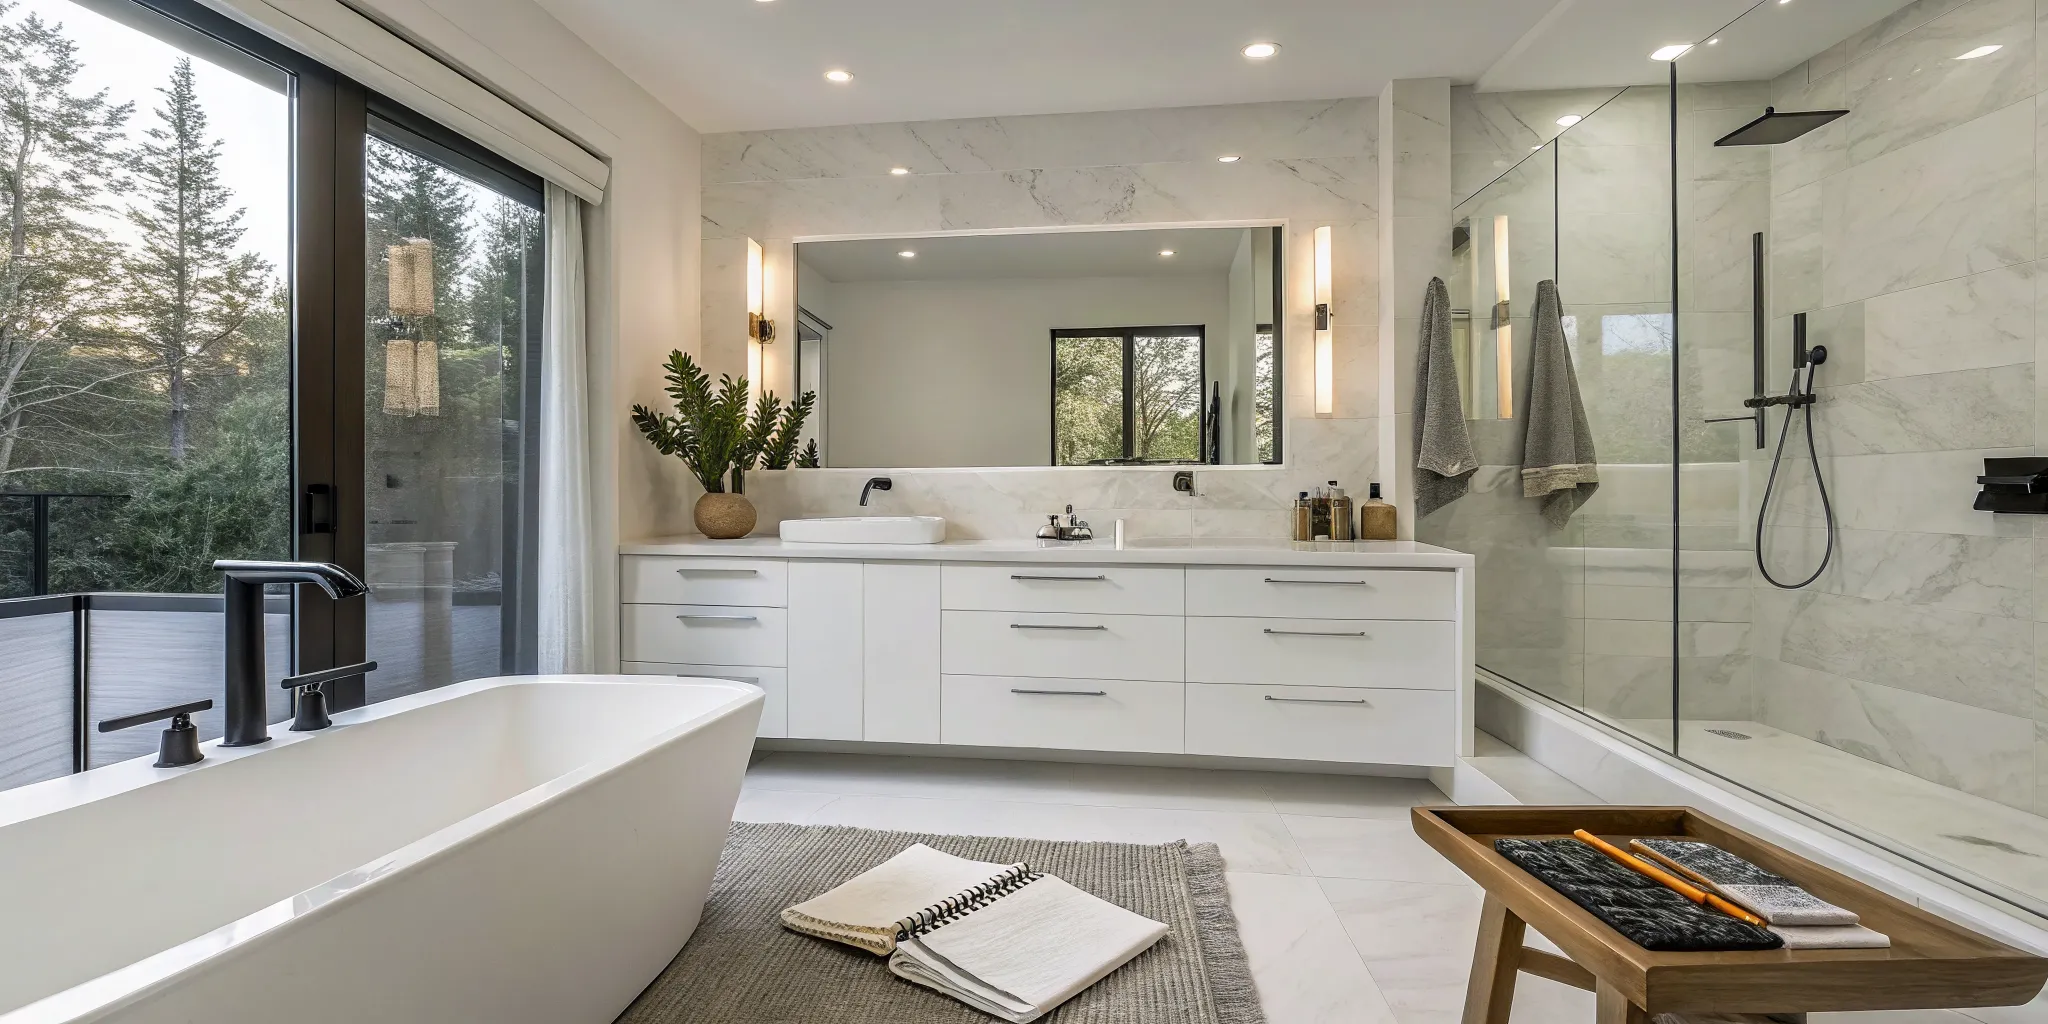
Think of a vanity backsplash as the perfect finishing touch for your bathroom sink area. It’s a panel of material—like tile, stone, or quartz—that covers the wall between your countertop and mirror. While it might seem like a small detail in a full bathroom remodel, a backsplash serves a few crucial purposes.
First and foremost, it’s a functional guard for your walls, protecting them from the inevitable splashes and splatters of daily life. But it’s also a fantastic design opportunity. The right backsplash can tie your whole look together, adding a dose of color, texture, and personality that elevates the entire space. Plus, it makes your life easier by simplifying your cleaning routine. Let’s look at why this feature is a non-negotiable for any modern bathroom.
Protect Your Walls from Water Damage
Your bathroom is a high-moisture environment, and the wall directly behind your sink is ground zero for water splashes, soap scum, and toothpaste splatters. Without a protective barrier, that moisture can seep into your drywall, leading to stains, peeling paint, and eventually, more serious issues like mold and structural damage. A vanity backsplash acts as a waterproof shield. It’s more than just a decorative element; it’s an essential component that preserves the integrity of your walls, saving you from costly repairs down the road and keeping your bathroom healthy and beautiful for years to come.
Add a Finishing Touch of Style
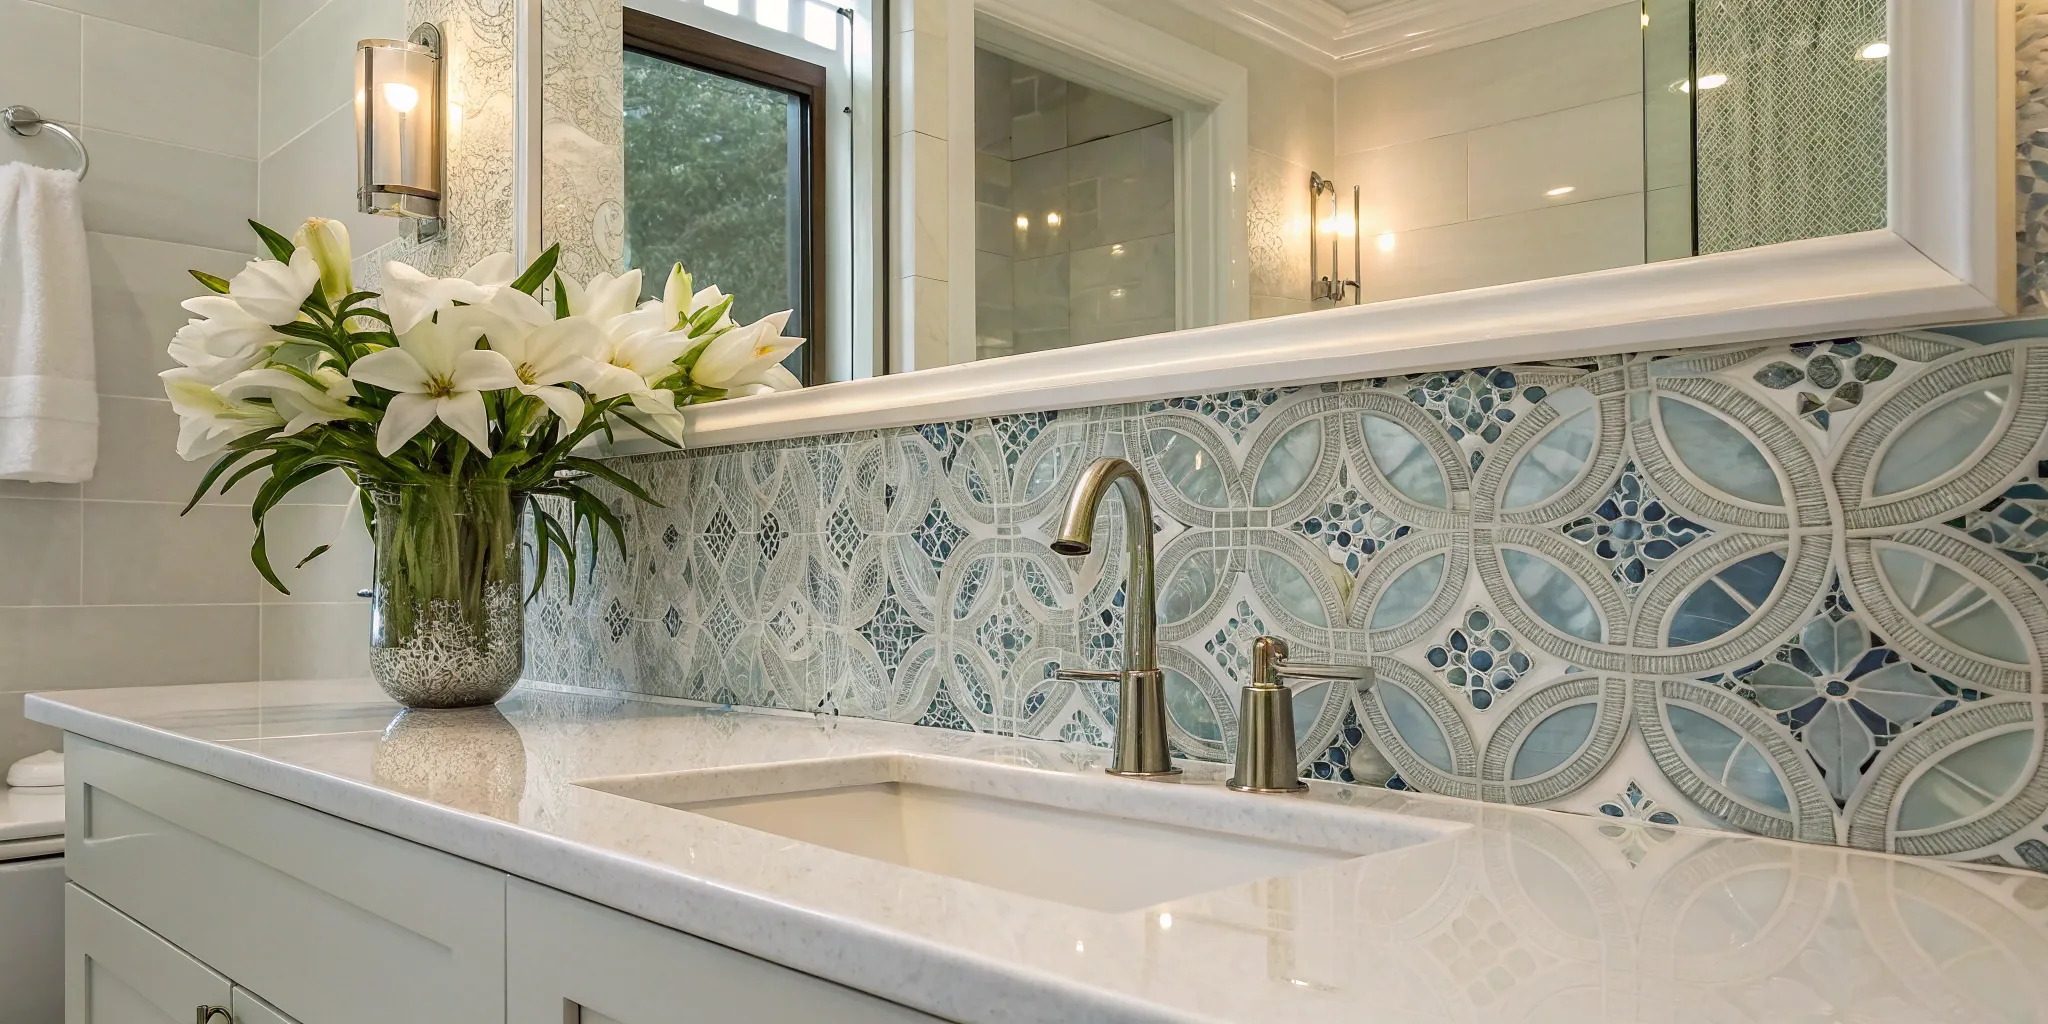
This is where the fun begins. A backsplash is your chance to inject personal style into your bathroom design. It’s the perfect spot to play with pattern and texture without overwhelming the room. You can create a calm, spa-like feel with a simple slab of marble or quartz that matches your countertop. Or, you can make a statement with a vibrant mosaic, a geometric tile, or a richly textured natural stone. The backsplash connects the vanity, countertop, and mirror, creating a cohesive and polished focal point. You can see how different materials create unique looks in some of our featured projects.
Simplify Your Cleaning Routine
Let’s be honest—no one wants to spend more time than necessary scrubbing their bathroom. A painted wall behind a sink is porous and prone to staining, making it difficult to clean. A proper backsplash, on the other hand, is typically made from durable, non-porous materials like ceramic, porcelain, or glass. These surfaces are incredibly easy to wipe down. A quick swipe with a cloth is all it takes to remove water spots, soap residue, and makeup smudges, keeping the area behind your faucet looking fresh and clean. Choosing the right material at our San Diego showroom ensures your new bathroom is as low-maintenance as it is beautiful.
How to Choose the Best Backsplash Material
The right backsplash material does more than just protect your walls—it ties the entire bathroom design together. Your choice will come down to three things: your personal style, how much maintenance you’re willing to do, and your budget. While photos are great for inspiration, nothing compares to seeing and touching the materials in person. Comparing options side-by-side helps you understand their true color, texture, and scale, ensuring the material you choose is one you’ll love for years.
At our San Diego showroom, we guide homeowners through this exact process, making it easy to find the perfect fit for their space. Let’s walk through some of the most popular choices for a bathroom vanity backsplash.
Ceramic & Porcelain: The Versatile Classics
Think of ceramic and porcelain tiles as the reliable workhorses of bathroom design. They are incredibly popular for a reason: they’re durable, water-resistant, and a breeze to clean, making them a practical choice for a high-moisture space. But practical doesn’t mean boring. These tiles come in a nearly endless variety of colors, shapes, and patterns, from classic white subway tiles to bold, graphic designs. This versatility means they can fit into any aesthetic, whether you’re aiming for a modern, traditional, or eclectic look. They can even mimic the appearance of more expensive materials like natural stone or wood, giving you a high-end look without the high-end maintenance.
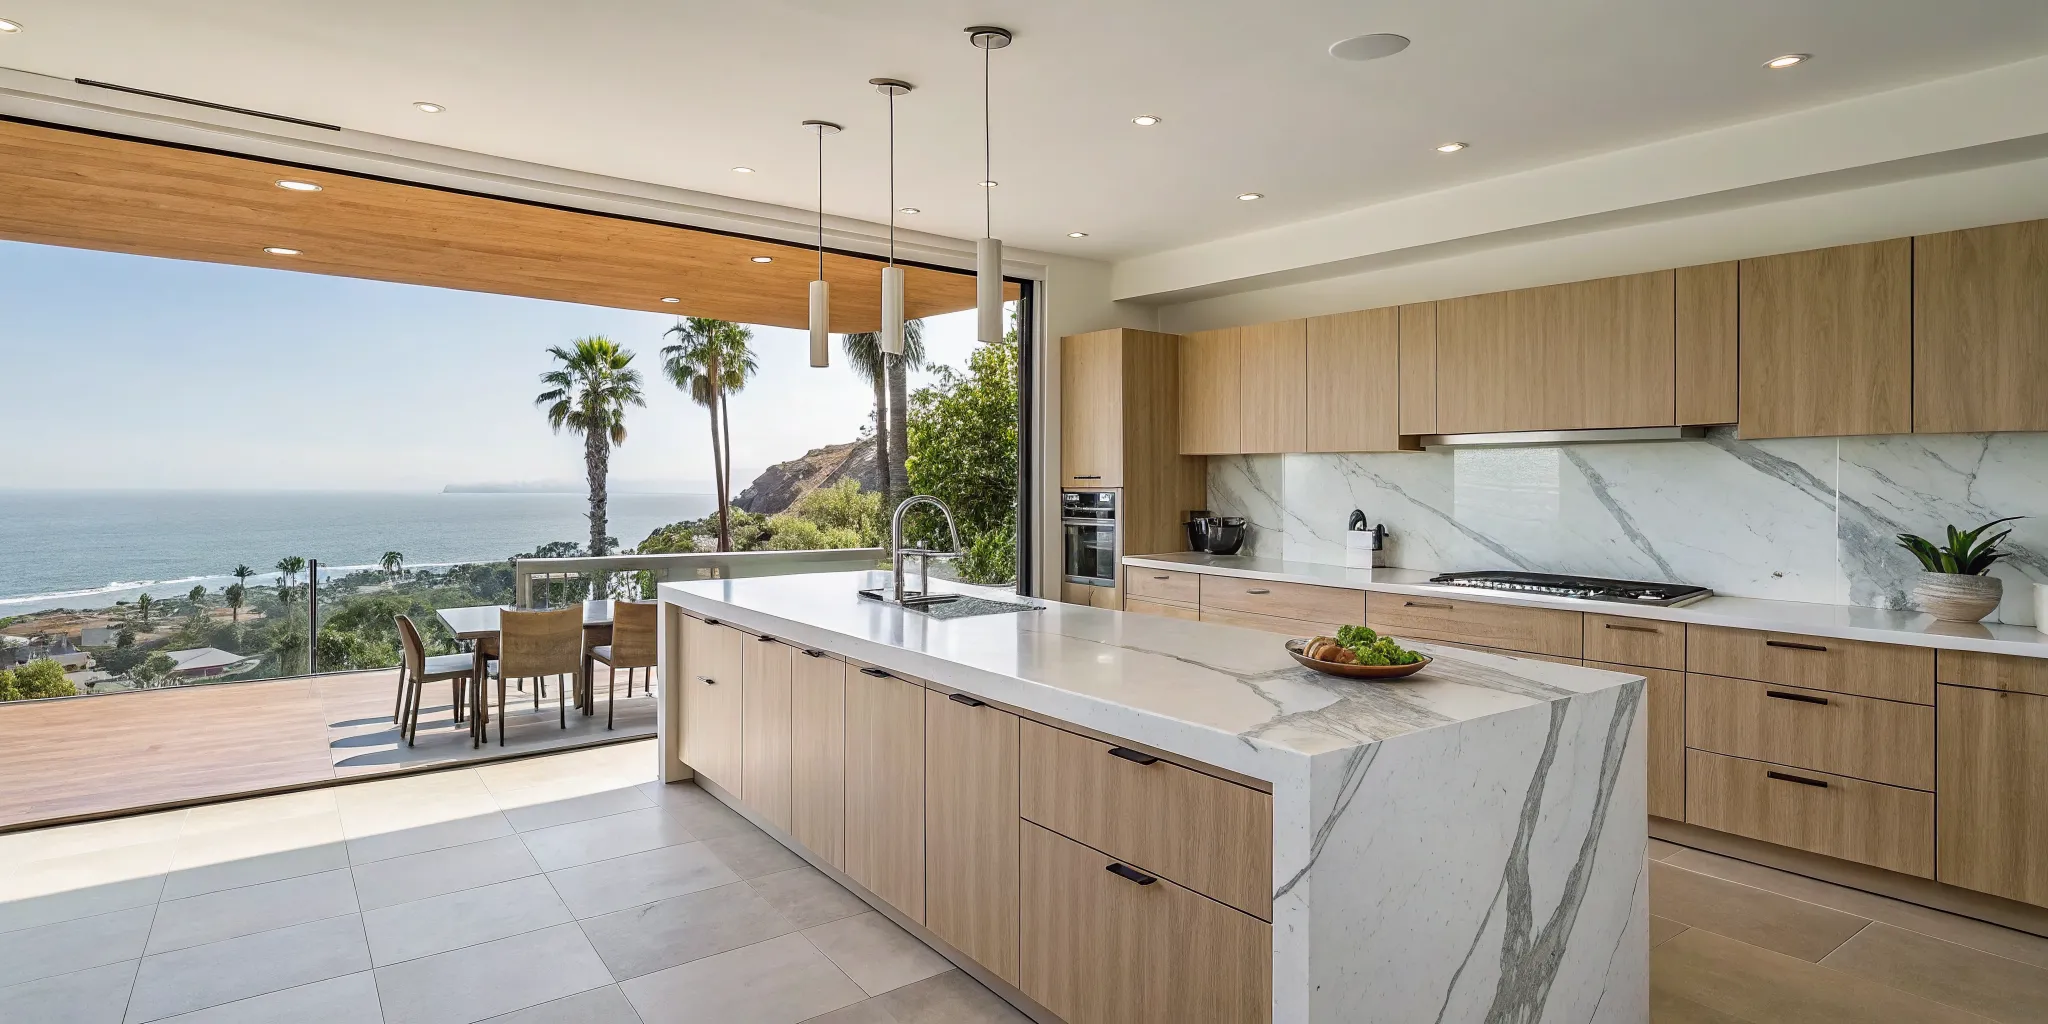
Natural Stone: For Timeless Luxury
If you want to create a truly elegant and spa-like retreat, natural stone is an unbeatable choice. Materials like marble, granite, and travertine bring a sense of organic beauty and sophistication that can’t be replicated. Each slab is completely unique, with its own distinct veining and character, turning your backsplash into a one-of-a-kind piece of art. While stone delivers a major style impact, it does require a bit more care. Because it’s porous, it needs to be sealed periodically to protect it from stains and water damage. For many San Diego homeowners, the timeless appeal seen in our featured projects is well worth the extra attention.
Glass & Mosaic: For a Bright, Modern Look
Want to make a statement? Glass and mosaic tiles are perfect for adding a pop of personality and visual interest to your bathroom. Glass tiles have a luminous quality that reflects light beautifully, which can help make a smaller bathroom feel brighter and more spacious. They come in a huge range of colors and finishes, from glossy to frosted. Mosaics, which can be made from glass, stone, or ceramic, allow for intricate patterns and custom designs. While the tile surfaces are easy to wipe down, keep in mind that the smaller the tile, the more grout lines you’ll have to clean.
Quartz & Solid Surfaces: For Durability and Ease
For those who prioritize low maintenance without sacrificing style, quartz and other solid surfaces are a fantastic option. As engineered materials, they are non-porous, meaning you never have to worry about sealing them. They stand up effortlessly to stains, scratches, and moisture, making them ideal for a busy family bathroom. A huge advantage is the ability to create a seamless look by using the same material for both your countertop and backsplash. This creates a clean, continuous flow that feels incredibly modern and polished. Plus, you can find quartz that convincingly mimics the look of marble or concrete, giving you the best of both worlds.
Matching Materials to Your Bathroom Style
Ultimately, your backsplash should feel like a natural extension of your overall bathroom remodeling design. It’s an opportunity to either create a stunning focal point or add a subtle, complementary texture. A sleek, large-format porcelain tile might be perfect for a minimalist design, while a richly veined marble slab can anchor a more luxurious space. Think about how the backsplash material will interact with your vanity, countertop, flooring, and fixtures. The best way to ensure everything works together is to see the materials in person. At our design center, you can lay out all your samples to create a cohesive palette that truly reflects your vision.
Gather Your Tools and Materials for Installation
Getting organized before you start is the secret to a smooth, stress-free installation. Just like a chef preps their ingredients before cooking, gathering all your tools and materials ensures you can work efficiently without any last-minute runs to the hardware store. A little preparation goes a long way toward achieving that clean, professional finish you see in designer bathrooms. It helps you focus on the task at hand—creating a beautiful and durable backsplash that protects your walls and completes your vanity’s look. Taking the time to set up your workspace properly is a non-negotiable step for any successful home project.
Your Essential Tool Checklist
Having the right tools makes all the difference. Before you begin, lay everything out so it’s within easy reach. You don’t need a professional workshop, but a few key items are essential for getting the job done right.
Here’s a basic checklist to get you started:
- Your backsplash material (tile, stone, etc.)
- Tape measure and pencil
- Level
- Caulking gun
- 100% silicone sealant or appropriate tile adhesive
- Waterproof caulk for sealing edges
- Clean rags or paper towels
- Painter’s tape
- Utility knife
Depending on your material, you may also need a tile saw or nippers for cuts. This prep work is a core part of our bathroom remodeling process, and it’s just as important for a DIY project.
Choosing the Right Adhesives and Sealants
The product you use to stick your backsplash to the wall is one of your most important decisions. In a bathroom, you’re fighting a constant battle with moisture, so you need an adhesive that’s up to the task. For most solid-surface backsplashes (like quartz or cultured marble), a high-quality, 100% silicone sealant is your best bet. It creates a powerful, waterproof bond that stays flexible, preventing cracks over time. For tile backsplashes, you’ll want to use a tile adhesive or thin-set mortar recommended for wet areas. Don’t be tempted by generic construction glue; choosing the right product ensures your beautiful backsplash stays put for years to come.
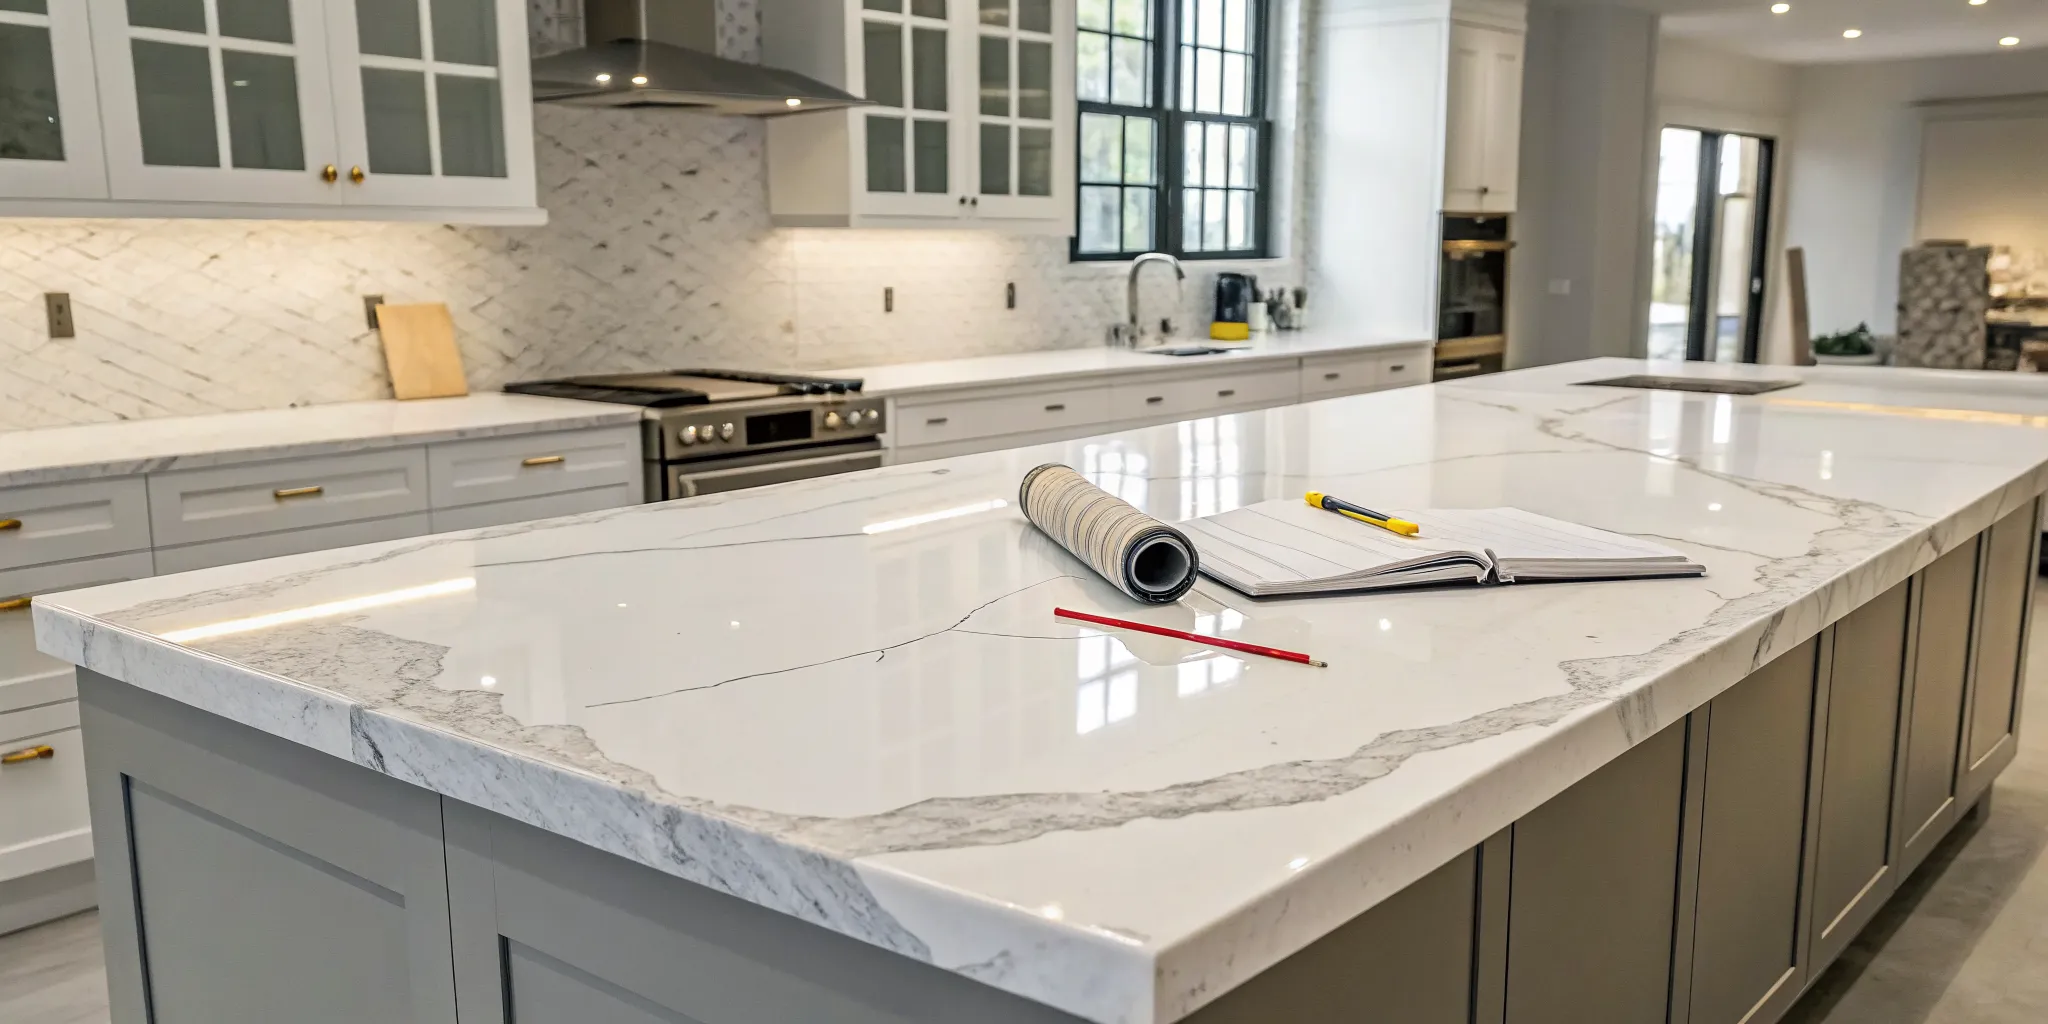
Supplies for Measuring and Cutting
The old saying “measure twice, cut once” has never been more true. Inaccurate measurements are one of the most common DIY pitfalls, leading to frustrating gaps or crooked lines. Start with a reliable tape measure and a level to ensure your layout is perfectly straight. Use a pencil to mark your wall and the back of your backsplash material for any necessary cuts. If you’re working with tile, you’ll need a tile cutter or a wet saw for clean, precise edges, especially around outlets. Taking your time with this step is what separates an amateur job from the flawless results you see in our featured projects.
Important Safety Precautions
Even small projects require a focus on safety. When you’re working with sealants and adhesives, make sure your bathroom is well-ventilated by opening a window or running the exhaust fan. It’s also a good idea to wear safety glasses, especially if you’re cutting tile or stone, to protect your eyes from flying debris. Here’s a pro tip: be careful not to get silicone on any surfaces you plan to paint later, as paint won’t stick to it. Keeping your work area clean and organized not only makes the job easier but also helps prevent accidents. Our professional process always prioritizes a safe and tidy job site.
How to Install Your Vanity Backsplash: A Step-by-Step Guide
Ready to give your bathroom a serious upgrade? Installing a vanity backsplash is a fantastic weekend project that adds both protection and personality to your space. While it might seem like a job reserved for the pros, it’s completely achievable with a bit of patience and the right instructions. Think of it as the finishing touch that ties your whole bathroom together.
This guide will walk you through the entire process, from prepping your wall to sealing the final seam. We’ll cover the essential steps to ensure your new backsplash looks clean, professional, and is built to last. Of course, every bathroom is a little different, so always trust your judgment. If you’re feeling inspired but would rather leave the work to an expert, our team is always here to help with your bathroom remodeling project. But if you’re ready to roll up your sleeves, let’s get started.
Step 1: Measure and Prepare the Wall
Great results start with great prep work. Before you even think about adhesive, take the time to get your space ready. First, measure the length of your vanity top and decide on the height of your backsplash—a standard height is four inches, but you can go taller for a more dramatic look. Use a pencil and a level to draw a faint guideline on the wall where the top of the backsplash will sit.
Next, clean the wall surface and the top of the vanity thoroughly with a degreasing cleaner. This removes any dust, grime, or soap scum that could prevent the adhesive from sticking properly. If you notice any bumps or uneven spots on the wall, lightly sand them down for a smooth, flat surface. Finally, for safety, turn off the power to any electrical outlets in the installation area and remove the faceplates.
Step 2: Plan Your Layout
This step is all about visualization. Before you commit with adhesive, do a “dry fit” by placing your backsplash material against the wall. This allows you to check the alignment and make sure everything fits perfectly. If you’re using tile, lay out your pattern on the counter to decide on the best arrangement. This is your chance to center the design and plan your cuts so you don’t end up with tiny, awkward slivers of tile at the edges.
Once you’re happy with the placement, use painter’s tape to mark where the edges of the backsplash will be. This gives you a clear visual guide to work with when you start applying adhesive. Taking a few extra minutes to plan your layout ensures a polished, intentional result, which is a key part of our design-build process.
Step 3: Cut Your Materials to Size
With your layout planned, it’s time to make your cuts. The tool you’ll need depends on your material. For ceramic or porcelain tile, a manual snap tile cutter works well for straight cuts, while a wet saw is better for harder materials like natural stone or for achieving cleaner edges. If you need to cut around outlets, a tile nipper or an angle grinder with a diamond blade will do the trick.
Always follow the golden rule: measure twice, cut once. Double-check your measurements before every cut to avoid wasting material. Wear safety glasses and gloves, especially when operating a wet saw or grinder. If you’re working with a solid slab backsplash, it’s often best to have it professionally fabricated to ensure precise, clean cuts.
Step 4: Apply Adhesive and Set the Backsplash
Now for the exciting part—getting the backsplash on the wall. If you’re using tile, apply a thin layer of tile adhesive (mastic) to the wall using a notched trowel. Spread it evenly within your guidelines. If you’re installing a solid slab, apply a few beads of silicone or construction adhesive directly to the back of the material.
Carefully press the backsplash into place, giving it a slight wiggle to ensure it makes full contact with the adhesive. Check that it’s level and aligned with your marks. To keep it from sliding down while the adhesive sets, secure the top edge to the wall with a few strips of painter’s tape. For tile, use spacers to maintain consistent grout lines between each piece.
Step 5: Let It Cure Properly
Patience is key here. Your adhesive needs time to fully dry and create a permanent bond with the wall. Most adhesives require about 24 hours to cure completely, but you should always check the manufacturer’s instructions for the specific product you’re using. During this time, avoid touching, bumping, or splashing water on the new backsplash.
Resist the temptation to move on to the next step too quickly. Rushing the curing process can lead to a weak bond, causing your backsplash to shift or even fail over time. Just let it be, and you’ll be rewarded with a secure installation that will last for years.
Step 6: Caulk and Waterproof the Seams
Once the adhesive has fully cured, it’s time to seal the deal. This step is crucial for protecting your wall and vanity from water damage. You’ll need to apply a thin, continuous bead of 100% silicone caulk along the seam where the bottom of the backsplash meets the countertop. You should also caulk the vertical seams where the backsplash meets the wall.
Choose a kitchen and bath caulk that is specifically designed to be waterproof and resist mold and mildew. To get a clean, professional-looking finish, smooth the bead of caulk with a wet fingertip or a caulk finishing tool. This simple step creates a watertight seal that keeps your bathroom protected and looking sharp.
Step 7: Do a Final Cleanup and Inspection
You’re almost there! After the caulk has had time to skin over (check the tube for instructions), you can carefully remove any painter’s tape. Use a damp cloth to wipe away any excess adhesive or caulk from the backsplash, countertop, and wall. For stubborn spots on tile, you may need to use a plastic putty knife to gently scrape them away.
Give your new backsplash a final inspection. Check that all the seams are neatly sealed and the surface is clean. Reinstall your outlet covers, and step back to admire your work. A new backsplash is a small change that makes a huge impact, and you can find even more inspiration from our featured projects.
Common Installation Mistakes to Avoid
Installing a backsplash can be a rewarding project, but a few common slip-ups can turn a dream finish into a DIY headache. Even small errors in measurement or material choice can lead to visible flaws or, worse, issues like water damage down the road. The difference between a professional-looking result and a project that falls flat often comes down to avoiding a few key mistakes. When you’re investing in beautiful materials and putting in the effort, you want the final product to look seamless and stand the test of time.
Getting these details right is a huge part of our process, ensuring every backsplash we install is not only beautiful but built to last. By paying close attention to preparation, materials, and placement, you can achieve a clean, durable finish that perfectly completes your bathroom vanity. Let’s walk through the most common installation mistakes and, more importantly, how you can steer clear of them to get a result you’ll be proud of for years to come.
Skipping Wall Prep and Measurements
It’s tempting to jump straight to the fun part of setting your tile or stone, but the final result is only as good as the surface underneath it. One of the most frequent mistakes is neglecting proper wall preparation. If the wall behind your vanity has texture, uneven patches, or is simply dirty, your adhesive won’t bond correctly. This can lead to loose tiles or an uneven finish. Before you begin, make sure the wall is clean, dry, and perfectly smooth. You’ll also want to measure everything—twice! Inaccurate measurements can result in awkward gaps or poorly placed cuts that disrupt the pattern and flow of your design, a detail that can undermine an entire bathroom remodeling project.
Using the Wrong Adhesive or Rushing the Process
Not all adhesives are created equal. Using the wrong type for your specific backsplash material is a recipe for failure. A heavy stone slab requires a much stronger bonding agent than a lightweight ceramic tile, and materials like glass have their own special requirements to prevent the adhesive from showing through. For example, while 100% silicone caulk is great for sealing seams, you’ll likely need a tile mastic or thin-set mortar for the initial application. Always read the manufacturer’s instructions for both your backsplash material and the adhesive. Rushing the process is another common error. Give the adhesive and grout adequate time to cure based on the product guidelines. Patience here prevents tiles from shifting and ensures a strong, permanent bond.
Forgetting to Waterproof Correctly
Your bathroom is a high-moisture environment, and your backsplash serves as a critical barrier protecting your wall from water damage. A huge mistake is failing to properly waterproof the seams. After the backsplash is installed and the grout has cured, you must apply a bead of waterproof, mold-resistant silicone caulk along the bottom edge where the backsplash meets the countertop and along any vertical edges that meet a wall. This simple step prevents water from seeping into the gaps, which can lead to rot, mold growth, and costly structural damage over time. Proper waterproofing techniques are non-negotiable for any wet area in your home.
Ignoring Tile Alignment and Spacing
Nothing screams “DIY job” faster than crooked tiles and uneven grout lines. Poor planning often leads to sloppy cuts and inconsistent spacing that can throw off the entire look of your vanity. Before applying any adhesive, it’s a good idea to do a “dry fit,” laying out your tiles on the counter to finalize your pattern and identify where you’ll need to make cuts. Use a level to draw a guideline on the wall to ensure your first row is perfectly straight. From there, use tile spacers consistently to maintain uniform grout lines. This attention to detail is what creates the clean, polished look you see in professionally completed featured projects and ensures your new backsplash is a stunning focal point.
Related Articles
- 25+ Small Bathroom Ideas on a Budget
- Cost to Remodel a Small Bathroom: A 2025 Guide
- 6 Best Luxury Vinyl Planks for Kitchens & Bathrooms
Frequently Asked Questions
How high should my vanity backsplash be? While a four-inch backsplash is a classic and safe choice, there’s no single right answer. The height really depends on the look you want to achieve. A shorter, four-inch splash is traditional and effective. For a more modern and impactful statement, you can extend the backsplash all the way up to the bottom of your mirror or medicine cabinet. Taking it even further, a floor-to-ceiling backsplash behind the vanity can create a stunning feature wall that makes the whole room feel more luxurious.
Do I have to match my backsplash to my countertop? Not at all! While matching your backsplash to your countertop creates a very clean, seamless, and modern look, it’s definitely not a requirement. In fact, choosing a contrasting material is a fantastic opportunity to add personality and create a focal point. You could pair a simple white quartz countertop with a colorful mosaic tile or a textured natural stone. The key is to make sure the two materials complement each other in color, pattern, and style.
What’s the easiest backsplash material to keep clean? If low maintenance is your top priority, you can’t go wrong with a solid surface like quartz. Because it’s non-porous and has no grout lines, you can simply wipe it clean. Large-format porcelain or ceramic tiles are another great option, as their size means you’ll have far fewer grout lines to worry about. While beautiful, smaller mosaic tiles will naturally have more grout, which requires a bit more attention to keep looking fresh.
Is it okay to install a new backsplash on top of an old one? It’s best to avoid this. While it might seem like a time-saver, installing new tile or stone over an existing backsplash can lead to problems. The new material may not adhere properly to the old surface, and the added thickness can look bulky and interfere with your faucet or electrical outlets. For a durable, professional-looking finish, you should always start with a clean, smooth, and properly prepared wall.
When does it make sense to hire a professional for this? While installing a simple tile backsplash can be a great DIY project, you should consider calling a professional for a few key situations. If you’re working with expensive or tricky materials like a large slab of marble or intricate glass mosaics, an expert ensures it’s cut and installed perfectly. A pro is also a wise choice if your project involves complex cuts around windows and outlets, or if your walls aren’t perfectly level. And of course, if the backsplash is part of a larger bathroom remodel, having one team handle everything ensures a cohesive and flawless result.